
Walking Floor Trailer Hydraulic Troubleshooting Guide
A Walking Floor trailer can leave the yard working normally and then stop halfway through unloading at the worst possible time, with a loaded trailer sitting at a customer's dump site and the operator waiting for the floor to restart. The first reaction is often to blame a damaged slat or replace the pump. That shortcut can turn a restricted hose, contaminated coupler, or overheating valve into a larger repair.
Effective walking floor trailer hydraulic troubleshooting starts with measurements. Pressure matters, but pressure alone doesn't tell you whether the system is delivering enough flow, whether a valve is bypassing oil, or whether heat is changing the fault as the unloading cycle continues. The practical sequence is to make the equipment safe, verify the hydraulic power path, record pressure, flow, temperature, and operating conditions, then inspect the floor and trailer structure.
Table of Contents
- Understanding Walking Floor Hydraulic Principles
- High-Pressure Safety and Hazard Mitigation
- Diagnostic Measurements and Fault Isolation
- Contamination Control and Heat Management
- Mechanical Inspections and Structural Integrity
- Preventive Maintenance and Professional Escalation
Understanding Walking Floor Hydraulic Principles
A loaded trailer can complete several normal floor strokes, slow under load, and stop at the dump site. It may run again after the trailer is emptied. That symptom points toward a hydraulic problem worth testing before anyone starts replacing slats or major components.
Walking Floor technology developed as a self-unloading method for agricultural materials such as feed, seed, and fertilizer. Ole Hallstrom and Keith Foster developed the moving-floor concept in the 1970s, using lengthwise slats and coordinated hydraulic-cylinder strokes. Keith Manufacturing introduced the first commercially viable WALKING FLOOR unloading system in 1973, with a fully hydraulic drive powerful enough for a semitrailer, as documented in this history of Keith Walking Floor innovation.
Why the slats depend on sequence
The body stays level while hydraulic cylinders move groups of lengthwise slats through a controlled sequence. Friction between the cargo and the moving slats carries material toward the discharge end. Another group returns, so unloading continues without tipping the trailer.
That sequence gives technicians several possible fault areas. Uneven movement can result from low hydraulic supply, a switching or control valve that is out of sequence, internal cylinder leakage, mechanical binding, or worn and damaged slats. The symptom appears at the floor, while the restriction or loss may be in the wet kit, couplers, valve block, or hydraulic tubing.
The technology expanded into the solid-waste industry during the 1980s. Walking Floor systems now handle waste, biomass, agricultural commodities, construction materials, and recyclables. Those loads create different friction and resistance, but every application depends on cylinders and slats overcoming cargo resistance in a controlled order.
Pressure and flow answer different diagnostic questions. Pressure shows the resistance the system is working against. Flow shows whether the pump and circuit are delivering enough oil to produce the required floor speed. A trailer that slows as oil heats may have bypassing in a valve or pump, restricted supply, or oil that has lost effective viscosity. Measuring both prevents a technician from condemning a pump when the actual fault is heat, contamination, or restriction.
Record the operator's exact observation before assigning a cause. “The floor paused after several normal cycles” provides useful direction. “The switching valve failed” remains only a hypothesis until testing supports it. Note whether the trailer was loaded or empty, where the floor stopped in its stroke, and whether noise, vibration, heat, or visible oil accompanied the fault.
A floor that runs empty but stalls under cargo increases suspicion of inadequate flow, pressure loss under load, valve restriction, cylinder leakage, or mechanical friction. A floor that binds at the same physical location while empty points more toward slat damage, debris, structural distortion, or a floor-side obstruction. The distinction is not absolute, but it narrows the inspection and reduces unnecessary parts replacement.
High-Pressure Safety and Hazard Mitigation
A walking floor hydraulic fault can look minor at the hose or fitting and still be dangerous at working pressure. Mobile hydraulic equipment commonly runs around 2,000 to 3,500 psi, and injection injuries can occur at pressures as low as approximately 100 psi, according to the Purdue review of high-pressure injection injuries. A pinhole stream is often hard to see, yet it can penetrate skin, gloves, or clothing.
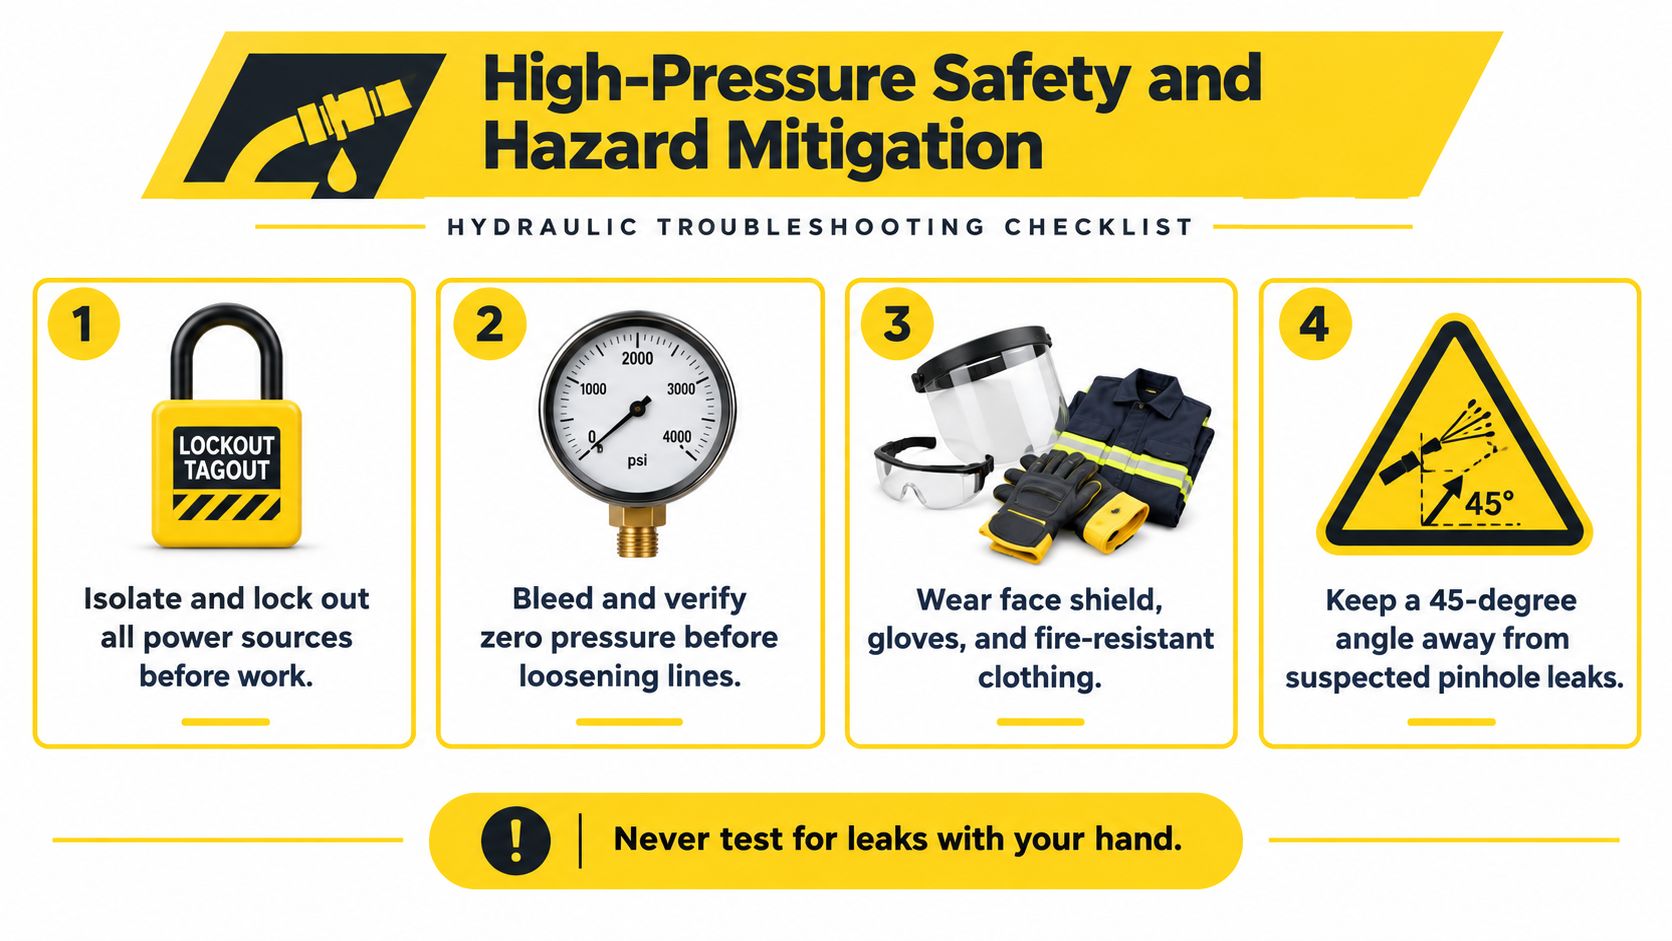
Secure the trailer before any diagnosis starts. Park it on stable ground, keep people clear of the discharge area, secure the load, disengage the PTO, shut down the power source, and release stored pressure using the floor and wet-kit service procedure. Pressure can stay trapped in hoses, cylinders, valves, and accumulators after the engine stops.
A safe isolation sequence
Use a controlled sequence every time. Do not assume the system is depressurized.
- Secure the trailer. Apply the parking brake, use suitable wheel restraints, and keep everyone away from the discharge path and moving floor.
- Isolate the power. Disengage the PTO, shut down the hydraulic power source, and apply the fleet lockout and tagout process where required.
- Relieve stored energy. Operate the controls only through the approved procedure for that equipment, so trapped pressure can return safely.
- Verify zero pressure. Use an appropriate gauge or approved test method before loosening a hose, fitting, valve, tube, or cylinder connection.
- Inspect without contact. Use a flashlight, mirror, cardboard, or an approved leak-detection method. Never use a hand or finger to search for oil.
Stay out of the line of fire. A small suspect leak still deserves full respect, whether it is a pinhole in a hose, abrasion on a line, a damaged coupling, a loose fitting, or a cylinder fault. Do not place a hand, rag, phone, or tool near a pressurized leak.
The medical risk is serious because the puncture can look minor while internal damage continues. In the Purdue review, among 127 reported cases, 45% entered through the index finger, 23% through the palm, 33% through other fingers or the thumb, and 1% through the forearm. The same review reported amputation rates of 14% for hydraulic fluid, 23% for grease, and 67% for diesel fuel. A suspected injection injury needs prompt medical evaluation even if the skin opening looks small.
Testing without creating a new hazard
Do not have one person cycle the trailer while another works underneath it. Set one person in control, define where everyone stands, and stop the test if the floor moves unexpectedly, a component separates, or a leak becomes active.
Pressure testing belongs only after fittings, hoses, and gauges are installed correctly and rated for the circuit. Face protection, suitable gloves, protective clothing, and safe positioning help reduce exposure, but they do not replace depressurization. Keeping people out of the pressure path is the strongest control on the shop floor.
Diagnostic Measurements and Fault Isolation
A pressure gauge can show a convincing number while the floor still lacks the flow needed to unload. A worn pump may reach high standby pressure but fail to deliver volume during a working cycle. A partially open ball valve can also restrict flow, generate heat, slow the floor, and eventually stop operation.
Start with the symptom and record the operating conditions. Measure while the system is performing an actual cycle, preferably under the load that produces the fault. Record engine or PTO rpm, pressure, flow, reservoir temperature, oil level, coupler condition, and whether the behavior changes as the oil warms.
Check the simple points first
With the system isolated and safe, inspect for external leaks around the cylinders, pressure and return tubes, switching valve, check valves, fittings, and quick-disconnect couplers. Confirm that the pressure and return couplers are correctly matched, clean, undamaged, and fully seated. A coupler that looks connected may still restrict flow if contamination prevents full engagement.
Then verify the operating positions:
- PTO: Confirm that the PTO is engaged and driving the wet-kit pump.
- Directional control: Make sure the directional control valve is fully selected, not sitting between operating positions.
- Drive-unit ball valve: Confirm that the ball valve is completely closed for operation. The manufacturer identifies a partially open or partially closed condition as a cause of heat damage, reduced floor speed, or complete stoppage.
- Fluid level: Check the reservoir level and condition before interpreting a pressure reading.
- Cycle behavior: Observe whether the fault appears during extension, retraction, switching, start-up, or only under cargo resistance.
The referenced system specification calls for at least 5 gal/min, or 19 L/min, at 3,000 psi, or 207 bar. It specifies a relief-valve setting above 2,800 psi, or 193 bar, but no higher than 3,000 psi. The same system calls for a 40-gallon reservoir. These figures come from the Keith WALKING FLOOR Running Floor II DX and DXE manual, and they must be compared with the manual for the specific floor model and wet-kit configuration.
Hydraulic diagnostic baseline metrics
The figures below are model-specific reference points, not universal settings. Use a calibrated test gauge and a suitable flow meter, then compare the readings with the applicable manufacturer documentation.
| Metric | Target Range / Condition | Fault Indication |
|---|---|---|
| Pump flow | At least 5 gal/min, or 19 L/min, at the specified test pressure | Adequate pressure with insufficient flow points toward pump wear, restriction, couplers, or suction-side problems |
| Working pressure | Approximately 3,000 psi, or 207 bar, under the specified test condition | Low pressure can involve the relief valve, pump, plumbing, control valve, or cylinder leakage |
| Relief-valve setting | Above 2,800 psi, or 193 bar, and no higher than 3,000 psi | Premature opening reduces force and can resemble a weak pump |
| Reservoir capacity | 40 gallons for the referenced system | An unsuitable reservoir or inadequate cooling capacity can worsen heat-related faults |
| Valve position | Ball valve fully closed for operation | Partial opening creates restriction, heat, slow movement, or stoppage |
A second manufacturer specification illustrates why generic checklists can mislead mixed fleets. Another system calls for 90 to 110 L/min, at least 225 bar, and at least 150 L of oil, as described in the Keith troubleshooting guidance. The correct target comes from the installed floor system, not from a rule copied from another trailer.
Separate pressure faults from flow faults
If pressure is low during the operating cycle, isolate the circuit in order. Check the wet-kit pump and PTO, relief valve, couplers and hoses, trailer control or switching valve, and finally possible cylinder leakage. Don't adjust the relief valve first. If flow, plumbing polarity, and valve positions haven't been verified, adjustment may hide a restriction and create excess heat.
If pressure reaches the expected level but the floor remains slow, measure flow under load. Low flow with acceptable standby pressure supports a pump-wear or restriction diagnosis. If flow and pressure remain reasonable but movement is uneven, examine valve synchronization, trapped air, cylinder behavior, and mechanical binding.
Cold and hot comparisons are especially useful. If the floor deteriorates as the oil warms, suspect internal leakage, worn seals, or valve bypass. If the system produces noise, foam, or erratic movement, investigate aeration and suction restriction before replacing the pump.
Contamination Control and Heat Management
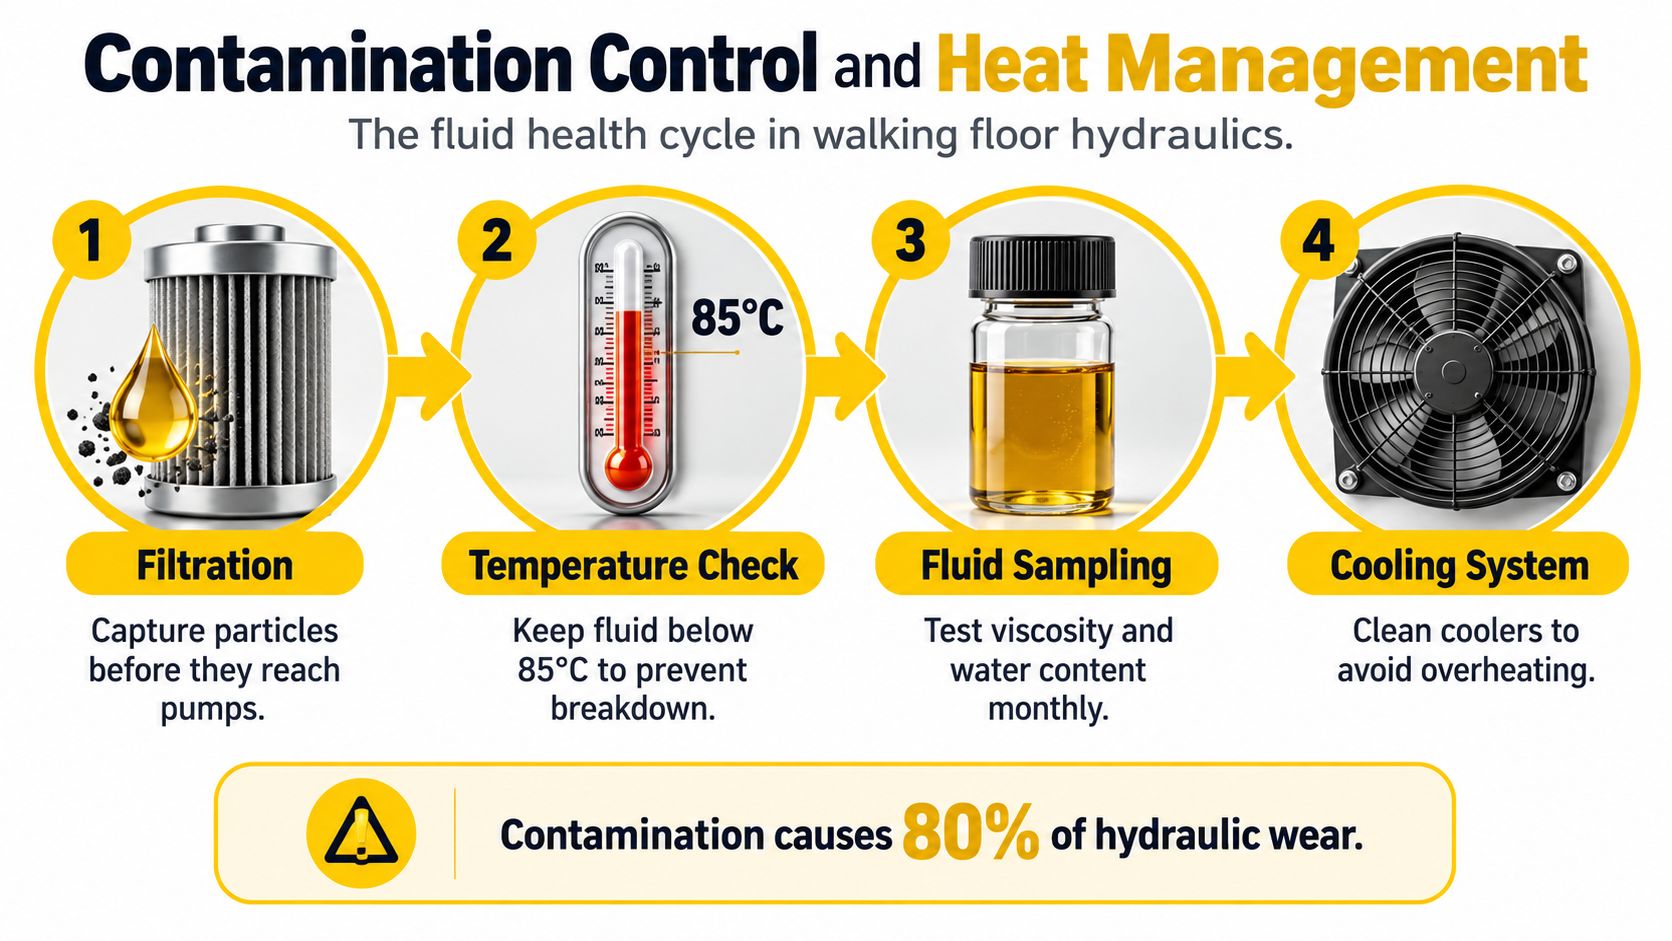
A walking floor trailer that starts off normally and then slows down later in the shift usually points to fluid condition, not a dead pump on the first pass. Dirty oil, water, air entrainment, and excess heat can all create the same complaint: slower cycling, rough switching, pump noise, and rising reservoir temperature. Contamination is widely treated in hydraulic maintenance guidance as a major failure driver, which is why cleaning up the oil path matters before parts swapping begins.
Replacing a pump without finding the contamination source wastes time and money. The new pump will see the same dirty oil, suction leak, or overheated fluid, and the fault comes right back.
A practical fluid-health workflow
Start with the symptom and work outward.
- Document the behavior. Record cycle speed, load condition, reservoir temperature, and whether the problem gets worse as the oil warms.
- Inspect the reservoir. Check oil level, color, visible debris, water signs, and foaming. Look for anything that could let air into the suction side.
- Check filtration. Inspect the return filter and any pressure-side filtration. A restricted filter can cut available flow and build heat.
- Trace the suction path. Look at the suction hose, fittings, clamps, strainer, and tank connection for restriction or air entry.
- Sample the oil. Use particle and water testing, not just a visual check.
- Fix the source. Clean contaminated couplers, repair suction leaks, replace restricted filters, and refill with clean oil that matches the installed system.
- Retest under the same conditions. Repeat pressure, flow, cycle-speed, and temperature checks with the same load and operating setup.
Read temperature as evidence
Heat tells you a lot about what the circuit is doing. A restricted filter, a bypassing valve, a partially positioned ball valve, low flow, or weak cooling can drive oil temperature up. As the oil gets hotter, internal leakage can increase and the floor can slow even more.
That matters in real shop conditions. Hot ambient weather and repeated unload cycles expose marginal reservoirs, coolers, and return-line layouts fast. A trailer that runs acceptably cold and fades when warm usually has a leakage, bypass, or cooling problem, not a random control issue.
Measure reservoir temperature against the limits specified for the installed floor system and wet-kit configuration. Record readings under comparable operating conditions and follow that equipment's cooling and shutdown procedure. For contamination control, Danfoss's Contamination Control Solutions brochure identifies dirty or poorly maintained hoses and tubes as contamination sources and explains why equipment manufacturers specify oil-cleanliness standards.
Foam, pump noise, and erratic floor movement point toward aeration or suction restriction. A hot system that gets slower with each cycle points toward bypass or internal leakage. Those patterns do not prove a failed component, but they do tell you which test belongs next.
Mechanical Inspections and Structural Integrity
A trailer can have solid hydraulic readings and still hang up on a mechanical fault. After pressure and flow checks are recorded, inspect the slats, floor guides, cylinder mounts, debris pockets, and discharge area. Packed material beneath the floor, bent slats, shiny rub marks, warped guides, loose fasteners, and repeat bind points usually show where the trouble starts.
Loaded trailers can hide drag because cargo force adds friction. An empty-cycle test can show whether the floor binds without load, but only if the discharge area is controlled and everyone stays clear of the moving path. Never reach between slats, and never work under unsupported equipment.
Aluminum repairs need material identification
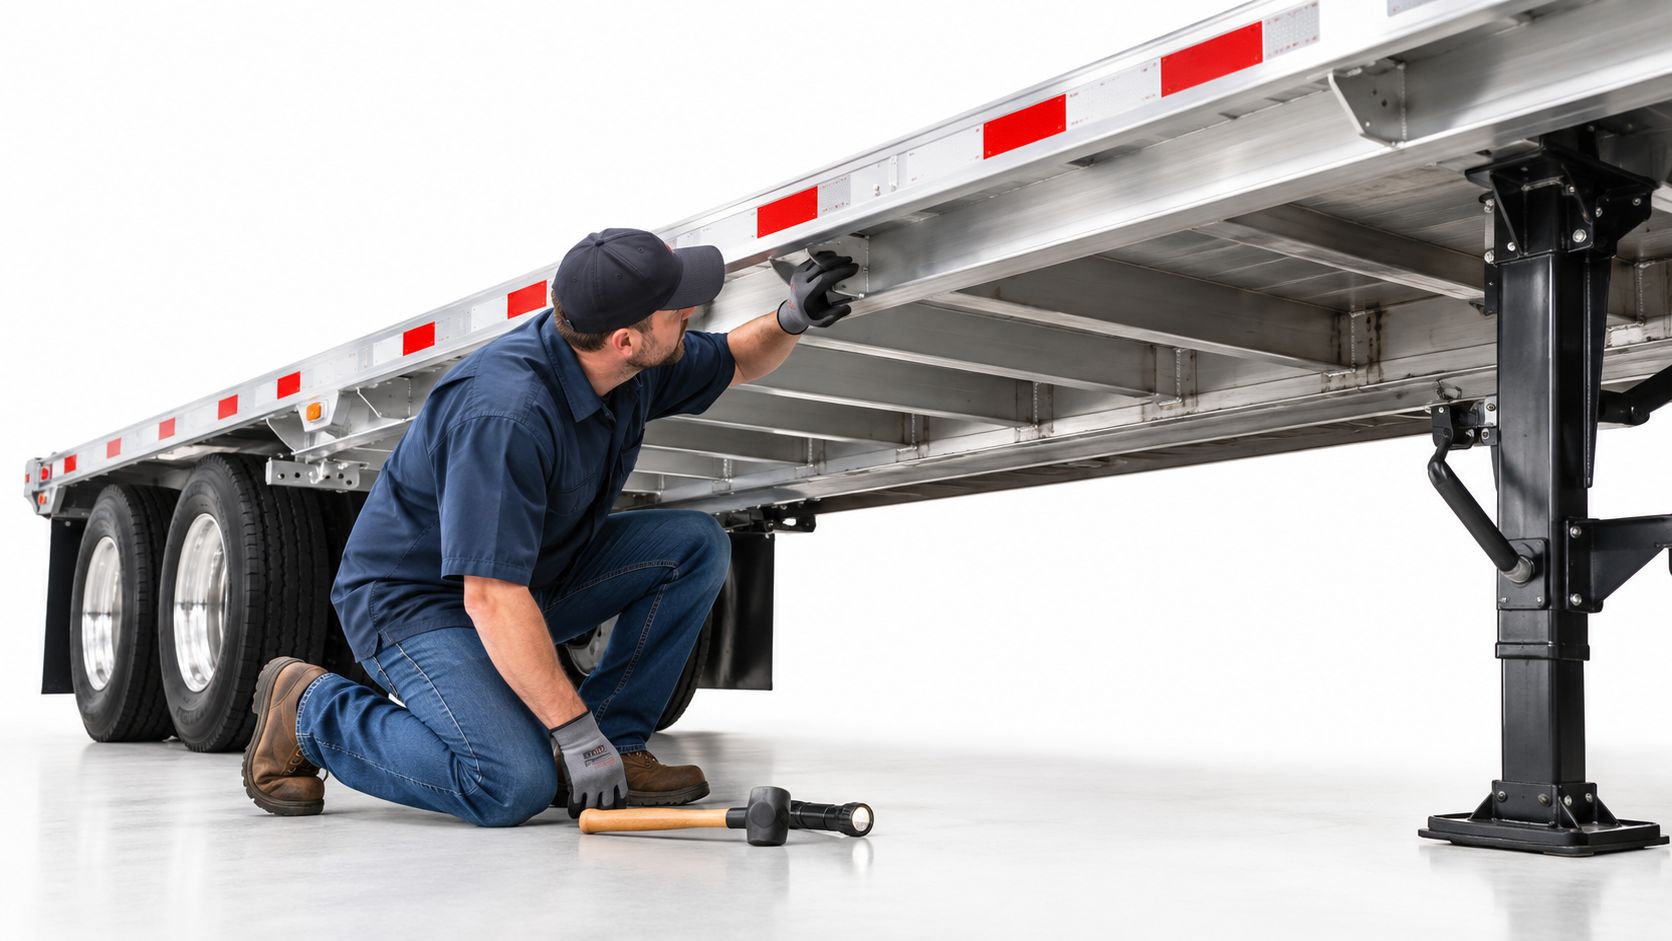
A crack in an aluminum frame, crossmember, body section, or repeatedly flexed area cannot be judged by weld appearance alone. The ESAB Aluminum Technical Guide identifies the 2XXX, 6XXX, 7XXX, and some 4XXX series as heat-treatable aluminum alloys and recommends identifying the base alloy early in the repair process. If the alloy is unknown, contact the original component manufacturer.
Welding usually reduces aluminum strength in the heat-affected zone, even when the bead looks sound. The repair decision has to account for joint prep, fit-up, softened metal beside the weld, the part's load path, and whether reinforcement or replacement makes sense. A clean-looking repair can still leave a weak area that opens up again when the trailer flexes under service.
Hydraulic repair doesn't replace roadworthiness checks
A floor that cycles correctly can still be unsafe on the road. Commercial motor-carrier maintenance programs must include systematic inspection, repair, and maintenance of commercial motor vehicles and trailers under 49 CFR Part 396. The annual inspection requirement in 49 CFR 396.17 covers brakes, coupling devices, frames, lighting, steering, suspension, tires, wheels, and related safety equipment, as summarized in this commercial trailer maintenance reference.
Keep the hydraulic work order tied to the broader inspection record. Document the defect, the repair performed, and whether the condition affected safe operation before the trailer goes back into service.
Preventive Maintenance and Professional Escalation
Preventive maintenance works when technicians measure trends instead of waiting for a trailer to stop at a customer's site. Record cycle behavior, leaks, temperature, filter condition, oil condition, and recurring operator observations. A short symptom timeline is often more useful than a vague note that says “hydraulics weak.”
Use the manufacturer maintenance schedule for the installed floor system and wet-kit configuration. KEITH's Walking Floor maintenance guidance recommends a six-month check of parts for correct torque and operation. Follow the applicable model manual for initial inspections, operating-hour intervals, fluid and filter service, and any additional checks required by the duty cycle.
Decide what belongs in the shop
In-house technicians can handle safe visual inspections, fluid-level checks, filter service, coupler cleaning, symptom documentation, and properly equipped pressure and flow testing. Escalate when the repair involves stored pressure, a cylinder rebuild, deep valve-block diagnosis, repeated contamination, uncertain pump condition, or a structural aluminum component.
Precision aluminum welding deserves the same caution as hydraulic diagnosis. Alloy identification, heat-affected-zone evaluation, fit-up, reinforcement decisions, and post-repair inspection all affect whether a repair will survive repeated service. A workshop with the right fabrication capability can assess the structure rather than just covering a crack with weld metal.
Maintain access to common service parts such as filters, seals, couplers, check valves, switching valves, and suitable hydraulic fittings when the fleet's equipment justifies that inventory. Parts on hand can shorten downtime, but stocking parts shouldn't replace testing. A new valve or pump installed against a contaminated or restricted circuit may fail for the same reason as the original.
For Tampa Bay operators, Brothers Truck Trailer Repair and Welding Corp. handles Walking Floor diagnostics and repair, slat replacement, hydraulic service, aluminum welding, fabrication, truck and trailer maintenance, and parts support. Direct workshop access is useful when a fault crosses system boundaries, such as a hydraulic symptom combined with floor binding or aluminum structural damage.
Bring a stalled or overheating Walking Floor trailer in for measured hydraulic diagnosis, floor and slat inspection, aluminum repair, fabrication, or related truck and trailer maintenance from Brothers Truck Trailer Repair and Welding Corp.. Share the trailer's symptom history, recent service records, pressure and temperature readings, and safe photos so the repair team can focus quickly on the fault affecting your fleet.
Built with Outrank app

Expert commercial trailer repair in Tampa for Walking Floor, aluminum welding, and fleet maintenance. Minimize downtime with Brothers Truck Trailer Repair.

Preventive maintenance for commercial trailers: inspection checklists, Walking Floor care, aluminum repairs, and fleet service in Tampa Bay.

Source the right folding wagon replacement parts with our fitment guide. Learn to measure frames, match wheel brackets, and verify tube dimensions.