Folding Wagon Replacement Parts Fitment Guide
A folding wagon sits dead in the corner of the shop because one wheel has started to wobble, the handle pulls sideways, or the frame no longer folds squarely. The repair looks simple until a replacement wheel arrives with the wrong bracket, a handle shaft rattles inside the tube, or an axle bolt fits the hole but binds the assembly. The cart remains out of service while the correct part is identified.
Treat folding wagon replacement parts with the same discipline used for heavy trailer components. A folding utility cart is a modular machine, not a universal box on wheels. Tube shape, frame orientation, hole spacing, shaft diameter, bearing fit, and fastener design all determine whether a part will work safely under load. Guessing may produce a part that installs, but it won't necessarily produce a wagon that tracks straight, folds correctly, or stays stable in service.
Table of Contents
- Why Generic Wagon Parts Fail in the Field
- The Evolution of Standardized Wagon Components
- How to Measure Frame Cross-Sections and Mounting Holes
- Evaluating Wheel Brackets and Bearing Assemblies
- Sourcing the Correct Handle and Shaft Replacements
- Selecting Axle Bolts and Structural Fasteners
- Implementing a Preventive Maintenance Checklist
- Managing Inventory for Fleet Utility Carts
Why Generic Wagon Parts Fail in the Field
A loaded shop wagon usually reveals a fitment mistake at the worst possible time. The operator pulls it over a threshold, the wheel twists, and the bracket takes a sudden side load. The replacement part may look identical to the original, yet a small difference in tube dimensions or mounting geometry can leave the wheel loose or make the handle impossible to secure.
Folding wagon assemblies are geometry-sensitive because several components meet at compact interfaces. A handle shaft has to enter the correct tube, a pivot must align with the bracket, and the wheel assembly must sit at the intended angle relative to the frame. Replacement catalogs list handles, shafts, wheels, brackets, and axle-bolt hardware as separate service items because those parts aren't interchangeable merely because they belong to the same broad wagon category. Replacement-parts catalogs illustrate the separate service components and fitment variations.
The part that almost fits
A generic wheel can have the right appearance and still fail in operation. Its axle opening may be wrong, its bracket may face the opposite direction, or its mounting holes may sit far enough from the original pattern to prevent proper installation. A handle can create the same problem. If its inner width is too large, it develops play under pulling force. If it's too narrow, technicians may be tempted to force it into place or alter the frame.
That kind of improvisation creates a second repair. Shims can compress, drilled holes can elongate, and a forced bracket can distort the folding mechanism. The wagon may move during a short test but behave unpredictably when the load shifts.
Shop rule: A replacement part isn't correct because it mounts. It's correct when its interface, orientation, movement, and load path match the original assembly.
Measure before opening the parts catalog
Start with the undamaged side whenever possible. Record the frame tube shape, outside dimensions, mounting-hole spacing, shaft diameter, bolt diameter, and bracket orientation. Photograph the assembly before disassembly, including the direction of the wheel fork and the position of spacers or caps.
The practical sequence is straightforward:
- Identify the interface: Confirm whether the part connects to square, rectangular, or round tubing.
- Record the geometry: Measure the tube cross-section and the distance between mounting holes.
- Separate the assembly: Decide whether the failure is limited to a wheel or has spread to the bearing, bracket, axle, or frame.
- Compare the replacement drawing: Check dimensions and orientation, not just the product photograph.
- Document the result: Save the measurements with the wagon's asset record so the next order doesn't begin from guesswork.
This process takes less time than ordering an almost-compatible component, discovering the mismatch during installation, and taking the wagon apart again. It also gives the supplier useful information when the original brand or model marking has worn away.
The Evolution of Standardized Wagon Components
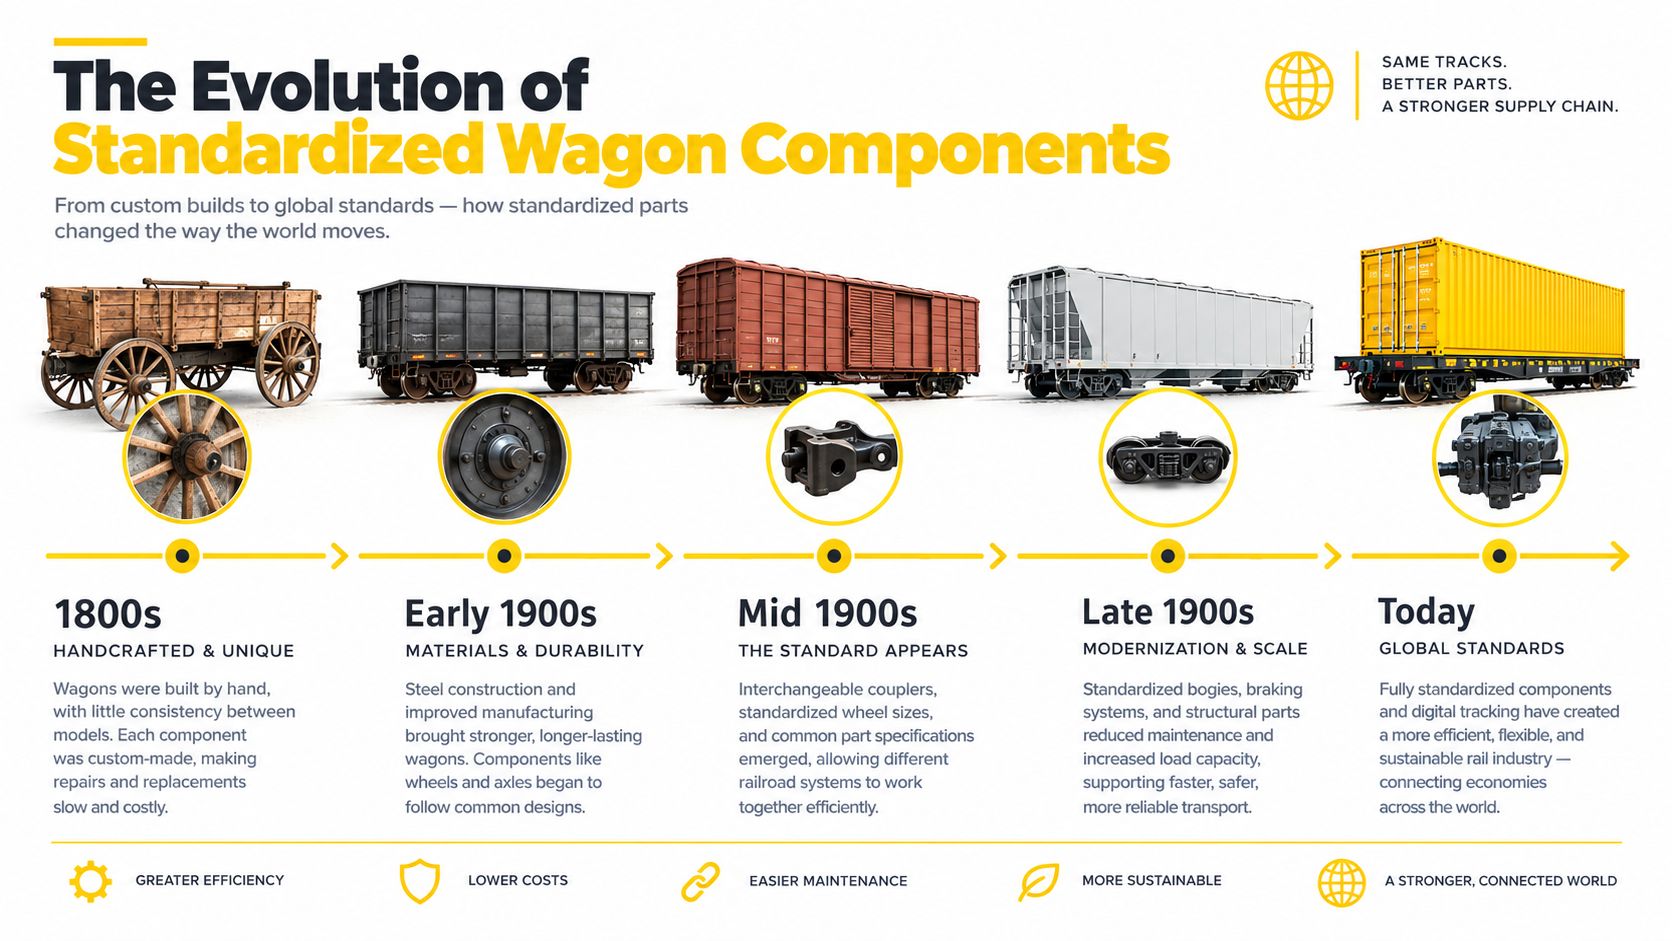
Modern folding carts benefit from an old maintenance principle: interchangeable parts only work when manufacturers control the interfaces. Rail operators learned that lesson when inconsistent wagon construction created safety and maintenance problems. After the 1885 Barnsley Junction accident, in which a wagon axle fractured as a passenger train passed and three people died, the Railway Clearing House began promulgating wagon standards in 1887. The work addressed components such as buffing, coupling, and lubrication, and a widely used revision of the standards was dated 1923. A documented history of wagon-part standardization describes the Railway Clearing House standards and their safety context.
The lesson isn't that a folding utility wagon should be maintained like a railcar. The lesson is that standardization has value only at the points where parts meet. A wheel bracket can be standardized within a product family, but that doesn't make it universal across every folding cart. Tube profiles, hole patterns, pivot hardware, and frame orientation still have to match.
Scale depends on repeatable interfaces
Germany's rail sector applied the same logic in another way. From the mid-1920s, the Deutsche Reichsbahn pushed common parts and tighter tolerances, and construction under those principles began in 1927. The short Oppeln became the most numerous Austauschbauart wagon family, with 28,000 units built, demonstrating how common components could support maintenance and replacement across a large fleet. A historical parts listing provides the background on German standardized wagon construction and the Oppeln production figure.
A shop fleet can apply the principle at a smaller scale. Give each wagon an asset identifier, record its tube dimensions and wheel configuration, and retain the measurements after a successful repair. Over time, the parts room develops a usable fitment map instead of a pile of visually similar components.
The useful distinction is between controlled interchangeability and generic compatibility. Controlled interchangeability means a replacement matches a defined interface. Generic compatibility usually means the part resembles the original or is marketed for a similar cart. The first supports dependable repairs. The second leaves the technician responsible for proving fitment after purchase.
The video below provides additional visual context for how wagon design and component standardization developed.
How to Measure Frame Cross-Sections and Mounting Holes
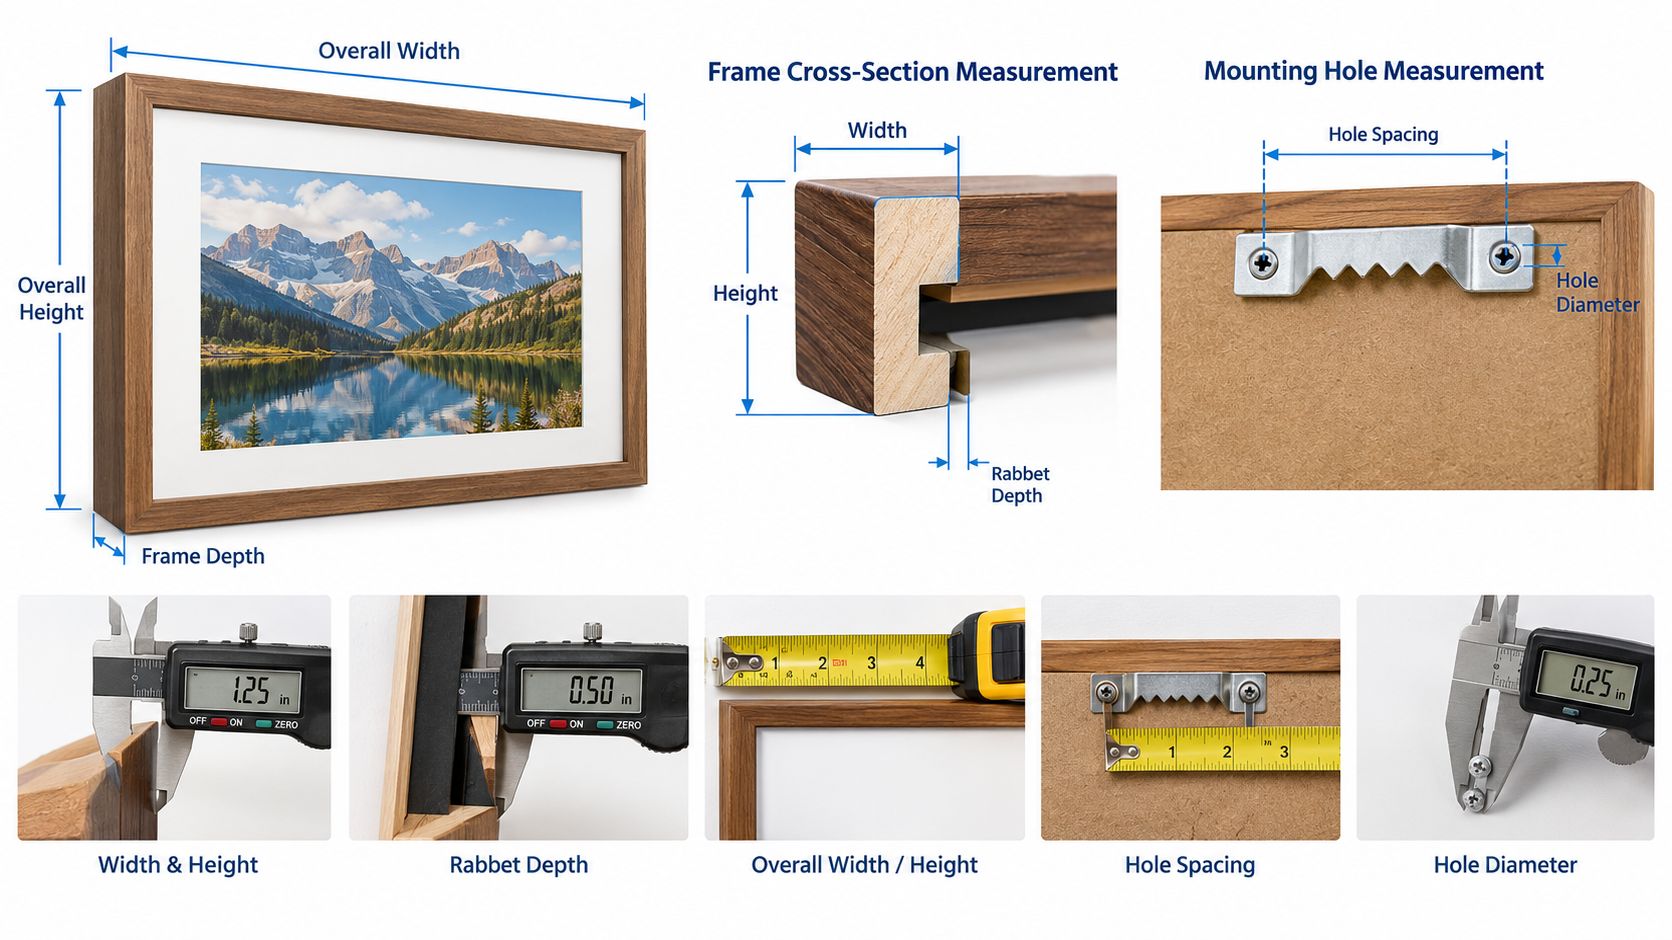
A wagon can look ready for service and still reject a replacement bracket because the tube profile or hole pattern is wrong. Measure it like a trailer component before ordering anything. Park the wagon on a stable surface, remove loose cargo, and take off the bag or canopy if it blocks access. Support the frame so a damaged wheel does not alter its geometry during measurement.
Use a steel rule or tape measure for broad dimensions. Use calipers for tube walls, shafts, bolts, and narrow mounting features. Record each reading against the assembly interface, not only the part name. “Front wheel” leaves too much uncertainty. Identify the front or rear bracket, whether it faces inward or outward, and whether the frame uses round, square, or rectangular tubing.
A repeatable workbench procedure
Clean the measuring points. Remove dirt, loose paint, and burrs from the tube face and mounting holes. Debris can make the tube appear larger or move a caliper jaw away from the true edge.
Measure the tube cross-section. For square or rectangular tubing, record outside width and height. If a replacement slides inside the tube, measure the available internal opening as well. For round tubing, record the outside diameter and describe the circular interface.
Check the handle interface. Measure the handle's outer and inner width pair where it joins the frame. Replacement-handle listings demonstrate why tube size and fixed width pairs matter, with examples for square tube frames of approximately 1.5 cm and 2.0 cm. Replacement-handle listings demonstrate why tube size and fixed width pairs matter.
Measure mounting-hole spacing. Measure from the center of one hole to the center of the next. Record whether the holes run across or along the tube. For elongated holes, document the slot direction rather than treating them as round holes.
Measure the hardware. Check shaft, axle, and pivot-pin diameters with calipers. Record head style, cap-nut arrangement, and spacers that set side clearance.
Verify orientation. Mark front, rear, left, and right before removing a bracket. Components can share dimensions while remaining mirror images.
Why measurements need a record
Write the readings on a job card and photograph the caliper position. Store the tube profile, hole spacing, hardware details, and orientation with the wagon's asset record. A supplier's generic model description is not a fitment specification.
Compare interfaces line by line before installation. If the replacement differs, stop and resolve the mismatch before forcing it into place.
Do not use a washer stack to compensate for an unknown tube mismatch. Washers can address limited spacing differences, but they cannot correct a wrong bracket angle, an incompatible shaft, or a hole pattern that moves the wheel outside the frame's intended load path.
Evaluating Wheel Brackets and Bearing Assemblies
Wheels, bearings, brackets, and axle hardware deserve first attention because they control how the wagon rolls, steers, and carries a shifting load. A damaged outer wheel may be obvious, but the bracket behind it often carries the more consequential damage. A bent bracket can force the wheel to track at an angle, while a rough bearing increases resistance and transfers vibration into the frame.
Independent utility-cart documentation and parts catalogs support a modular repair approach. Serviceable assemblies commonly include wheels, canopy poles, a bag frame, and bolt or cap-nut fasteners. Listings also separate wheel-bearing kits, 7-inch replacement wheels, front and rear wheel brackets, and axle bolts, allowing a technician to replace the failed subassembly rather than discard the entire wagon. Utility-cart replacement-parts documentation describes modular wheel, bearing, bracket, and axle service items.
Inspect the complete load path
Spin the wheel by hand with the wagon unloaded. Listen for grinding, feel for roughness, and check whether the wheel stops abruptly instead of rotating smoothly. Then grasp the wheel and test for side-to-side movement. A little movement at the tire can become substantial movement at the bracket when the wagon is loaded.
Inspect the bracket housing for cracks around the axle opening and mounting points. Look for polished metal where parts have been rubbing, fresh deformation around a bolt hole, and fastener holes that have changed from round to oval. Check whether the wheel remains centered under the frame when the wagon is folded and unfolded.
| Inspection Point | Failure Symptom | Recommended Action |
|---|---|---|
| Bearing rotation | Grinding, rough movement, or inconsistent resistance | Replace the bearing assembly or the wheel module if the bearing seat is damaged |
| Wheel side play | Noticeable wobble when the wheel is rocked by hand | Inspect the axle and bracket, then replace the affected module rather than only the outer wheel |
| Bracket housing | Cracks, bends, or polished rub marks | Replace the bracket assembly and inspect adjacent fasteners |
| Axle opening | Elongation, burrs, or uneven wear | Replace the axle hardware and bracket if the opening no longer holds alignment |
| Wheel tracking | The wheel points away from the frame or scrubs sideways | Verify bracket orientation and frame alignment before ordering a wheel |
Tire-only repair versus module replacement
Replacing only a worn tire makes sense when the wheel body, bearing seat, axle opening, and bracket are sound. It preserves the existing fit and limits the parts used. The risk is that a visible tire problem may conceal bearing roughness or bracket distortion.
Replacing the entire wheel and bracket module costs more in parts, but it restores the interfaces together. That approach is usually more dependable when the bracket is cracked, the wheel wobbles, the axle opening is worn, or the assembly has experienced a hard impact. Don't salvage an outer wheel shell when the component that holds its alignment is already compromised.
Sourcing the Correct Handle and Shaft Replacements
A folding wagon can steer correctly when empty and still fail under load. The handle carries pulling tension, side load during turns, and shock as the cart crosses thresholds. If the shaft, pivot, or tube interface is mismatched, the assembly may shift even though it appears tight during a quick inspection.
Identify the handle arrangement before measuring parts. A telescoping handle requires controlled clearance between nested tubes and a lock that holds the selected position. A fixed shaft depends on accurate alignment at its mounting points. A pivoting handle requires the correct pin diameter, spacer stack, retaining method, and frame orientation. Treat these interfaces with the same dimensional discipline used for trailer subassemblies.
Match the tube before the handle style
Replacement listings may show fitment for 1.5 cm and 2.0 cm square tube frames, along with handles defined by a fixed outer and inner width pair. Those specifications describe different interfaces, not interchangeable labels. Measure the wagon itself, then compare those measurements with the replacement before ordering. Replacement-handle specifications provide examples of tube-size and width-pair fitment.
Use a written measurement record:
- Measure the receiving tube: Record the outside profile, wall condition, and usable internal opening.
- Measure the replacement interface: Confirm outer width, inner width, clearance, and insertion depth.
- Identify the shaft type: Separate telescoping and fixed designs, then verify the locking method.
- Check the pivot: Match pin or bolt diameter, spacer arrangement, and retention method.
- Confirm orientation: Establish whether the handle mounts at the front, rear, left, or right side.
- Test the loose assembly: Before final installation, move the handle through its full range and check for binding or excessive play.
A tube measurement alone does not confirm fit. A worn receiving tube can be out of shape, and a distorted bracket can make a correctly sized shaft sit crooked. Inspect the interface for oval holes, crushed tubing, burrs, and uneven contact surfaces before approving the replacement.
Do not correct loose fit with improvised hardware
Excessive play points to a wrong interface, a worn pivot hole, or missing retaining hardware. A random sleeve can shift under load, while over-tightening may deform the tube and restrict movement without restoring alignment. Replace the affected subassembly when the mounting point no longer holds the shaft square.
The installed handle should move through its intended range without scraping, dropping out, or twisting separately from the frame. Pull the unloaded wagon in several directions, check the pivot, then apply a modest working load and inspect it again before returning the cart to service.
For broader truck and trailer component references, use the truck repair parts catalog. The sourcing rule is the same: document the interface, verify the dimensions, and replace the modular assembly that cannot hold alignment.
Selecting Axle Bolts and Structural Fasteners
A wagon can have a sound frame and still track poorly because one axle bolt is wrong. The bolt controls wheel position, while the cap-nut and bracket hardware keep the load contained. Match the original design for shoulder length, thread engagement, head style, diameter, and material. A bolt that passes through the hole may still allow movement, contact the bearing, or prevent the wheel from sitting square.
Remove the fastener without forcing it through a damaged bracket. Examine the threads for stripping, the shank for wear, and the hole for elongation. Check the mating surfaces for crushed tubing, gaps, burrs, or contact marks that show the bracket has shifted under load.
Fit matters more than hardware-store convenience
A generic bolt creates play when its unthreaded shoulder is too short. It can also cause binding when the threaded section enters the bearing area or the shoulder extends too far. Cap-nuts, washers, spacers, and other retaining hardware must preserve the original clearance while stopping the axle from walking out.
For wagons exposed to water, road salt, fertilizer, or wash-down work, corrosion-resistant hardware can protect the joint. Confirm its strength and dimensions before installation. Corrosion resistance does not correct the wrong geometry.
Fastener principle: Use the original part as a dimensional reference, not as proof that every similar-looking bolt belongs in the assembly.
Before final tightening, confirm that the wheel spins freely and that the bracket sits square to the frame. Tighten bracket hardware evenly so one side does not pull the assembly out of alignment. Use the torque value specified by the wagon manufacturer or fastener system. If no specification is available, tighten in stages and check for movement and bearing drag after each adjustment. Do not crush thin tubing or preload a bearing to hide a bent bracket.
Check the holes before installing stronger hardware
A stronger bolt cannot repair an elongated hole. If the bracket shifts after tightening, remove it and inspect the frame, spacer, washer, and bracket as one interface. Replace the worn component or the complete modular subassembly when the mounting point no longer holds alignment. Replacing only the bolt leaves the failure in place.
Inspect cap-nuts after repeated folding cycles. Loss of retention, a missing washer, or a bent axle can let the wheel move even when the main bracket remains intact. Confirm the axle remains centered, the wheel clears the frame, and the retention method still works as designed before returning the wagon to service.
Implementing a Preventive Maintenance Checklist
Preventive maintenance works best when it becomes part of an existing handoff, safety walk, or equipment check. The inspection doesn't need to become a lengthy rebuild. It needs to catch the small changes that precede a wheel, bracket, handle, or folding-joint failure.
Assign each wagon an identifier and keep a short record of the last inspection, observed defect, replacement part, and measurement used for fitment. A technician should be able to see whether a recurring wheel problem comes from the wheel itself, a misaligned bracket, overloaded use, or a damaged frame.
Use a condition-based inspection
Check the wagon folded and unfolded. The frame should move through its intended travel without a hard catch, sudden twist, or uneven collapse. Inspect pivot points for looseness, cracked metal, and contact marks that indicate one part is carrying load incorrectly.
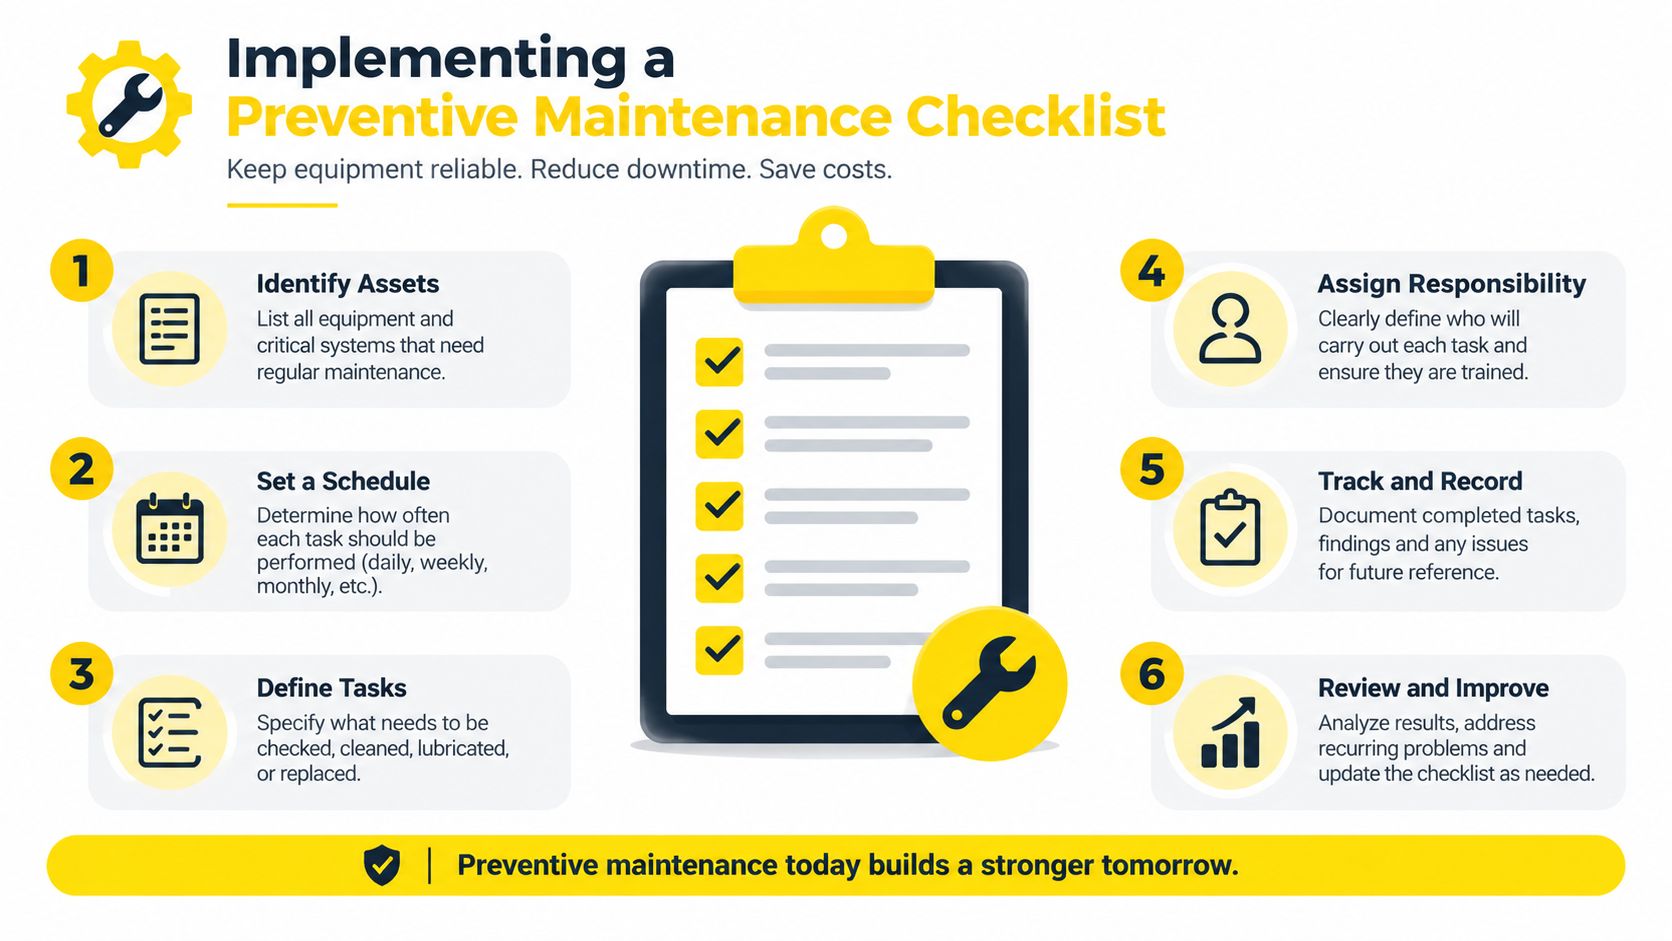
Use the following checklist:
- Roll the wagon unloaded: Listen for bearing noise and feel for rough rotation.
- Rock each wheel: Check for side play, axle movement, and bracket flex.
- Inspect bracket housings: Look for cracks, bent plates, elongated holes, and fresh rubbing.
- Operate the handle: Confirm that telescoping sections lock and pivoting joints remain controlled.
- Examine the frame: Check welds, tube faces, folding joints, and areas around fasteners for fatigue or deformation.
- Inspect the bag and canopy assembly: Look for torn fabric, pulled stitching, bent poles, and stress around attachment points.
- Review the fasteners: Confirm that axle bolts, cap-nuts, washers, and retaining clips remain present and secure.
- Clean before lubrication: Remove abrasive dust before applying lubricant to bearings or pivots.
Lubrication should support movement without turning the joint into a dust trap. Use a product appropriate for the bearing or pivot, apply it sparingly, and wipe away excess. A thick film around an exposed folding joint can collect grit and accelerate wear rather than prevent it.
Remove questionable carts from service
A wagon with a cracked bracket, severe wheel wobble, or handle that slips under load should be tagged and removed from use. Don't send it back to the floor because it still rolls when empty. The inspection is successful only when technicians act on the defect and record the exact replacement required.
For broader maintenance planning and parts support in a truck and trailer workshop context, the Brothers Truck Trailer Repair and Welding service site provides a reference point for repair and maintenance capabilities. The same operational standard applies to utility carts, identify the fault, document the interface, and repair the failed assembly before it becomes a larger interruption.
Managing Inventory for Fleet Utility Carts
A cart can be back on the floor in minutes, or remain parked for days, depending on how its parts are recorded. A bin of assorted wheels does not solve a fitment problem if the shop has no record of tube size, bracket orientation, hole pattern, bearing seat, or axle interface. Manage inventory against the fleet's measured configurations.
Start with an asset audit. Record each wagon's frame profile, tube dimensions, handle style, wheel configuration, bracket type, mounting-hole spacing, and fastener arrangement. Keep those measurements with the asset number. Two carts may look identical while using different tube profiles or attachment geometry.
Build inventory around failure points
Stock the assemblies that commonly stop a cart from working: wheels, bearings, brackets, handles, and axle hardware. A modular system lets technicians replace the failed subassembly instead of holding a complete cart out of service while waiting for a full replacement.
A practical spare-parts register should cover:
- Wheel assemblies: Match diameter, tread style, axle opening, and front or rear bracket orientation.
- Bearing components: Keep kits that match the recorded wheel and axle interfaces.
- Bracket modules: Separate front and rear versions, and label the frame orientation and hole pattern.
- Axle hardware: Store the correct bolts, washers, spacers, cap-nuts, and retaining parts together.
- Handle components: Record outside and inside tube dimensions, shaft length, pivot-hole size, and pivot hardware. Appearance is not a fitment specification.
- Consumables: Keep cleaning and lubrication products suited to the cart's working environment.
Label each bin with dimensions, orientation, compatible asset identifiers, and the subassembly it services. A photo helps technicians identify a part, but written measurements control the issue decision. Measure every new wagon before its first failure, then assign it to an existing parts family only when the interfaces match.
Avoid false standardization
Standardized purchasing reduces errors when several wagons share the same dimensions and mounting geometry. It does not justify forcing every cart into one specification. A different tube profile, hole pattern, bracket offset, or axle opening requires a separate family and separate stock location.
After each repair, inspect removed parts before returning anything to inventory. A wheel removed with a cracked bracket may still be usable, but its bearing seat, axle opening, and rim must be checked. Quarantine parts with uncertain condition and record the reason for removal. Verified subassemblies belong in active stock. Untested leftovers do not.
For Spanish-language catalog browsing, the Spanish truck and trailer parts catalog provides a parts reference. The operating rule remains the same: compare the documented component with the measured wagon before it reaches the repair bench.
Brothers Truck Trailer Repair and Welding Corp. provides truck and trailer repair, Walking Floor system diagnostics, aluminum welding, custom fabrication, and an in-stock parts catalog for fleet maintenance needs. For help diagnosing a damaged rolling assembly or sourcing a fitment-focused repair, visit Brothers Truck Trailer Repair and Welding Corp..
Refined using Outrank

Expert commercial trailer repair in Tampa for Walking Floor, aluminum welding, and fleet maintenance. Minimize downtime with Brothers Truck Trailer Repair.

Preventive maintenance for commercial trailers: inspection checklists, Walking Floor care, aluminum repairs, and fleet service in Tampa Bay.
Master walking floor trailer hydraulic troubleshooting with expert diagnostics, safety protocols, and repair strategies to minimize fleet downtime.