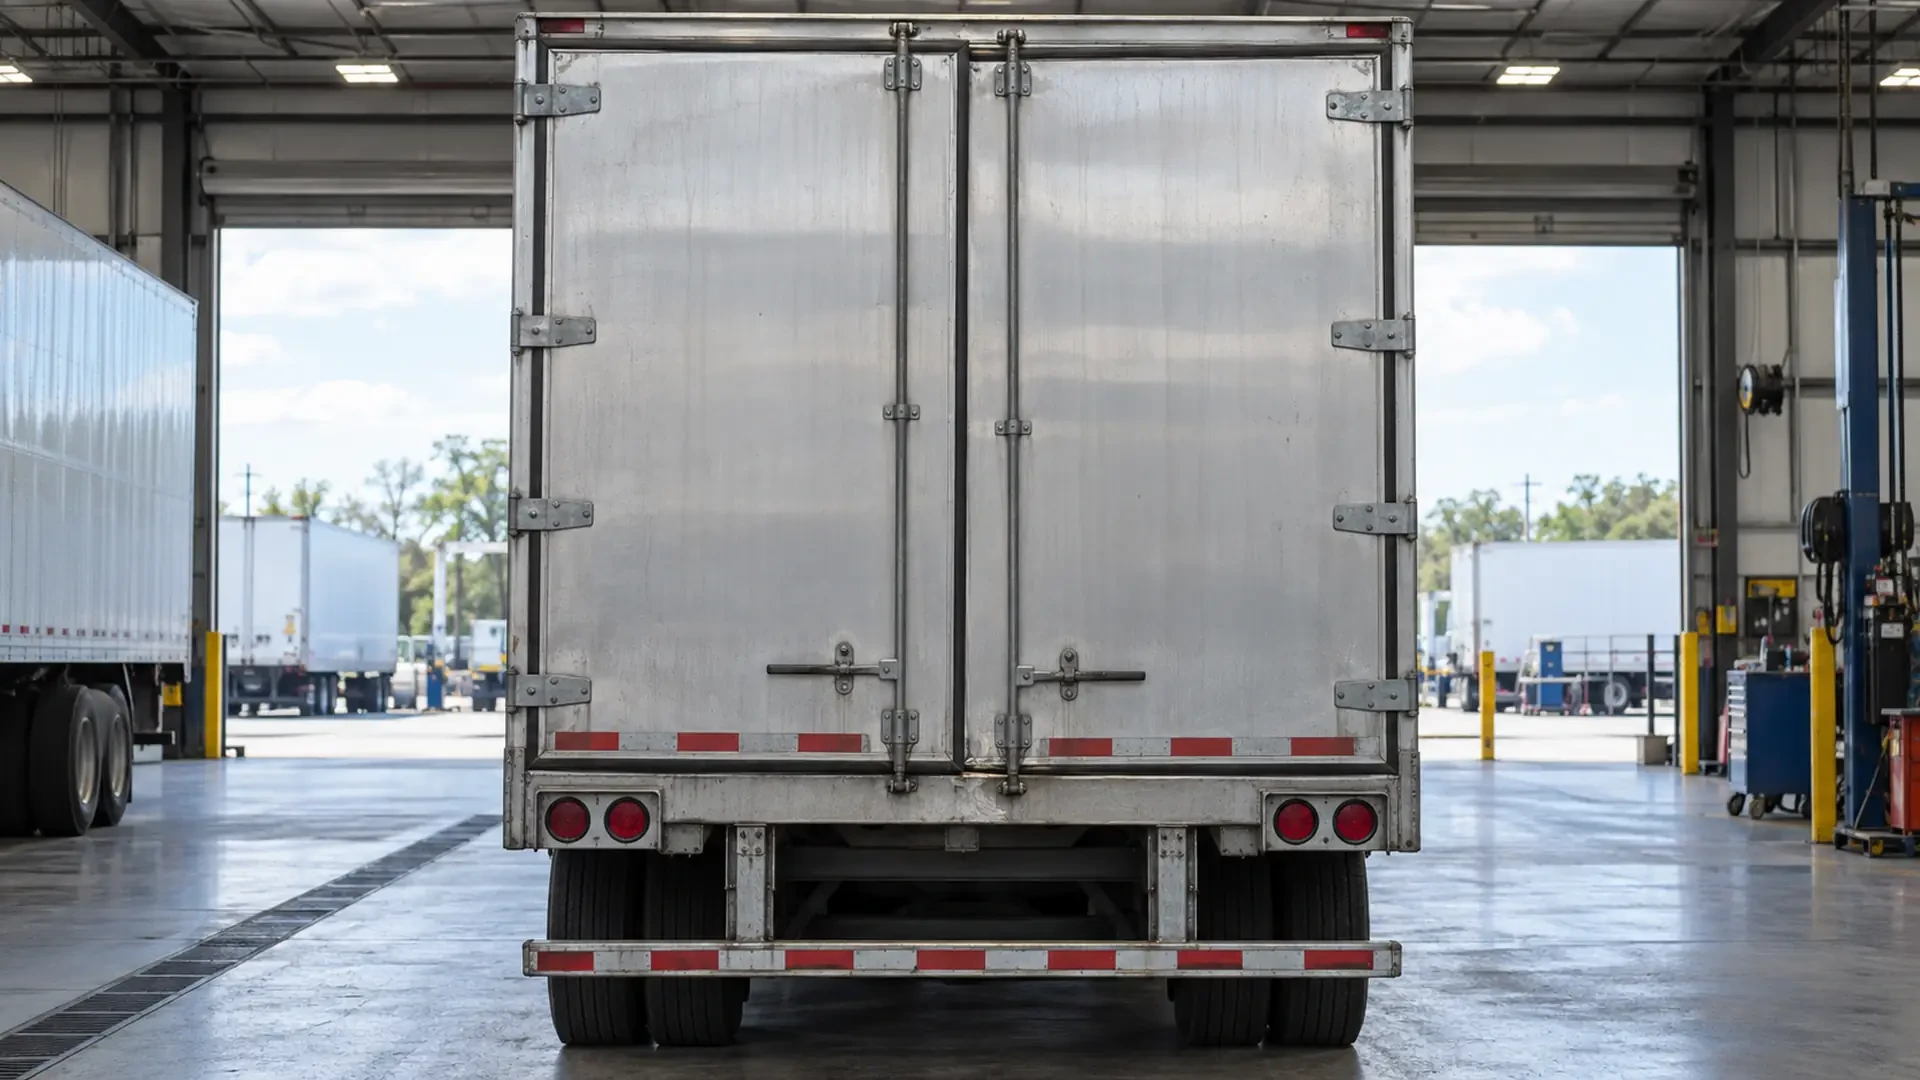
Trailer rear opening no longer aligns: what to document before repair
A rear door that closes differently, an uneven gap around the opening or a latch that no longer lines up as usual is an observable change—not a complete diagnosis. The condition may involve the door, hinges, hardware, surrounding material, deformation or another repair area that must be inspected in person.
Before forcing the door or requesting a specific weld, document the complete opening and the sequence in which the change appeared. Wide photos and simple measurements can make the first service conversation more useful.
Brothers Truck Trailer Repair and Welding Corp. provides trailer repair, aluminum welding and fabrication from its workshop at 1620 S 51st St, Tampa, FL 33619.
Start with the exact change you observed
Alignment problems are easier to discuss when the description separates the door or opening from an assumed cause. Examples of useful observations include:
One door sits higher or lower than before.
The gap is wider at the top than at the bottom.
A latch reaches its keeper differently.
The door rubs at a new contact point.
The opening edge appears bowed or displaced.
A seam, crack or separation is visible near a hinge or corner.
The change is present when empty but looks different under another normal condition.
Avoid statements such as “the frame is bent” unless that finding has been confirmed. Brothers Truck Trailer should inspect the actual unit before defining the affected area or repair method.
Do not force the door to prove the symptom
Repeatedly pulling, pushing or striking a door can add damage, change the evidence or create a safety risk. If it does not move as expected, stop and record the position.
Do not stand in the path of an unsecured door, place hands between closing surfaces or attempt to operate damaged hardware solely for a video. Secure the area using the unit’s normal safe procedures and contact the shop if you are unsure how to proceed.
The objective is not to make the door close for the photo. It is to preserve and explain the condition you found.
Photograph the complete opening before the detail
Take a straight, wide rear view
Stand far enough back to include the full opening, both sides, upper edge and lower threshold. Keep the camera as level as practical. This view helps show whether a gap, edge or door position changes across the complete opening.
Add a three-quarter view
A diagonal angle can reveal depth, bowing or a door that sits forward or behind the adjoining surface. Include enough of the trailer side and rear to establish orientation.
Capture the top and bottom relationships
If it is safe, photograph the top corners, hinge side, latch side and lower edge. Do not crop so closely that the nearby seam or panel line disappears.
Document contact marks
Fresh scraping, polished metal, missing finish or residue can show where surfaces meet. Photograph the mark and then step back for a second image that shows its location.
Include previous repairs
If there is an existing weld, reinforcement or repaired area nearby, show the complete feature and its relation to the current change. Its presence is useful history, but it does not establish why the alignment changed.
Use simple reference points consistently
Measurements can support photos when they are taken without forcing or moving the damaged area. Depending on access, record:
Gap near the top and bottom of the same edge.
Distance from a latch to its usual meeting point.
Difference in height between comparable door corners.
Location of a crack or contact mark relative to a fixed seam.
Use the same reference points each time. Note the date, whether the trailer was empty or loaded during normal operation, and whether it was parked on a visibly level surface.
Measurements are observations, not tolerances. Do not declare a component within or outside specification unless the correct specification has been verified for that trailer.
Record when the alignment changed
The timeline can help the shop decide what areas require attention. Write down:
When the door or opening last operated normally.
When the new gap, rubbing or latch position was first observed.
Whether the change appeared gradually or during one known event.
Whether the trailer was empty, loaded, being loaded or being unloaded.
Whether a new sound, vibration or movement occurred around the same time.
Whether work was recently completed near the opening.
If the condition changed over several inspections, keep each dated photo. Do not recreate an impact, loading condition or movement just to complete the timeline.
Look beyond the latch without diagnosing the structure
A latch that no longer lines up may be the most noticeable symptom, but the service request should include the surrounding area. Observe visible conditions such as:
Loose-looking or displaced hardware.
Uneven hinge spacing.
A changed seam or panel line.
Cracking near a corner, hinge or repaired area.
New contact between the door and threshold.
Bowing or deformation around the opening.
Water, debris or material buildup affecting the visible area.
Do not remove hardware or adjust hinges before the shop reviews the condition unless qualified personnel have determined that action is appropriate. An adjustment made too early can hide the original relationship between the components.
Why a surface-only repair may be incomplete
Closing a visible crack or moving a latch can address one obvious symptom, but it may not explain why the opening changed. The shop may need to evaluate the surrounding aluminum, adjoining surfaces, hardware position, prior repairs and any related deformation before choosing a repair path.
That does not mean every alignment change requires extensive work. It means the scope should follow inspection. Depending on the unit, the next step may involve trailer repair, aluminum welding, fabrication, hardware service or additional evaluation.
A request for “inspection of a changed rear opening and the crack beside it” leaves room for the physical evidence to guide the decision. A request to “weld the frame” assumes a service and diagnosis that have not yet been established.
Keep the area available for inspection
Before bringing the trailer to the workshop:
Keep the photos in their original order and resolution.
Do not grind, drill or heat a crack.
Do not hammer or pull the opening back into position.
Do not cover contact marks before photographing them.
Keep loose cargo or debris away from the area when normal safe procedures allow.
Bring notes about earlier repairs and the first appearance of the change.
If the door cannot be secured using normal procedures, do not assume the unit is ready to move. Contact the appropriate service provider and explain the condition before transport.
Prepare the repair request
Share a concise package with the shop:
Trailer year, make, model or unit number available.
Door or opening type and affected side.
Exact visible change: gap, height, rubbing, latch position, crack or deformation.
Date and operating condition when first noticed.
Any change between empty and loaded conditions already observed during normal work.
Prior repair or adjustment near the opening.
Wide rear view, three-quarter view and close detail photos.
Measurements taken from consistent fixed points.
Your requested next step: an in-person inspection and discussion of repair options.
This information helps the shop understand the problem without treating photos as a remote diagnosis.
Has your trailer’s rear opening or door spacing changed? Send Brothers Truck Trailer the unit information, timeline, wide photos and any safe reference measurements you have. Call +1 (813) 750-6380 or email [email protected] to discuss an in-person inspection at the Tampa workshop.

Expert commercial trailer repair in Tampa for Walking Floor, aluminum welding, and fleet maintenance. Minimize downtime with Brothers Truck Trailer Repair.
Preventive maintenance for commercial trailers: inspection checklists, Walking Floor care, aluminum repairs, and fleet service in Tampa Bay.
Master walking floor trailer hydraulic troubleshooting with expert diagnostics, safety protocols, and repair strategies to minimize fleet downtime.