
Trailer Lock Latch Fit and Install Guide
A heavier locking handle is the advice most counters still give when a door won't stay shut. It is the wrong first move. A trailer lock latch that only looks closed can sit on a bent keeper or a cracked aluminum mount, and a stiffer handle just pushes that load into the door frame. The failure moves. It does not stop.
The latch is the retention piece. It has to keep a cargo door, lock rod, or coupler from releasing under vibration and load shift. On dump bodies, box trailers, walking-floor units, and utility trailers, that job sits with coupling, doors, and cargo restraint. Fit, bite, and the metal around the bolts matter more than how solid the handle feels in your hand.
Table of Contents
- What a Trailer Lock Latch Must Hold
- Which Latch Fits the Door and Frame
- How to Mount and Align the Latch
- How to Test Engagement After Repair
- Daily and Annual Latch Maintenance
- Repair the Mount Before You Dispatch
What a Trailer Lock Latch Must Hold
A shut handle is not a locked door. The latch has to stay engaged when the trailer shakes, the floor cycles, or the load slides. FMCSA inspection guidance treats vehicle safety requirements as a defined compliance area under 49 CFR Part 393, and coupling-related rules require locking mechanisms to remain functional so parts do not separate by accident. Missing, broken, loose, or poorly adjusted locking hardware can be a roadworthiness defect. Reviewers look at the latch with coupling devices, doors, and cargo restraint, not as a convenience closer.
Before the unit rolls, confirm a full bite, a working secondary lock, and mounts that are not cracked or loose. Corrosion and wear that shorten engagement depth count the same as a missing pin. Those checks matter most on dump, box, walking-floor, and utility trailers, where vibration, debris, moisture, and repeated loading cycles work the hardware every day.
Five assemblies people order as one part
Parts lists collapse several devices into one name. Ordering the wrong family wastes a day and still leaves the door free to walk.
| Latch type | What it retains | Typical trailer use | False-closed sign |
|---|---|---|---|
| Rotary or paddle latch | Swinging cargo door to keeper | Box, van, and utility rear doors | Handle looks up but the door still shifts |
| Lock rod or cam latch | Barn-door pair into the seals | Dry van doors and dump gates | Rod turns yet daylight stays at the seal |
| Hasp, crossbar, or padlock | Handle movement only | Secondary anti-theft on any door | Padlock is on but the primary latch is short of full bite |
| Coupler or hitch lock | Tow lever or coupler jaw | Full trailer, pintle, or ball coupler | Lock is present but the lever can still lift |
| Keeper or striker | Mating face for the primary latch | Every door style above | Bent tip, shiny wear land, or bolt holes wallowed out |
Shop rule: A firm pull in the opening direction that cams the latch off the keeper means the door has already failed. Do not dispatch it.
The keeper fools more techs than the latch body. A bent tip, a polished wear land, or wallowed holes make a sound latch look bad. Match the mating face to the door style, or the new body will never take a full bite.
Which Latch Fits the Door and Frame
Fit is a systems check, not a hole-spacing guess. Photograph both faces of the assembly before you unbolt anything. Record trailer make, model, and door style, then measure shaft length and bolt spacing. Note left or right hand, and whether the door uses a single latch or a latch plus hasp or crossbar. Close the empty trailer without forcing it. If the handle needs a slam, stop buying. A heavier locking handle only moves force into the weak point.
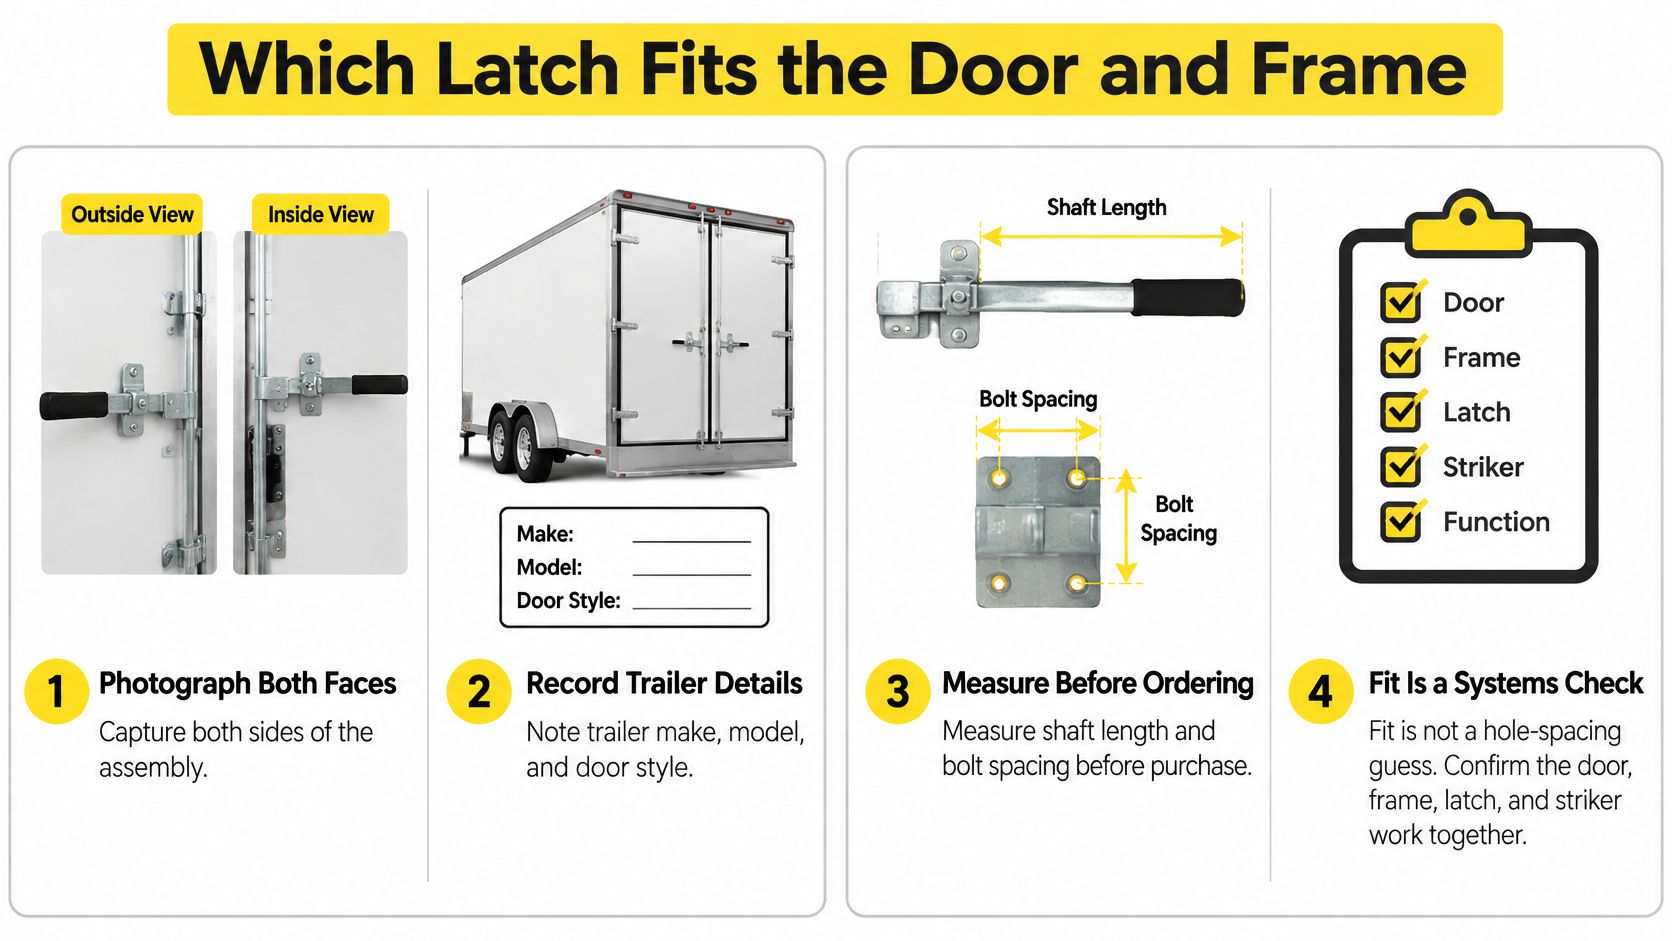
FMCSA guidance on securement and loading ties those duties to safe operation: the vehicle and cargo have to meet applicable requirements before travel. A hard close is a diagnosis, not a parts cue. The cause may be a bent keeper, a sagging door, a shifted hinge, seal compression, frame damage, or corrosion. The latch body is the last item on that list.
Repair versus replace
Work the checks in this order: keeper alignment, hinge and door sag, seal compression, frame twist, corrosion, then the latch body. Grinding the engagement face so it closes removes overlap and creates a false shut. The handle feels done. The door is not held.
| What you see | Likely cause | Repair or replace |
|---|---|---|
| Needs a slam to catch | Bent keeper or striker | Straighten or replace the keeper, then retest bite |
| Door drops as it closes | Sagging door or shifted hinge | Repair hinges and alignment before any new latch |
| Latch catches only partway | Crushed seal or twisted frame | Fix the frame or seal, do not grind the latch nose |
| Handle springs back open | Worn cam or short engagement | Replace the latch body only after alignment is true |
| Bolts will not stay tight | Elongated holes in aluminum | Repair or plate the mount, then refit hardware |
| Seized or gritty action | Corrosion from salt, wash water, or waste | Clean, check material match, replace if pitted |
Aluminum skins and walking-floor frames
On aluminum doors and walking-floor rear frames, elongated holes and cracked skins are the usual failure. A steel latch can outlast the plate it bolts to. Plate or repair the mount first, then fit a latch with the same shaft, handedness, and keeper reach. Humidity, salt air, wash water, and corrosive waste pit the body and swell the holes. A "universal" latch will not fix that geometry.
Installing a heavier handle can worsen reliability when it masks misalignment and dumps force into weakened aluminum.
Record pass or fail, the defect, and the corrective action in the inspection file. Verify the handle cannot rebound or open under vibration before the trailer leaves the bay. That note is what stops the next tech from ordering the same wrong handle.
How to Mount and Align the Latch
Treat the latch as cargo-securement hardware. Work on an empty trailer with the doors free to swing. FMCSA cargo-securement rules require securement devices and vehicle components used to secure cargo to be in proper working order, without damaged or weakened parts that could hurt performance. The same guidance identifies cargo-system design loads of 0.8 g forward, 0.5 g rearward, and 0.5 g lateral. A latch that creeps under a hand pull will not stay put under those forces. There is no reliable universal repair "success rate." Performance depends on design, door geometry, wear, and loading, so log pass or fail, defect type, corrective action, and a post-repair recheck.
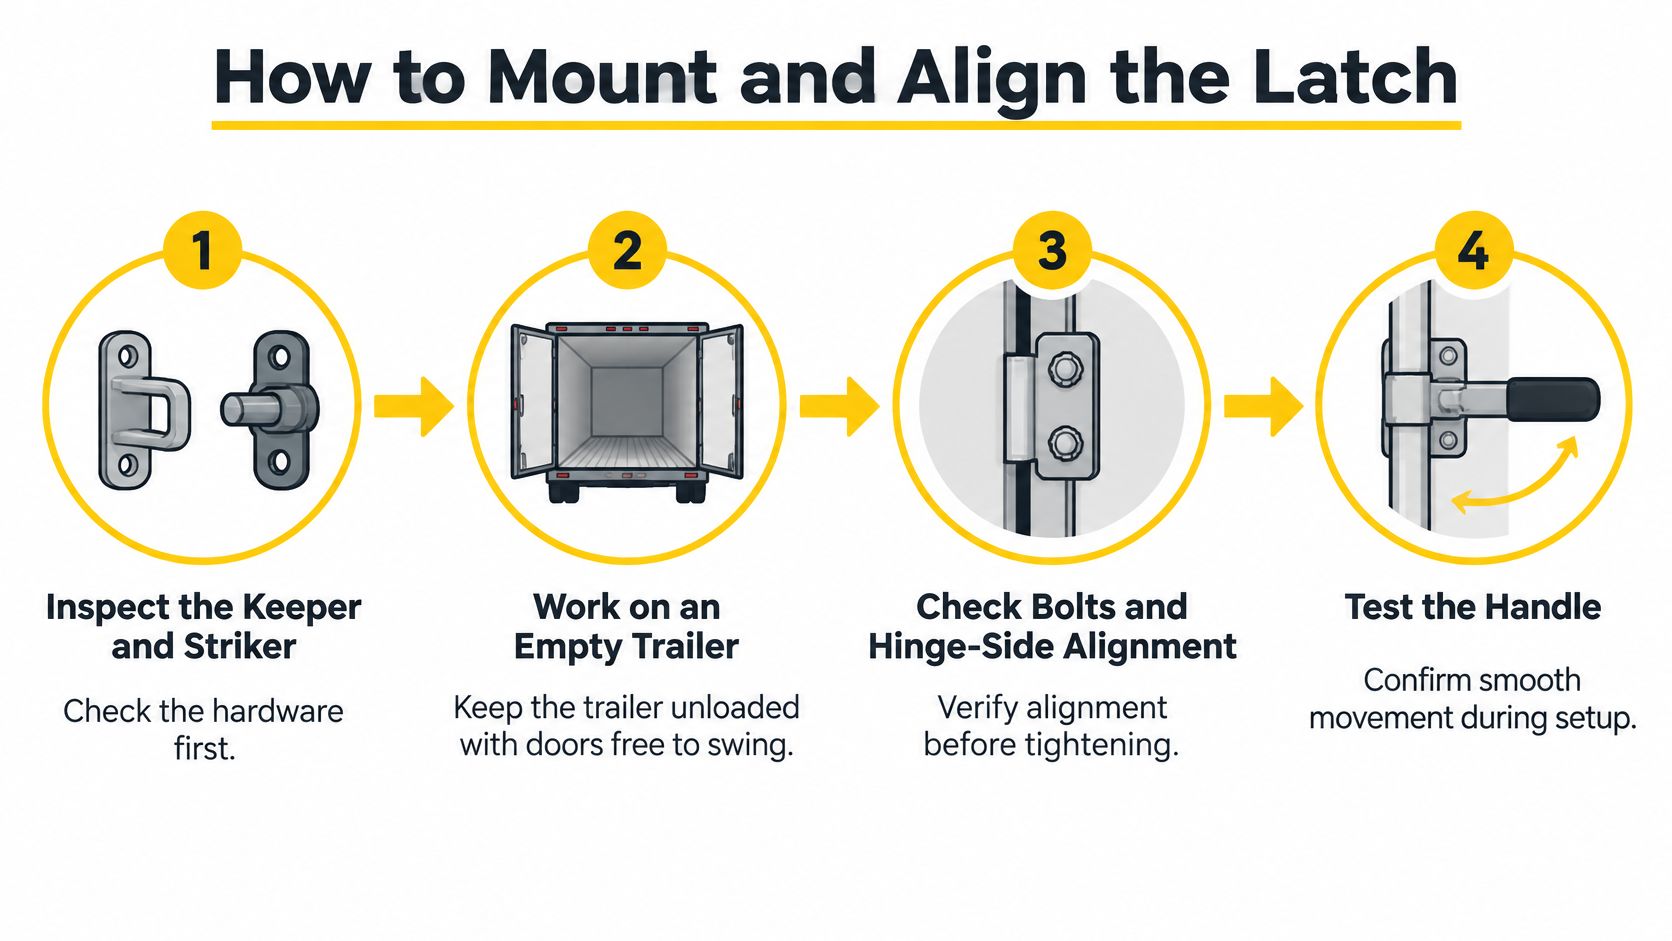
Set the hardware before you torque it
- Inspect the keeper, striker, bolts, hinge-side alignment, handle, locking pin, and door skin for cracks, bends, corrosion, egg-shaped holes, or missing fasteners. A strong body cannot make up for a cracked support.
- Support a sagging door so the hinge line is true before you drill or reuse old holes. Bolting a latch to a dropped door locks the misalignment in.
- Set the latch body on the existing pattern when the holes are round and the skin is sound. Match shaft length and handedness from the measurements you already took.
- Snug fasteners in a cross pattern. Leave final torque until the door closes without a pry bar. Early torque on a cocked plate twists the skin.
- Close both doors evenly and confirm the primary latch takes the full keeper, not a partial nose.
- Pull the handle with moderate force in the opening direction. It must not cam out, release, or let the door creep. If it does, stop and realign. Do not add force with a cheater bar.
- Engage the secondary device, whether a hasp, crossbar, or padlock, and confirm it holds the handle. It is an added layer, not the only restraint.
- Torque fasteners to the hardware maker's specification and mark them so the next inspection can see movement.
Binding gets fixed by alignment or by replacing the damaged part. Never grind the latch or the keeper to make it close. Lost overlap feels shut in the yard and lets go on the road.
Where the anti-theft lock actually goes
For theft resistance, pair a shrouded padlock on the hasp with a coupler lock on a full trailer. Position each lock so it blocks the handle or the tow lever, not a loose bracket off to the side. A lock on a bracket that can still swing does not retain anything. On a pintle or ball coupler, the lock has to stop the lever from lifting. Presence of a lock body is not engagement.
Document whether the door and latch can stay positively secured under vibration and load movement. Write the result as pass or fail with the defect named. Do not publish a percentage the inspection cannot support.
How to Test Engagement After Repair
Run one acceptance sequence every time, and write the result down. A different wiggle from each tech is how a half-caught door gets a green tag.
- Clean grit out of the latch and keeper so debris is not mistaken for engagement.
- Lubricate only with a product the hardware maker allows. The wrong grease packs with waste dust and hides wear on the cam.
- Cycle the handle and any secondary lock several times with the door open, so you feel the mechanism without the seal fighting you.
- Close the doors evenly. One door slammed ahead of the other cocks the rod.
- Confirm the primary latch is fully on the keeper from outside and from inside the box.
- Apply a controlled pull in the opening direction.
- Look for daylight or door shift at the seal.
- After a short controlled road test, or a yard vibration check, confirm the lock is still seated.
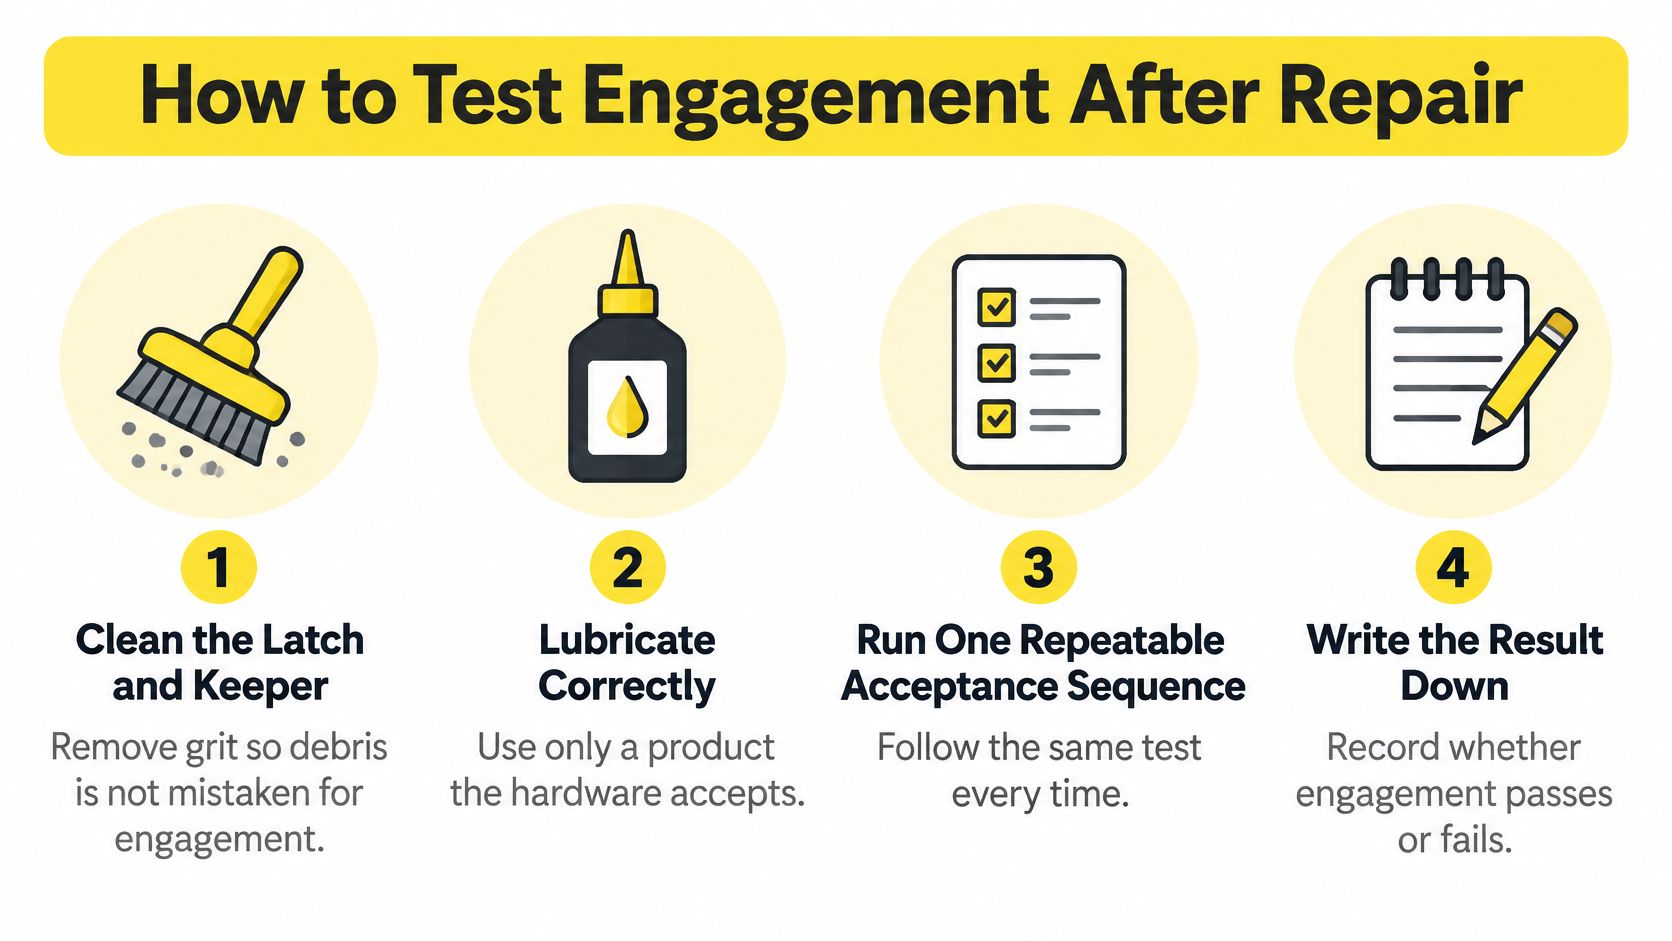
Fail the job on these misses
Fail the repair if you only wiggled the handle, missed a bent keeper, accepted a half bite, treated a padlock as proof the door is secure, or skipped the door frame for movement.
FMCSA's reading of the sealed-compartment rule is direct: a cargo compartment secured with a padlock is not automatically treated as sealed when the driver has the key. The driver still has to perform the required cargo and load-securing examinations. The same idea belongs in the bay. A padlock can freeze a handle and still leave a cracked or misaligned latch free to walk open.
Log condition before repair, measured door movement if you have it, parts changed, torque used, and the final pass or fail. A repeat failure on the same door then shows up in the file instead of looking like a new complaint. Federal sources set performance and inspection duties. They do not give a universal repair-success percentage, so do not invent one for the work order.
Daily and Annual Latch Maintenance
Put the latch on the same clock as the rest of the combination. A "fix it when it breaks" list is how a loose keeper becomes a door in the lane.
Under 49 CFR 392.7, a commercial vehicle may not be driven unless the driver is satisfied that its parts and accessories, including coupling devices, are in good working order, as the FMCSA safety planner lays out. A latch that will not seat, or that needs abnormal force, is a no-dispatch defect. Say a dump gate looks latched at the yard light but the handle sits high and needs a hip-check to catch. That unit stays.
End of the day and the yearly inspection
Federal motor-carrier inspection rules require drivers of non-passenger commercial motor vehicles to inspect each vehicle at the end of the workday and complete a signed written report on defects that could affect safe operation or cause a breakdown. Coupling devices are on that list. Use the report to catch a latch that loosened after a rough dump, a walking-floor unload, or a day of wash-rack spray. A driver who felt the handle go soft on the last stop should write it, not wait for the next pre-trip.
Every commercial vehicle, including each segment of a combination, needs a periodic inspection at least once every 12 months. The carrier keeps that report for 14 months, and proof of the latest inspection stays on the vehicle. Those two clocks show repeating patterns: the same door, the same elongated aluminum holes, the same keeper.
Knotted or twisted safety chains used only to couple a full trailer are judged under the coupling rule. FMCSA's 2018 clarification says that condition is not automatically a defect or an out-of-service item for that coupling use, and that no out-of-service violations had been cited in the preceding three years for knotted or twisted coupling safety devices in Level VI inspections. Do not log those chains as latch faults. Judge the device by the job it is doing and by how it is attached.
| Check point | Who | What to confirm | Fail example |
|---|---|---|---|
| Pre-trip before wheels turn | Driver | Full engagement, alignment, handle seats without abnormal force | Latch will not seat, sits crooked, or needs a slam |
| End-of-day DVIR | Driver | Signed written report of defects that could affect safe operation, including coupling devices | Latch loosened after rough dump or wash-rack spray |
| Periodic inspection, at least every 12 months | Carrier and inspector | Cracks, loose fasteners, and corrosion that shortened the bite, on each unit of the combination | Egg-shaped aluminum holes or bent keeper found again |
| Inspection records | Fleet maintenance | Periodic report kept 14 months; proof of latest inspection on vehicle | Same door failing repeatedly with no written trail |
A file with three slams on one walking-floor rear door and no corrective action is the defect. The hardware is only the symptom.
Repair the Mount Before You Dispatch
Dispatch only when the primary latch is fully on the keeper, the secondary lock works, fasteners are tight, and a pull test shows no door movement. Hold the trailer if the handle rebounds, the keeper is bent, holes are wallowed, or the aluminum skin or walking-floor rear frame is cracked.
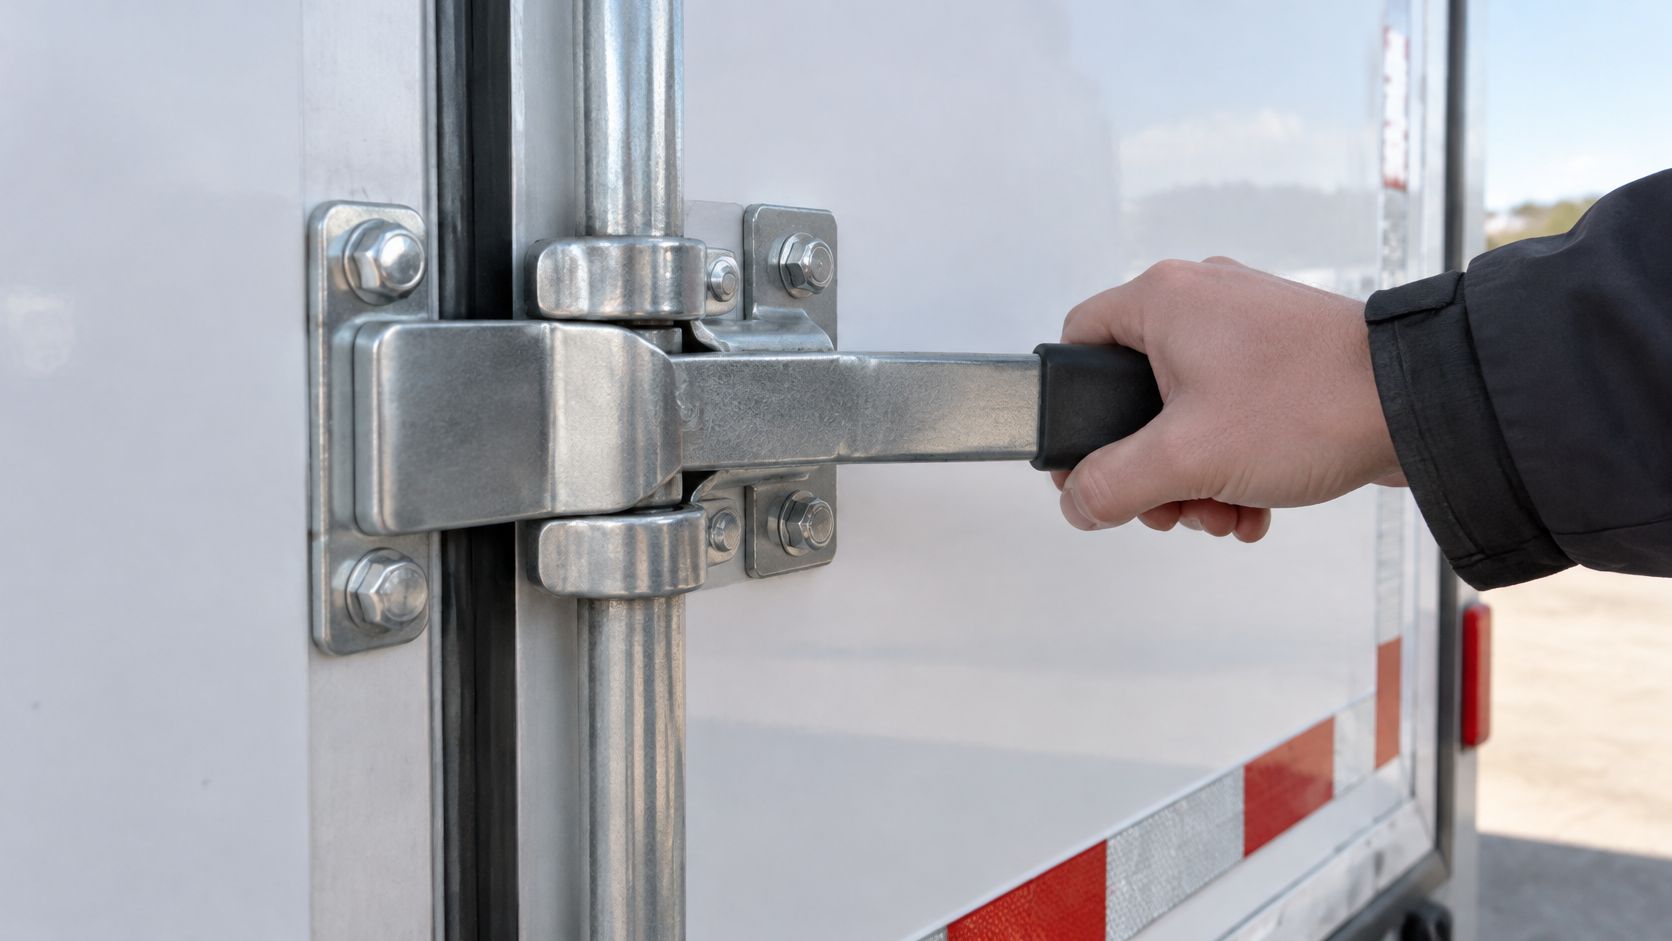
A new latch on that damage will not stay tight. A heavier anti-theft handle can grow the crack by levering a weak plate. That is the point to stop field fitting. Bolting fresh hardware into egg-shaped holes only marks the paint until the next unload.
We repair aluminum trailer bodies and components, and we fabricate to a specific truck or trailer fit when a mounting plate or door frame needs more than a bolt. We also keep truck and trailer parts in inventory so the latch can be matched to the repaired mount instead of guessed from a catalog photo. Bring photos of both faces, trailer make and model, shaft and bolt measurements, and the defect notes from the inspection file. Structural repair and latch refit can then be scheduled together, and the engagement test repeated before the unit returns to the road.
A short shop walk-through of handle and keeper movement is worth watching before you decide the body is the bad part.
If the skin is sound and the keeper is true, refit and retest in the bay. If the aluminum is cracked, welding and fabrication come first. The door holds because the mount holds, not because the handle got heavier.
Brothers Truck Trailer Repair and Welding Corp. welds aluminum trailer bodies, fabricates mounts to a specific truck or trailer fit, and stocks truck and trailer parts so a trailer lock latch can go back on sound metal. If a keeper, door frame, or walking-floor rear plate is cracked or wallowed, bring the photos and measurements in and have the structural repair and the engagement retest done together. Visit Brothers Truck Trailer Repair and Welding Corp. to schedule that work.

Walking floor slat replacement for fleets: when to rotate, plate, or replace slats, plus welding, hydraulic, and safety checks.

Aluminum trailer crack repair for fleets: classify the crack, inspect the full path, weld sound metal, and know when a shop should do it.

Standard trailer ball sizes with rated capacities, SAE load classes, torque values and a fit checklist so you match ball, shank and coupler correctly.