Trailer Deck Bolts: Inspection, Torque, Replacement
You're halfway through unloading a trailer with a fixed wooden deck when a board starts shifting under the load. A quick look finds a loose nut, a rusty washer, and a bolt head sitting lower than the surrounding boards. The easy answer is to grab a replacement from the parts bin and tighten it down. In a commercial trailer, that shortcut can leave crushed wood, oversized holes, hidden corrosion, or uneven clamping behind.
This guide covers fasteners in fixed wooden trailer decks. Trailer deck bolts are part of a structural joint exposed to vibration, moisture, impact, and repeated loading. The right repair considers the bolt, washer, deck board, cross-member, coating, torque, and installation sequence together. Moving-floor systems require their own manufacturer-specific procedures; the wooden-deck steps below are not instructions for repairing Walking Floor slats. That distinction matters for Tampa Bay fleets working around salt air, wet debris, road spray, and hard unloading cycles.
Table of Contents
- Why Trailer Deck Bolts Matter More Than Hardware Lists Suggest
- Inspecting Trailer Deck Bolts for Wear and Corrosion
- Choosing the Right Bolt Size and Grade
- Torque Procedures and Safe Replacement Steps
- Preventing Future Corrosion and Fastener Failure
Why Trailer Deck Bolts Matter More Than Hardware Lists Suggest
A deck bolt doesn't work alone. Its head transfers force into the wood, the shank passes through the board and supporting structure, the washer spreads load beneath the nut, and the clamped joint has to stay tight while the trailer flexes. If one part loses strength, the rest of the joint inherits more stress.
Start with the trailer manufacturer's current parts list, drawing, or service instructions for the exact deck assembly. Confirm the specified fastener diameter, length, grade, washer, nut, coating, and mounting pattern before ordering replacements. The board thickness, supporting member, and required clearances are part of that identification.
Record the trailer model and the document or approved part number used to select the hardware. If the original specification cannot be identified, obtain guidance from the trailer manufacturer or a qualified repair specialist before changing bolt diameter, drilling larger holes, or substituting a different grade. Hardware that fits the hole is not automatically an approved replacement.
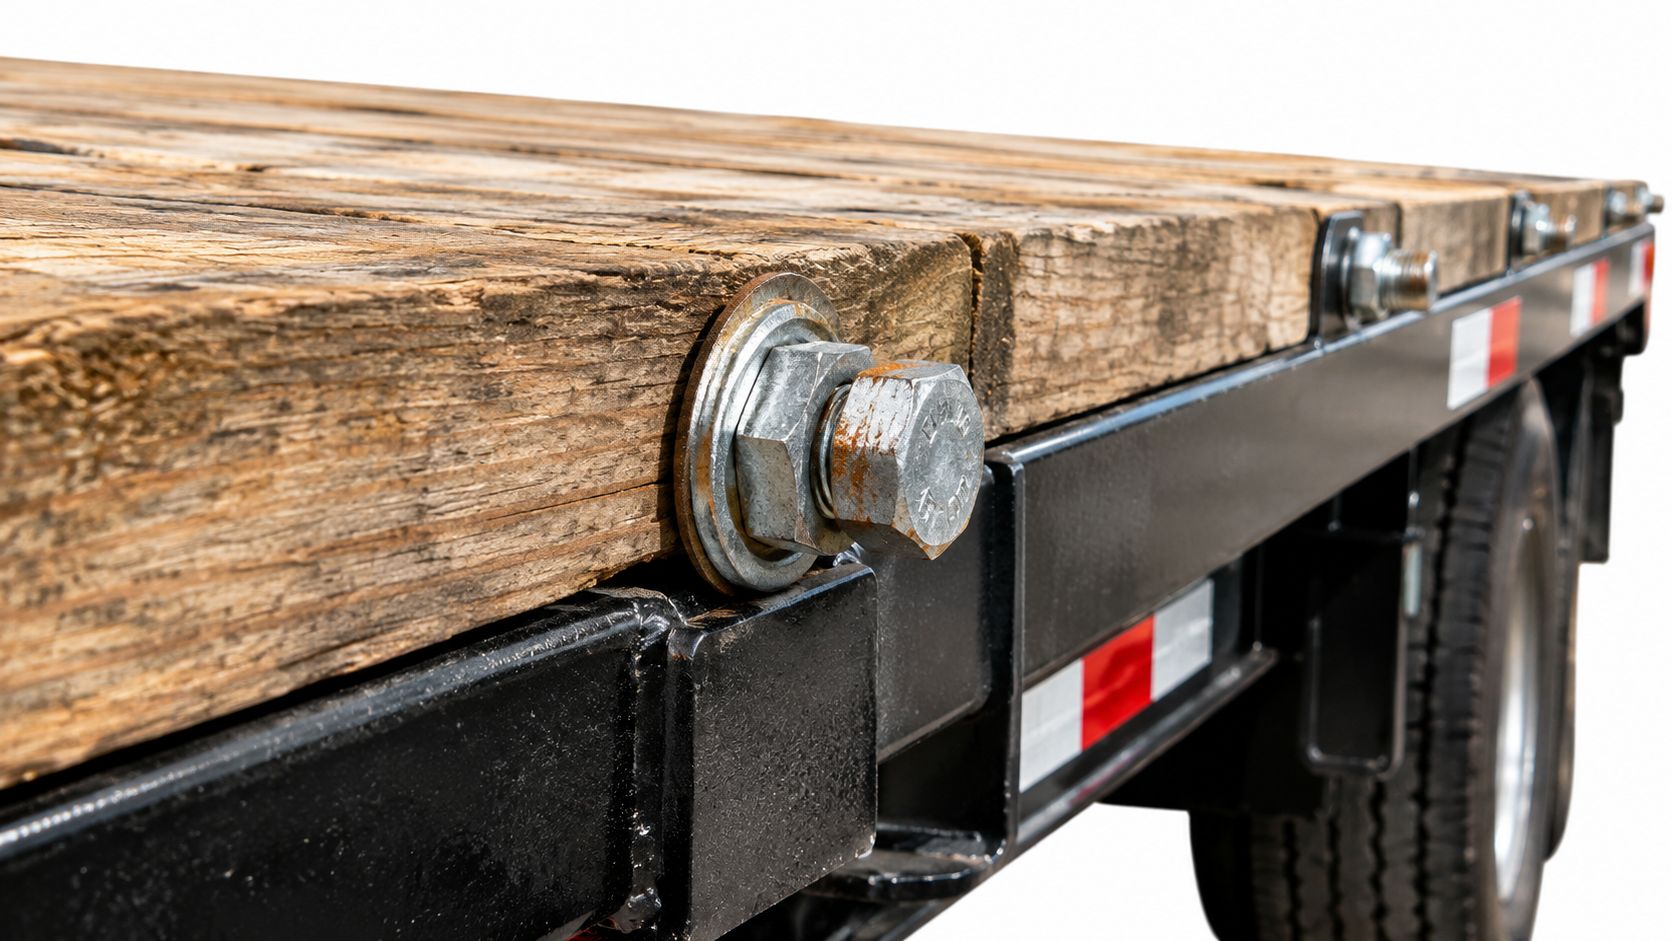
Geometry controls the repair
A bolt that's too long can leave exposed threads or hardware in a vulnerable position. A bolt that's too short may provide inadequate thread engagement after the washer and joint thickness are accounted for. Diameter affects clamping distribution, bearing pressure in the wood, and how easily the hole can be aligned without splitting the board.
The mounting pattern matters, too. Deck boards need to close against the cross-members evenly. If a shop tightens isolated bolts before inserting the rest, the boards can bow or bind, leaving some areas loose even though individual nuts feel tight.
Practical rule: Treat trailer deck bolts as a vibration and moisture joint, not as a list of replacement part numbers.
Walking Floor systems are a separate repair scope. Their hydraulically driven floor slats move material during loading and unloading, so slat fasteners and supporting components must be identified through the exact system manufacturer's parts and service instructions. Do not transfer fixed wooden-deck bolt sizes, grades, tightening sequences, or torque values to a moving floor. KEITH Walking Floor system overview
For commercial operators, the practical question isn't just whether a bolt fits. It's whether the complete joint will stay seated, protected, and serviceable through the trailer's operating environment. A structured repair workflow, supported by commercial trailer repair and maintenance resources, starts with that broader view.
Inspecting Trailer Deck Bolts for Wear and Corrosion
Start the inspection with the trailer safely supported and the deck reasonably clear. Look from above and below before putting a wrench on anything. A fastener that turns easily may be loose, but it may also be turning because the wood has crushed around the head or the underside washer has lost support.
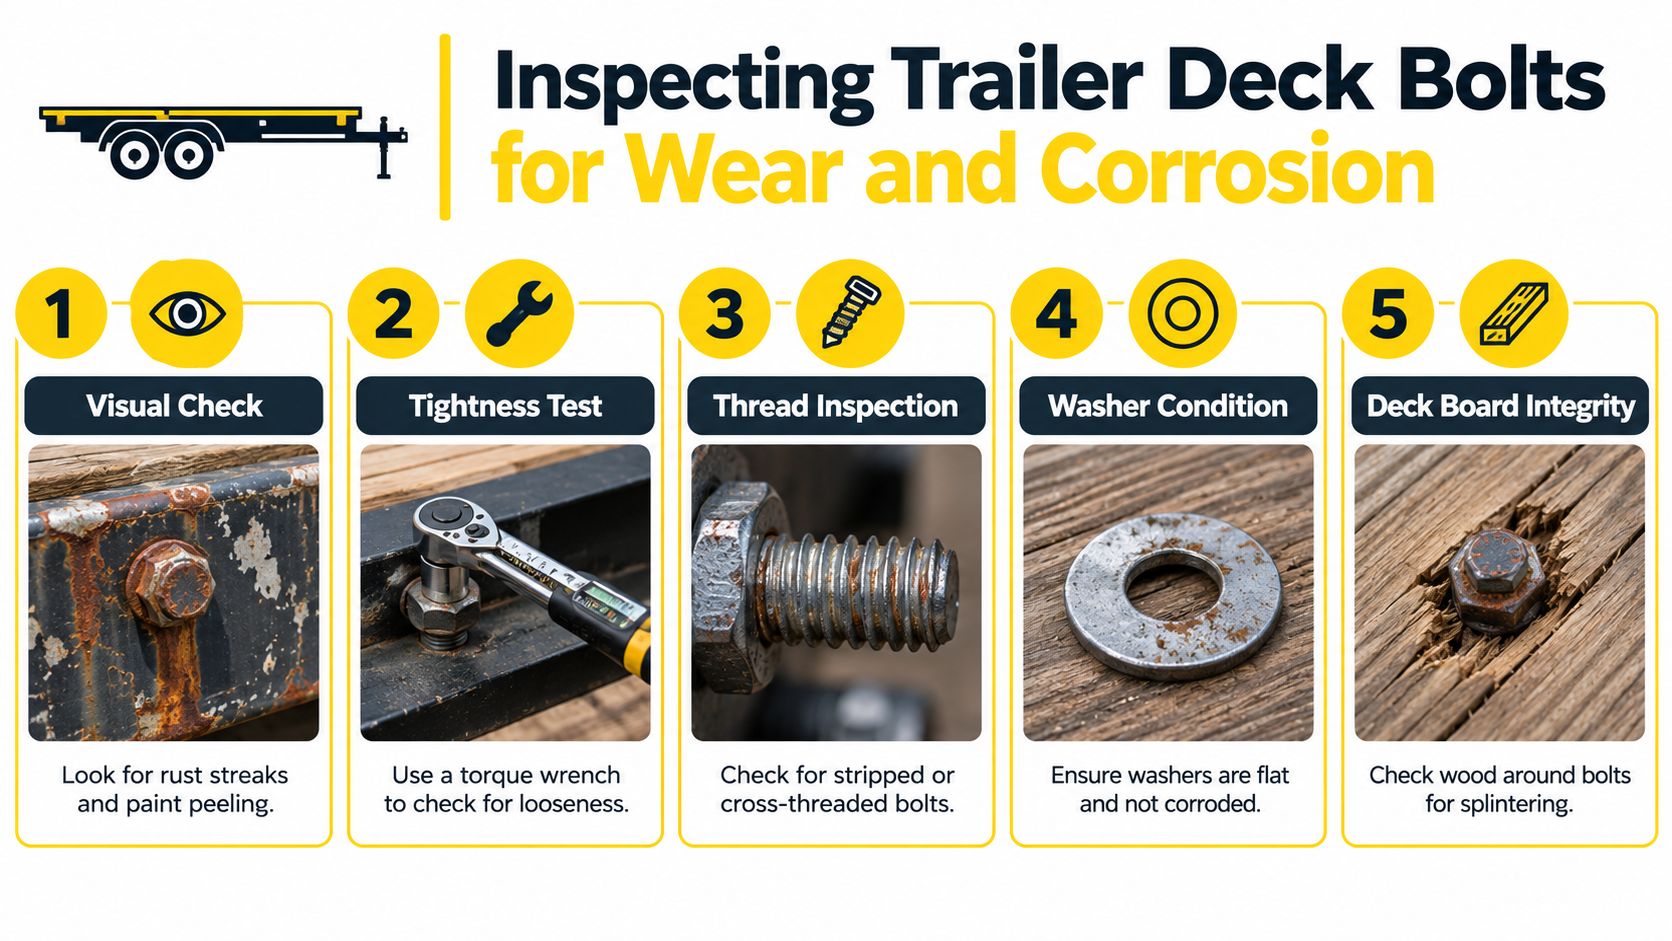
Start with the visible joint
Check the bolt head, nut, washer, and surrounding wood in that order. Rust streaks, peeling coating, dark moisture lines, and gaps beneath a carriage-bolt head deserve attention. A rounded nut or damaged head can turn a simple removal into a cutting operation, especially when the bolt spins inside the board.
Inspect the areas directly above cross-members, board ends, wet-debris zones, and locations where equipment or concentrated cargo repeatedly loads the floor. Look for:
Washer pull-through: The washer has begun sinking into the wood or no longer sits flat.
Hole elongation: The bolt has developed visible clearance in the board or supporting member.
Crushed fibers: The wood around the head or washer looks compressed, split, or polished from movement.
Thread trouble: Threads are stripped, cross-threaded, heavily reduced by rust, or no longer provide reliable engagement.
Rot and softness: A pick or probe enters wood that should still provide firm support.
Don't mistake a clean-looking bolt for a sound bolt. Guidance on ACQ-treated lumber reports white rust and some red rust on bolts and washers contacting the wood, and identifies uncoated mild-steel fasteners as a corrosion concern. The same technical review of ACQ-treated wood and fastener compatibility states that ACQ-treated wood is corrosive to mild-steel fasteners and recommends confirming compatibility with G185 galvanizing.
Read the metal pairing
Pressure-treated wood, moisture, salt, and dissimilar metals can create a failure environment even when the joint still feels mechanically tight. Aluminum flashing or connectors shouldn't sit directly against ACQ-treated wood, so repairs involving aluminum structures need a deliberate separation and material-compatibility check.
Probe questionable boards before deciding to retorque. If the wood is soft, split, or crushed, replacing the board or repairing the supporting structure comes before tightening hardware. A higher torque setting won't restore lost bearing strength.
Document the location and condition of each suspect fastener. Mark whether the defect is at the head, threads, washer, board, hole, or cross-member. That record helps distinguish an isolated damaged bolt from a repeating pattern caused by moisture entry, vibration, inadequate washers, or a deck that has begun moving as a system.
Choosing the Right Bolt Size and Grade
A replacement bolt should match the trailer's design, not just the hole diameter. Diameter affects the area carrying the clamp load, the stress placed on the wood, and the effort required to align boards and cross-members. A larger bolt isn't automatically better if the deck has been drilled out without enough surrounding material.
Grade matters just as much. Mixing grades across the same repair can produce different preload behavior, different resistance to stretching, and inconsistent service performance. Identify the grade markings and replace damaged hardware with a compatible system rather than combining whatever is available.
| Selection Check | Required Reference | Applies To | Key Consideration |
|---|---|---|---|
| Bolt diameter and length | Trailer parts list or approved drawing | Fixed wooden deck | Match the specified joint, clearances, washer arrangement, and thread engagement |
| Grade, material, and coating | Manufacturer-approved hardware specification | Fixed wooden deck | Do not substitute a different grade or coating solely because the bolt fits the hole |
| Slat and floor-system fasteners | Exact moving-floor model service manual | Walking Floor system | Use system-specific hardware and installation requirements; wooden-deck examples do not apply |
The table lists identification checkpoints, not approved sizes, grades, or torque values for a particular trailer. Confirm each item against the exact trailer or floor-system specification. Bolt grade, lubrication, washer geometry, wood species, and joint thickness affect the required installation conditions.
Coating is part of the fastener choice
Uncoated mild steel is a poor choice where treated wood and moisture create a corrosive environment. Zinc and galvanized systems can provide better protection, but the coating must be compatible with the lumber treatment and the surrounding metals. The ACQ guidance specifically points manufacturers toward compatibility with G185 galvanizing and warns about direct aluminum contact.
Stainless hardware can resist many corrosion conditions, but it still needs to match the structural and galvanic requirements of the repair. It also shouldn't be selected on appearance alone. A shiny bolt with the wrong grade or unsuitable washer may be a worse repair than a correctly specified coated fastener.
For fixed wooden decks, choose the complete approved assembly: bolt, washer, nut, coating, board, and cross-member. For a moving-floor system, identify its slat fasteners and other hardware separately through the system manufacturer. Keep the hardware record with the unit, and use a truck and trailer parts catalog when confirming fitment rather than relying on a bin label or visual match.
Torque Procedures and Safe Replacement Steps
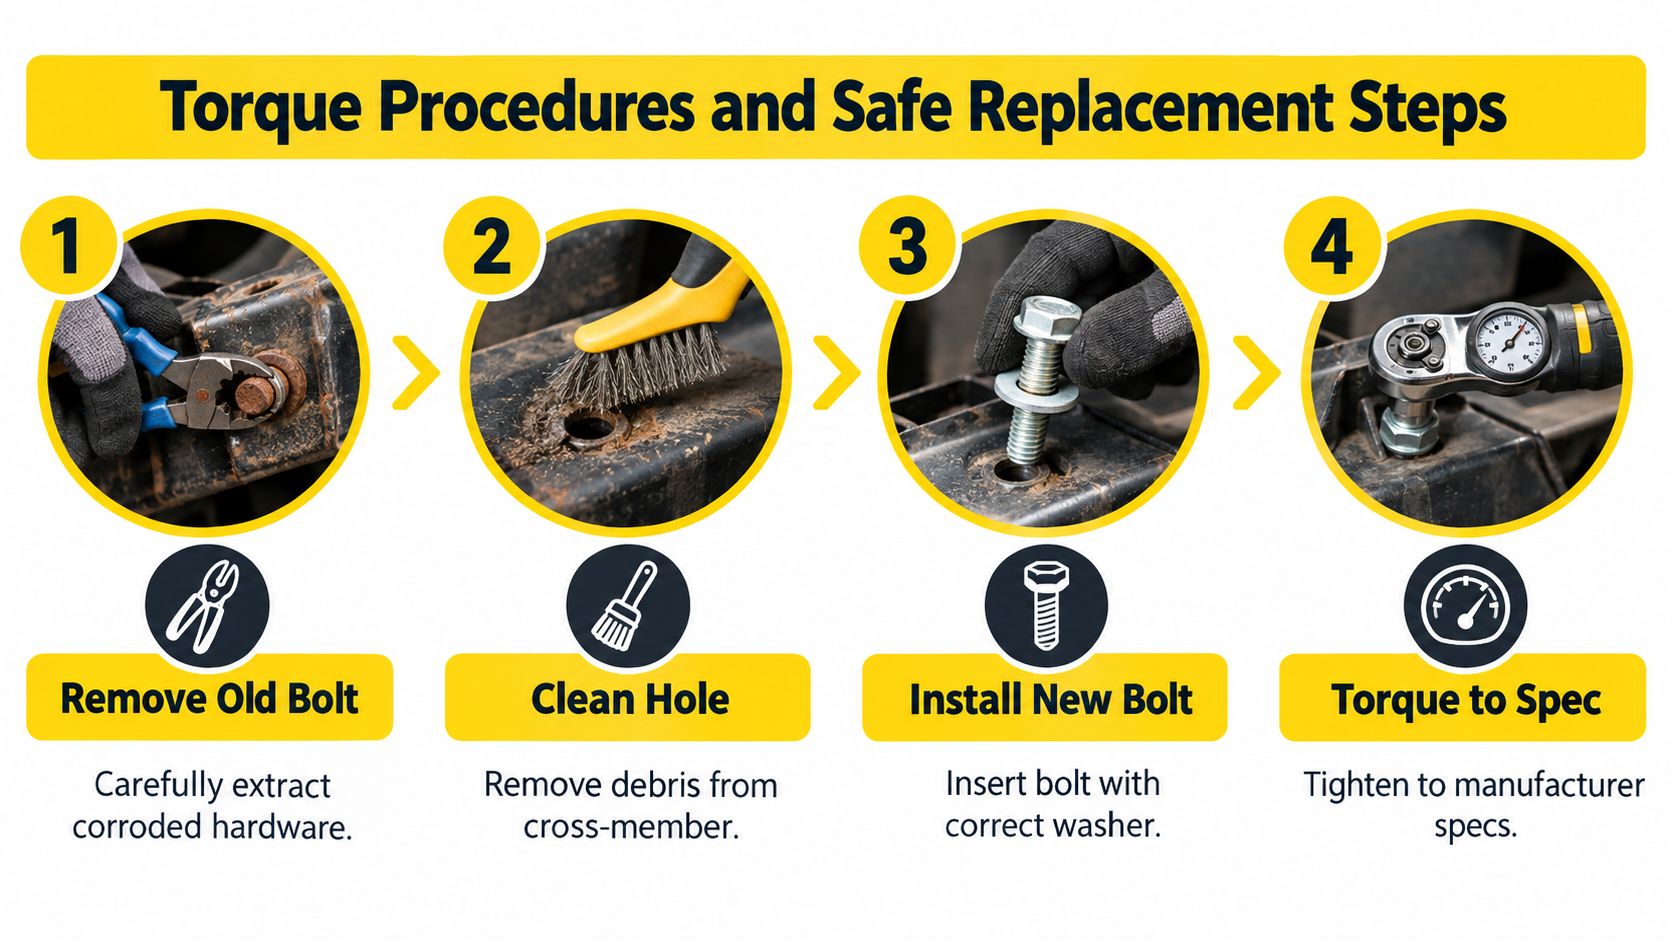
Remove damaged deck bolts without forcing the surrounding wood to carry removal loads. If the head spins, the carriage feature may no longer be seated. Hold the nut where possible, cut the hardware only when necessary, and inspect the board and cross-member after extraction. A bolt that comes out cleanly can still leave an enlarged or crushed hole.
Install the joint in sequence
First inspect the boards, cross-members, holes, underside surfaces, and moisture damage. Replace compromised material before installing new hardware. Drill aligned clearance holes and counterbores where needed so carriage-bolt heads sit flush without splitting the deck.
Insert every fastener loosely before final tightening. This lets the boards settle into alignment and prevents one early-tightened bolt from pulling the joint out of position. A controlled center-out sequence works well:
Seat the boards and hardware: Confirm that the bolt heads are flush, washers are flat, and nuts have adequate thread engagement.
Snug the rigid center region: Begin near the most rigid central area instead of pulling down a free edge first.
Progress toward the edges: Close the joint gradually so the deck seats uniformly.
Finish at the specified torque: Tighten only enough to seat the washer and establish the required clamp.
Use the tightening sequence specified for the exact trailer deck. The center-out outline above is a seating example only; follow a different sequence when the manufacturer requires it. The final torque and thread conditions must come from the instructions for the joint being repaired.
Control the torque conditions
Torque is an indirect way to establish preload. Dry and lubricated threads do not produce the same preload at the same wrench setting. Confirm whether the exact joint specification requires dry threads, lubrication, a locking compound, or another installation condition before tightening.
Do not substitute a generic torque chart for a deck-specific specification. Identify the bolt diameter and grade, nut and washer arrangement, and specified thread condition before selecting the setting. Follow the manufacturer's instructions for locking nuts or other locking elements; do not apply an automatic percentage increase unless that exact installation procedure requires it.
Torque is not a cure for damaged wood. If a nut keeps loosening, find the reason before adding force.
Use a calibrated torque wrench after confirming dry or lubricated thread requirements and the fastener grade. Over-torquing crushes wood fibers and can pull washers into the deck. Under-torquing permits movement, vibration-related loosening, and fretting at the hole.
Record the bolt diameter, grade, coating, torque setting, thread condition, replaced locations, and any board or cross-member repairs. Reinspect after the first operating period and after wet and dry cycling. If the joint loosens again, check for oversized holes, crushed fibers, inadequate washers, corrosion, or a mismatched fastener system rather than just tightening it harder.
Use the visual process below as a reminder of the sequence, not as a replacement for the manufacturer's specification.
A repair record that follows the trailer is valuable during shift changes and repeat service. Truck and trailer repair information can support parts identification and maintenance planning, but the final torque value still belongs to the equipment specification.
Preventing Future Corrosion and Fastener Failure
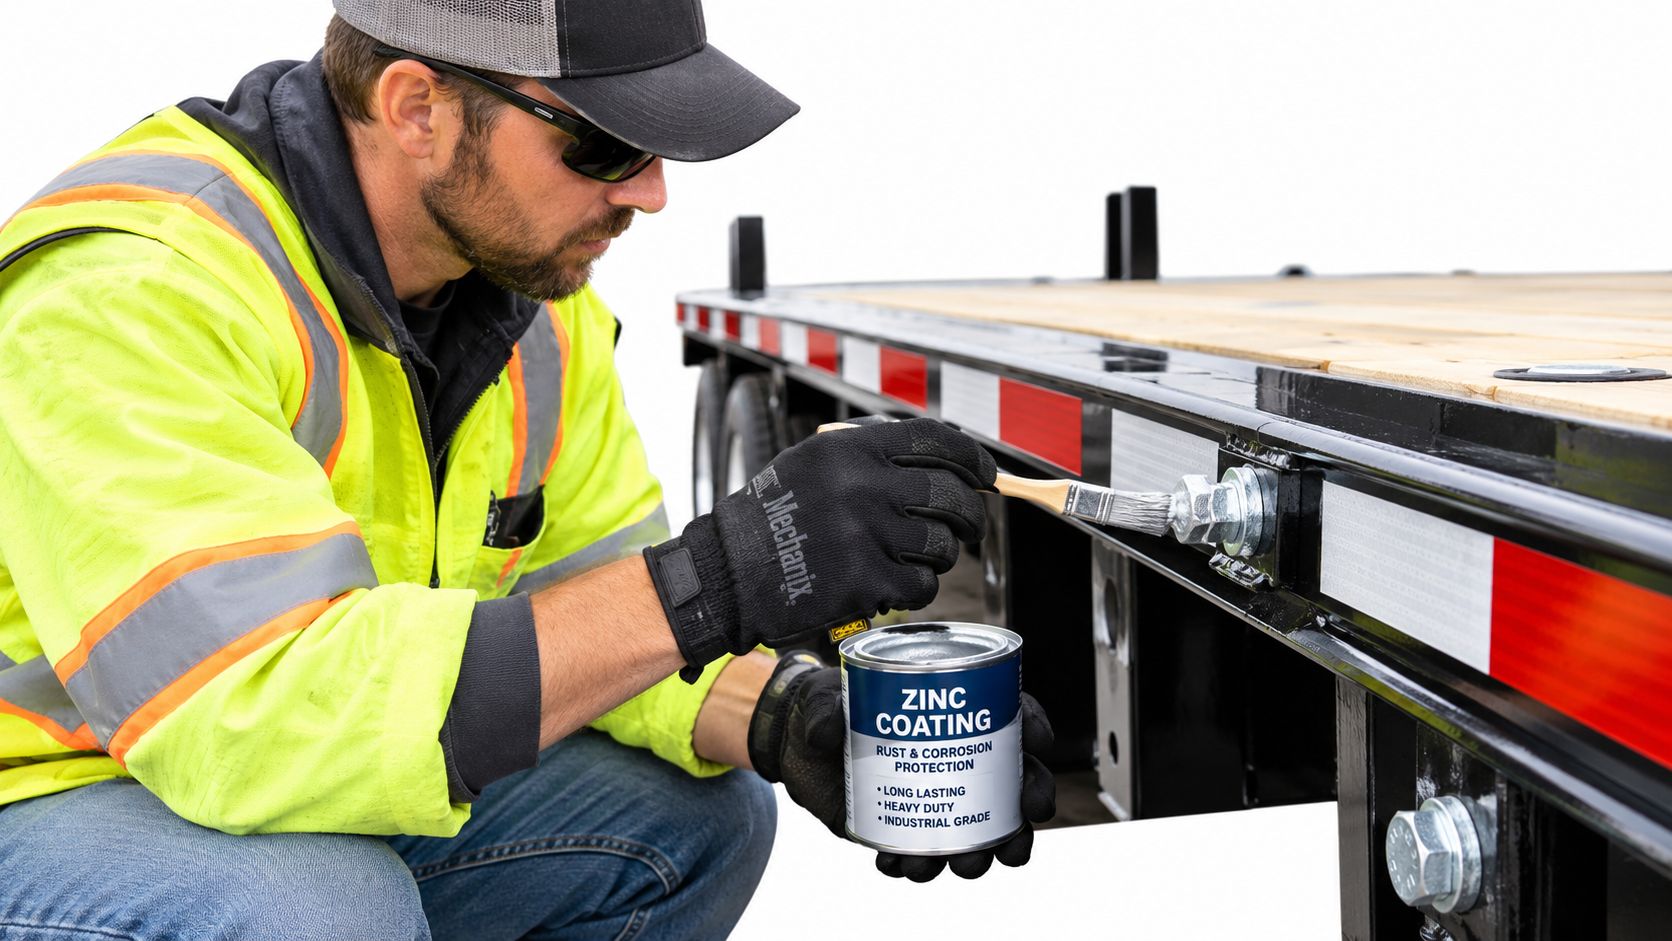
A deck-bolt repair should not end when the torque wrench clicks. These joints live in a wet, vibrating environment, so use an inspection and retorque schedule based on the exact trailer manufacturer's instructions, loading, and service conditions. Follow any specified checks after installation or the first operating period, and reassess the joint after wet and dry cycling or severe service. Seasonal movement of wooden boards can change the clamping condition.
Inspect from both sides at each service interval. Concentrate on bolt holes, board ends, areas over cross-members, wet-debris pockets, and points carrying concentrated equipment loads. Verify that the head remains seated, the washer hasn't pulled into the wood, the nut has thread engagement, and the bolt hasn't rotated or developed visible clearance.
Treat recurring looseness as a diagnosis
Repeated retightening usually indicates a condition that torque can't correct. Crushed wood, elongated holes, poor washer support, corrosion loss, and unsuitable fastener pairing all require corrective repair. Replacing only the nut can hide the problem until the joint loses more bearing area.
The USDA Forest Products Laboratory has documented long-term research into fastener corrosion and the effects of chemical wood treatment. That work supports evaluating wood treatment, coating, moisture exposure, and metal pairing together, rather than judging a bolt by surface appearance alone. Keep drainage paths clear, remove wet debris, and repair coating damage before water sits around the hardware.
Connect deck work to trailer systems
Keep fixed-deck and moving-floor diagnosis separate. In a Walking Floor system, uneven slat movement, worn bearings or seals, abnormal unloading, and loose system fasteners need evaluation against that system's service instructions. Check the supporting structure as well, but do not use the wooden-deck procedure as a substitute for moving-floor maintenance. Repairing a visible symptom without identifying the underlying fault can return the trailer to service with the original cause intact.
Aluminum repairs need the same discipline. AWS D1.2/D1.2M applies to welded structures made from aluminum structural alloys and covers qualification, fabrication, inspection, workmanship, and related technical provisions. It excludes aluminum pressure vessels and pressure piping, so structural trailer frames, body structures, and fabricated aluminum components fall within the code's general subject area, as described in the AWS structural aluminum welding code. A crack near a deck attachment isn't a cosmetic patch opportunity. The repair needs alloy identification, suitable joint preparation, qualified welding personnel, inspection controls, and attention to cyclic loading.
Brake and compliance work belongs in the same documented workflow. Federal rules require carriers to ensure that brake inspections, maintenance, repairs, and service comply with applicable regulations, with responsible inspectors properly qualified. FMCSA qualification guidance recognizes approved training, qualifying state or provincial programs, relevant CDL air-brake testing in applicable circumstances, or at least one year of brake-related training and experience. Carriers must retain qualification evidence during employment and for one year afterward, subject to the stated exception for certain personnel who passed the CDL air-brake knowledge and skills test.
Commercial vehicle brakes must remain operable and generally act on all wheels, with limited exceptions for specified trailer, dolly, and driveaway-towaway operations, as summarized in FMCSA brake-system requirements. A deck repair record should identify related brake or suspension defects found during the same inspection, especially when underbody access exposes damaged hardware.
Commercial vehicles subject to 49 CFR 396.17, including each vehicle in a combination, require a periodic inspection at least once every 12 months by an inspector meeting the applicable qualification requirements. The current minimum standards are in Appendix A to Part 396. This periodic interval does not replace pre-trip checks or maintenance required by severe service, corrosion, loose deck hardware, cracks, or abnormal unloading. FMCSA periodic-inspection requirements
If your fleet has loose trailer deck bolts, damaged boards, Walking Floor problems, or aluminum cracks, Brothers Truck Trailer Repair and Welding Corp. can inspect the complete repair condition, handle trailer and Walking Floor work, perform structural aluminum welding and fabrication, and help identify needed parts. Visit Brothers Truck Trailer Repair and Welding Corp. to arrange the next step for your Tampa Bay truck or trailer.
Technical reference for 3500 lbs trailer axles covering GAWR, tire ratings, brake rules, fitment specs, and inspection protocols for commercial fleets.

Learn how etracks in trailer systems work, installation best practices, and repair procedures to keep your cargo secure and compliant on the road.
Master trailer wheel bearings maintenance with expert steps for inspection, repacking, and replacement. Reduce downtime and prevent costly failures today.