Dump Trailer Hydraulic Maintenance: A Practical Guide
A dump trailer that raises slowly after a dusty run is usually telling you something before it quits. The oil looks darker than it should, a fitting is wet, the pump sounds harsher than yesterday, and the temptation is to top it off and keep hauling. That shortcut can turn a small contamination problem into a stranded trailer, a damaged pump, and a repair bill nobody planned for.
Dump Trailer Hydraulic Maintenance works best when you treat it as a contamination-control and safety discipline, not a calendar task. The hard parts are simple to say and easy to skip, fluid cleanliness, safe body support, and records that show what changed before the failure showed up. Those three habits protect pumps, valves, cylinders, seals, and the people working around the trailer.
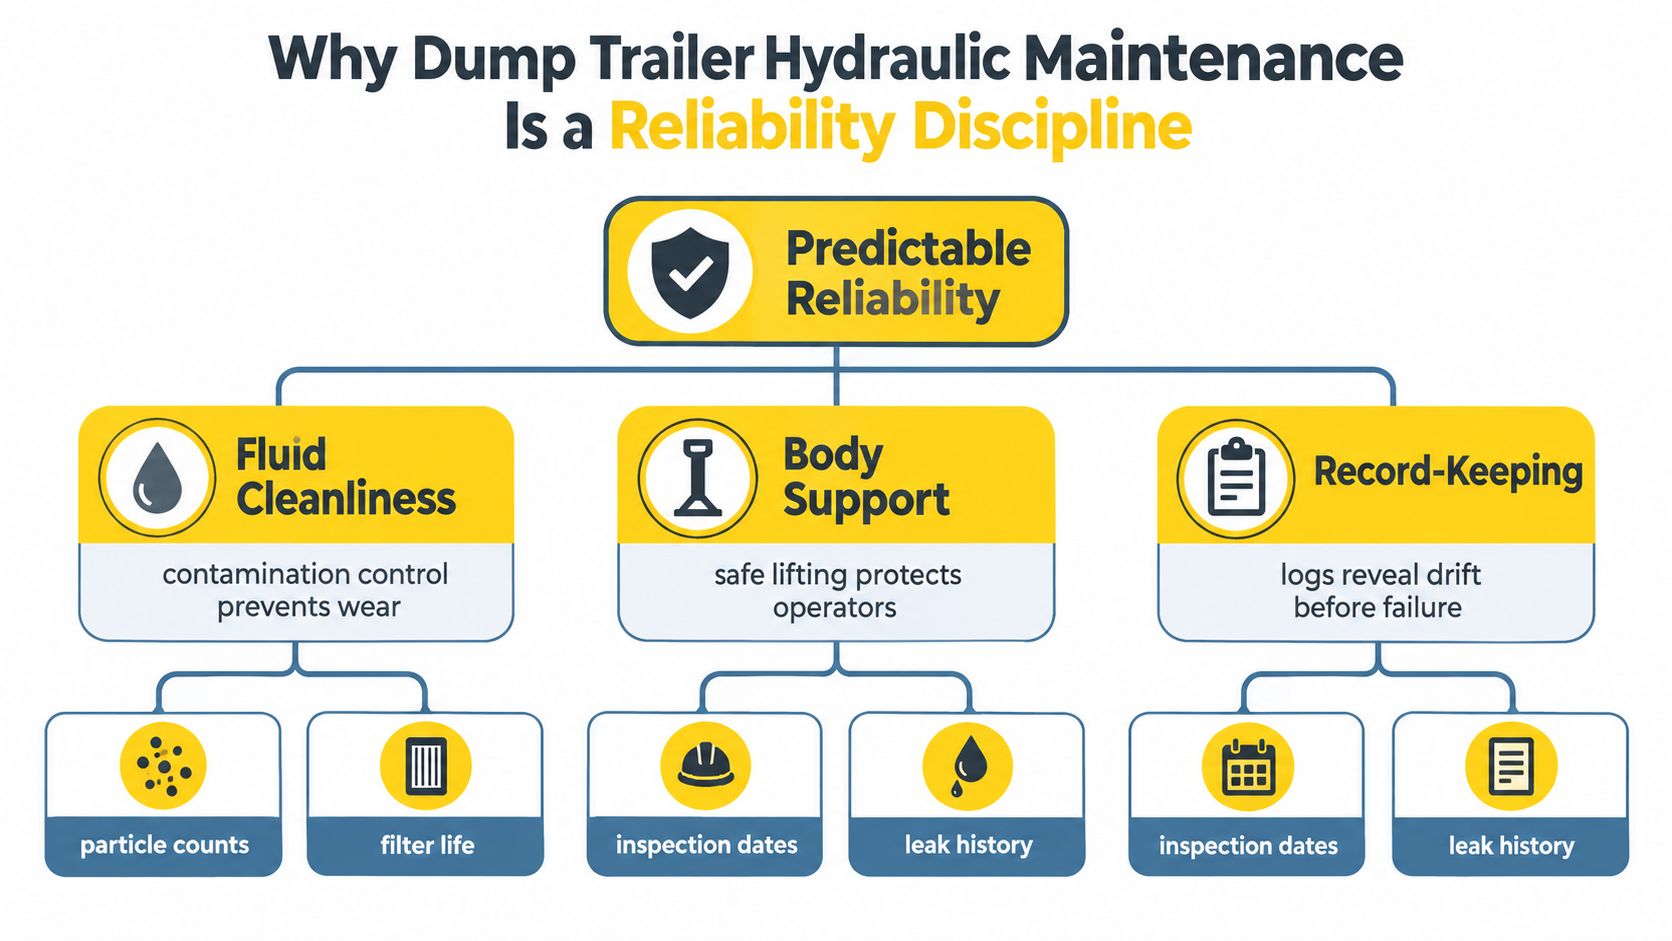
Table of Contents
- Why Dump Trailer Hydraulic Maintenance Is a Reliability Discipline
- Daily and Weekly Visual Inspection Routine
- Fluid and Filter Service Step by Step
- Diagnosing Common Hydraulic Problems in the Field
- Safe Leak Checks and Body Support Procedures
- Hose, Cylinder, and Hardware Replacement Standards
- Record-Keeping and When to Bring in a Specialist Shop
Why Dump Trailer Hydraulic Maintenance Is a Reliability Discipline
A dump trailer rarely fails without warning. The fluid gets dirty, a hose starts sweating at a fitting, the lift sounds rougher, and then the trailer shows up dead on the wrong job. That is why hydraulic maintenance belongs to contamination control and safety, not a calendar reminder. The Society of Tribologists and Lubrication Engineers says at least 75% of hydraulic-system failures can be linked to oil contamination STLE best practices.
The yard habit that causes most trouble
A trailer comes back from a dusty aggregate run, the lift is slower than normal, and someone sees darker oil in the reservoir. The usual reflex is to top it off and send it back out. That only hides the source while abrasive material keeps moving through pumps, valves, cylinders, and seals.
Practical rule: if dirt got in through a breather, an open filler neck, a hose repair, or a component swap, new oil alone does not make the system clean.
That is the trade-off on real equipment. You can keep hauling and accept higher wear, or you can stop, clean the system properly, and avoid chewing up the pump and valve stack. Maintenance records matter here because they tell you whether the problem started after a fluid top-off, a hose change, or a leak that was ignored.
The three pillars that matter in the field
A good program comes down to three controls. First, contamination control, because dirt and wear particles do not care about pump tolerances. Second, safe inspection, because a raised body is a hazard until it is mechanically supported. Third, traceability, because the unit history shows whether a slow lift is a one-off or the start of a pattern.
The economic case is real too. A Chevron Lubricants example involving end-dump trailers said replacing four hydraulic pumps in one year cost a sand-and-gravel hauler $9,600 in parts, oil, labor, and lost revenue, and the same example said correct cleanliness could roughly halve that expense Chevron example. That is an industry example, not a universal fleet average, but it shows why hydraulic work belongs in the same priority lane as brakes and tires. Clean fluid handling, protected openings, proper support, and a clear service log keep the system predictable.
Daily and Weekly Visual Inspection Routine
A fast walkaround catches most ugly surprises before the trailer ever gets into the load line. The point isn't to diagnose the entire system in the yard, it's to spot leaks, damage, and behavior that says the unit needs a closer look. Eyes, ears, and a flashlight do most of the work here.
The 90-second pre-shift pass
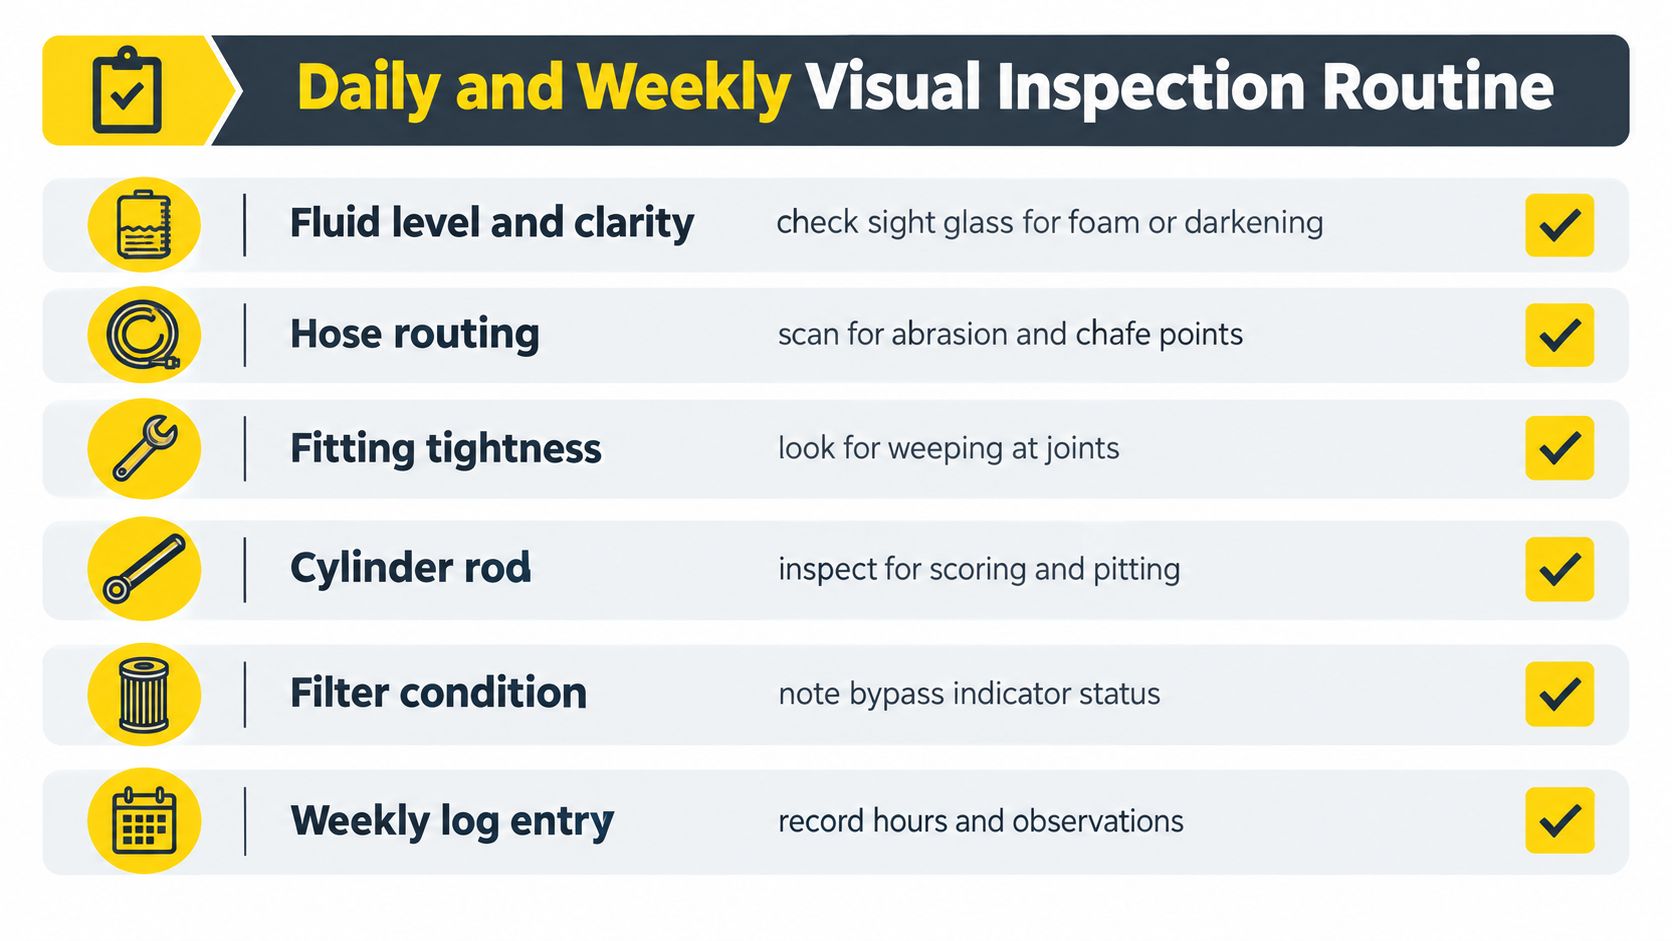
Start with the reservoir. Check the level, then look at the oil condition for foam, darkening, cloudiness, or grit. After that, trace the hose routing and watch the common rub points, frame edges, clamps, and places where the hose can chafe while the trailer flexes.
A quick visual pass should also include the fittings and cylinder rod. Wet joints, cracked hose jackets, exposed reinforcement, scoring, pitting, corrosion, or a bent rod all deserve attention before the unit cycles again. If the trailer has a prop or body support kit, make sure it's present and usable.
Don't keep cycling a trailer that's already telling you it's unhappy. Slow lift, new pump whine, or a wet fitting is a stop-and-check signal, not a “one more load” signal.
What changes in the weekly washout
The weekly look should be slower and more deliberate. Wipe the reservoir, inspect around the pump and motor box, and confirm that fittings stayed tight through the week's vibration. If the trailer has a filter indicator or bypass flag, log what it shows so you're not relying on memory later.
A short log entry beats a long argument after a breakdown. At minimum, note the date, the trailer number, visible leaks, lift feel, and any unusual noise. A driver can do that in a few lines, and a technician can use it later to separate a rough day from an actual trend.
Field habit: a clean trailer still needs a dirty-job mindset, because hidden abrasion and early seepage usually show up before a full failure does.
Fluid and Filter Service Step by Step
Fluid service is where good habits pay off or fail fast. Open a reservoir carelessly, reuse a dirty funnel, or pour in the wrong oil, and the trailer can come back from service worse than it went in. Treat the job as contamination control first, fluid replacement second.
Build the service around cleanliness, not just replacement
Start with the approved fluid. One dump-trailer hydraulic manual warns against substituting motor oil, diesel fuel, or water, and it also calls for cleaning the suction filter when the oil is changed dump trailer power unit manual. That means the service is a cleanout and refill process, not just a drain job.
Take a representative reservoir sample and record the cleanliness result. A published dump-cylinder maintenance guide uses ISO 4406 code 20/18/15 or cleaner as the target and calls for corrective action above 22/20/17 ISO cleanliness guide. ISO 4406:1999 reports particle contamination with three code numbers for particles at least 4, 6, and 14 micrometres per millilitre STLE best practices.
A workshop sequence that holds up in the field
- Warm the system briefly. Warm oil drains more fully, and it gives a clearer read on noise, foam, and response.
- Capture a clean sample. Pull it without introducing dirt, then label it with the trailer ID and date.
- Drain and clean the reservoir area. Wipe the filler neck, cap, and nearby surfaces before the system opens.
- Clean the suction strainer. Suction restriction can look like pump trouble, so don't skip this step.
- Replace the return or pressure filter at the OEM interval. A published maintenance guide gives a typical 1,000 to 2,000 operating-hour interval, but the manufacturer's schedule controls dump trailer maintenance schedule.
- Refill through sealed transfer equipment. Open buckets and dirty funnels bring contamination right back in.
- Bleed air by cycling without load. Then recheck the level and watch for foaming or erratic motion.
| Item | Target or Interval | Notes |
|---|---|---|
| Fluid cleanliness | ISO 4406 20/18/15 or cleaner | Correct above 22/20/17 per the same guide |
| Filter and fluid interval | 1,000 to 2,000 operating hours | Manufacturer schedule overrides the same maintenance guide |
| Fluid type | OEM-approved hydraulic fluid | Never substitute motor oil, diesel fuel, or water |
| Post-service check | Cycle without load, then recheck level | Watch for air, leak points, and drift |
Diagnosing Common Hydraulic Problems in the Field
A slow trailer is not always a pump failure. I start with contamination, aeration, suction restriction, heat damage, cylinder bypass, and small leaks that are easy to miss at a glance. On a Tampa Bay yard truck, that order matters, because guessing at pressure settings before you check the oil usually wastes time and can make a bad problem worse.
Start with the fluid and the motion
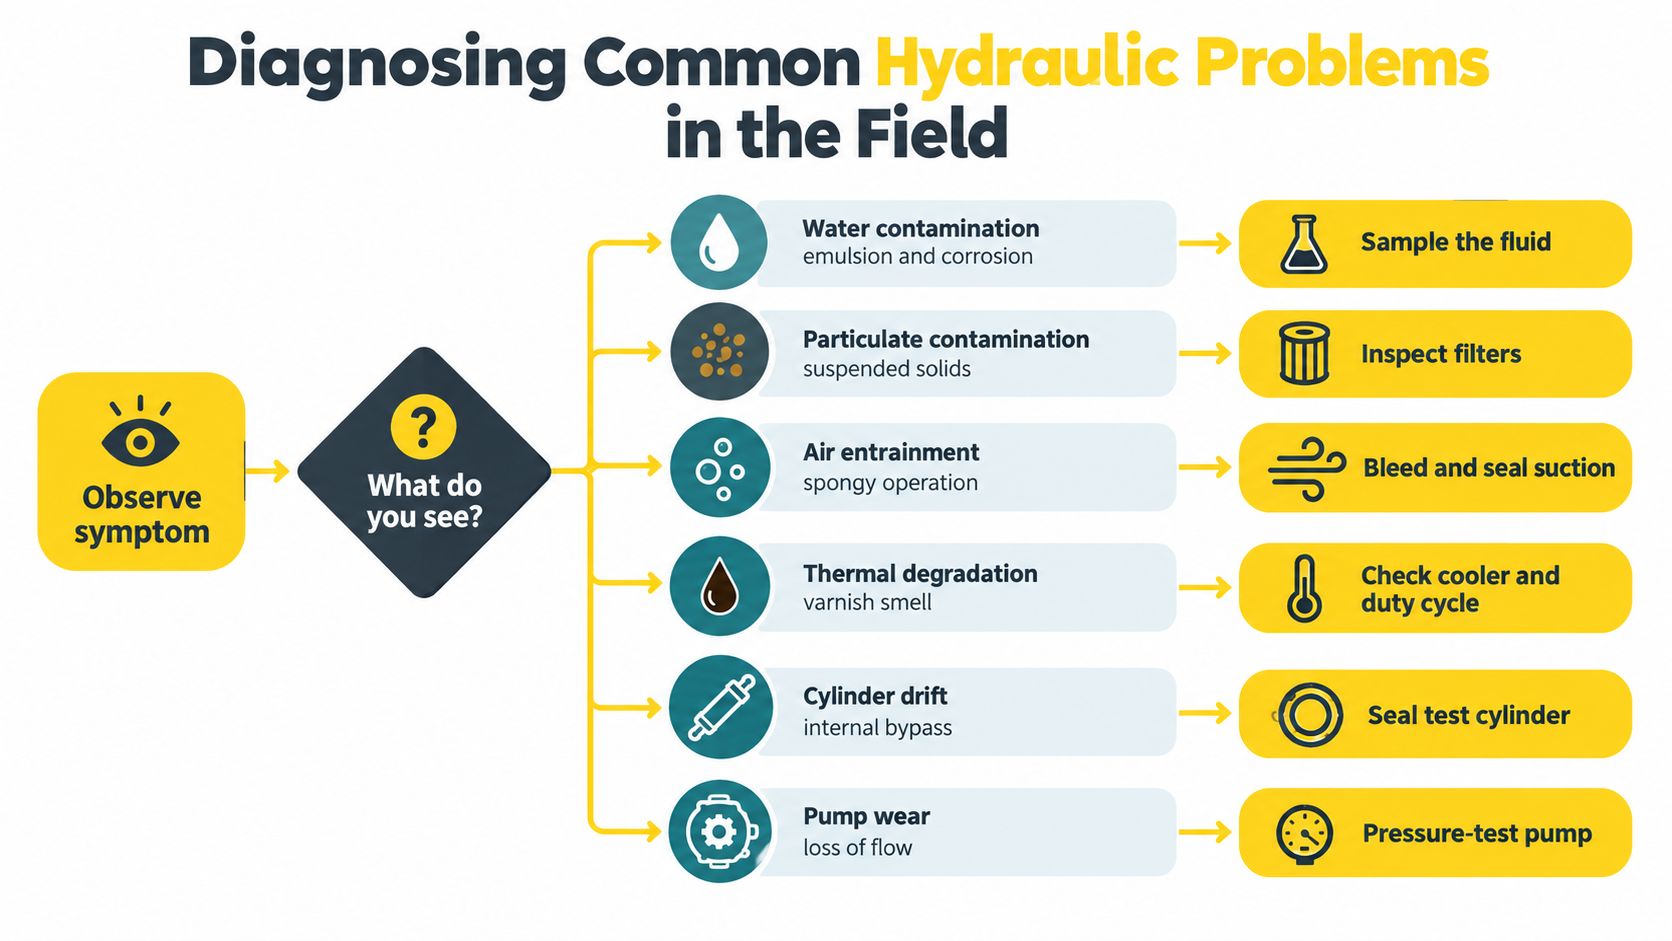
Milky oil usually points to water contamination, especially on trailers that live outside or get washed hard. Dark, burnt-smelling oil points to thermal breakdown. Foam in the reservoir or spongy motion usually means air entrainment. Gritty oil means particulate contamination, and that contamination keeps working through the system even after the symptom changes.
A cylinder that drops more than 50 mm (2 in) in five minutes under load warrants technician diagnosis because drift can point to seal wear, load-holding valve trouble, or cylinder damage dump trailer inspection guide. That benchmark gives an operator a clear stop point instead of letting the body creep down while someone keeps guessing.
Decision rule: if the oil condition is poor and the motion is poor, do not start with the relief valve. Sample the fluid, inspect the filters, and check for air or contamination before changing pressure settings.
What the symptom usually means
A trailer that raises slowly and needs higher engine RPM may be dealing with pump wear, suction restriction, or dirty oil. Audible whine or cavitation noise often comes from air or starvation, not just a tired pump. Uneven unloading on a Walking Floor unit can point to contamination, restricted flow, or a mechanical problem in the hydraulic path, so treat it as a system fault, not a single noisy part.
A useful field decision tree is plain. If the fluid is milky or foamy, look for water entry or air entry and inspect the breather and suction side. If the fluid is gritty, inspect the filtration path and the contamination source. If the cylinder drifts, test the hold. If the pump gets noisy and the trailer slows, verify level, suction restriction, and cleanliness before assuming the pump is done.
What to do first and what to stop
Take a representative sample when the same symptom shows up twice. Write down the operating condition, such as cold start, hot cycle, loaded lift, or empty bed, because that tells the shop more than a vague complaint about slow hydraulics. If the problem returns after a fluid change, the source was not fixed, and more patching just burns time.
Safe Leak Checks and Body Support Procedures
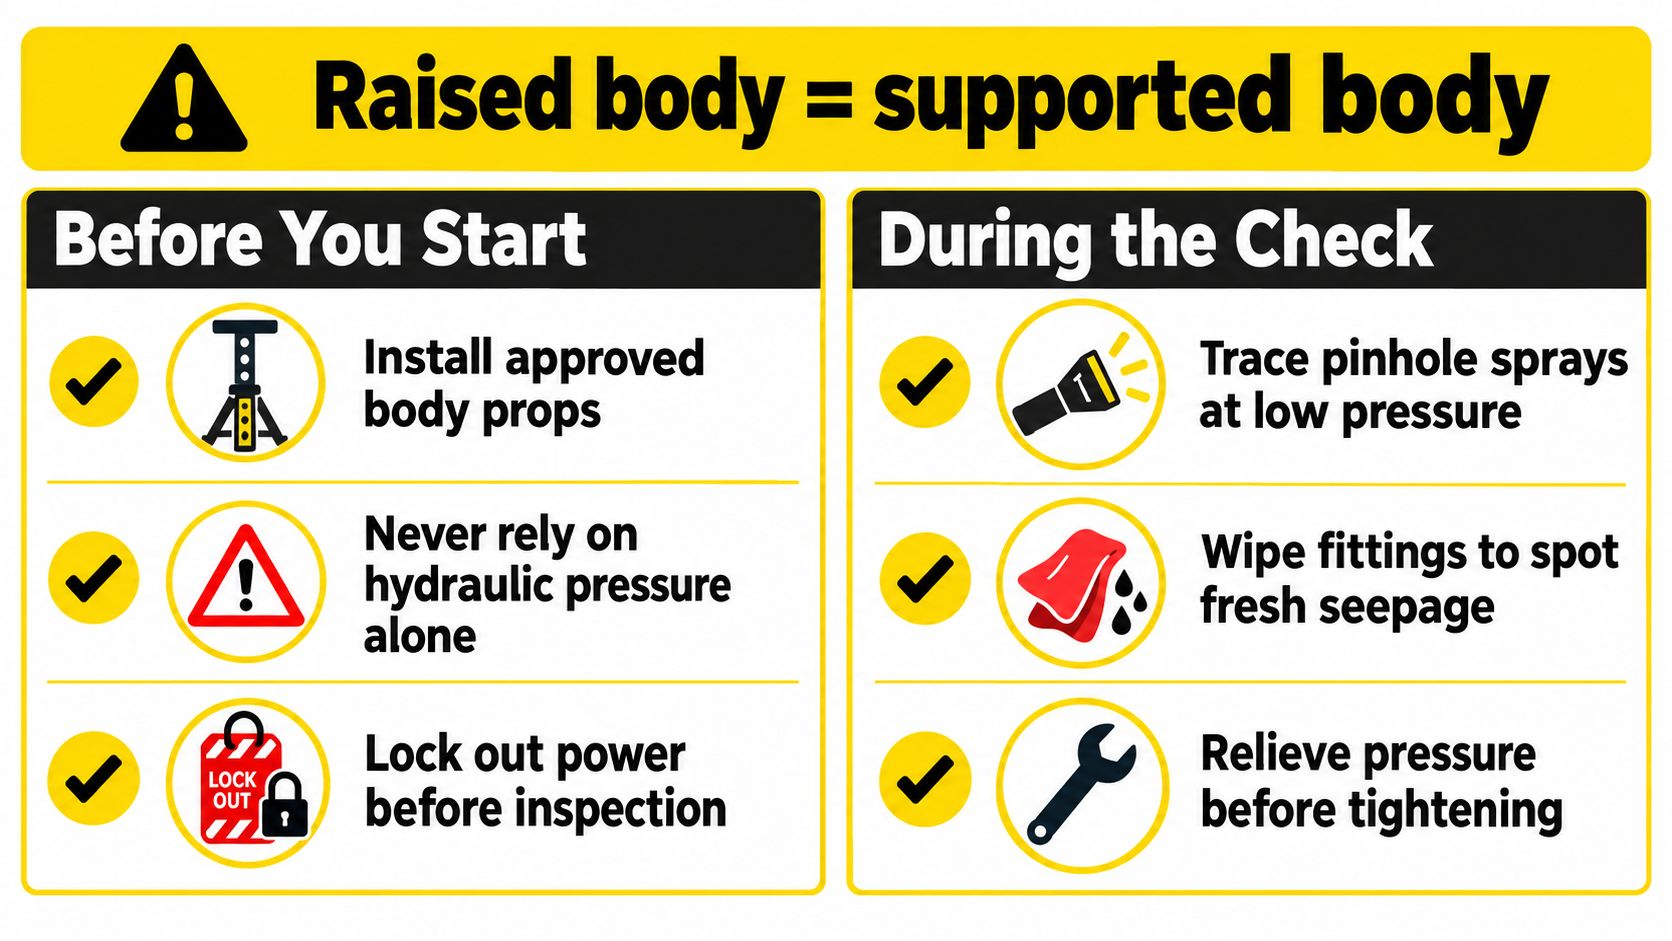
A raised dump body is not a work platform. If you're chasing a seep or a pinhole leak, the first question isn't where the leak is, it's whether the body is mechanically supported before anyone gets near it. Hydraulic pressure alone is not a support method.
The stop-work setup
Lower the body fully when you can. If the body has to stay raised, install the manufacturer-approved mechanical safety props before anyone inspects the system. Isolate electrical and hydraulic energy, then verify that the trailer can't move unexpectedly while you work.
A small external leak matters more than it looks. Guidance for trailer hydraulic maintenance warns that even a small leak can lower reservoir level, draw air into the system, attract abrasive dirt, and create a slip hazard. It also warns that high-pressure fluid can penetrate skin, so hands are the wrong tool for finding leaks trailer hydraulic pump maintenance.
How to inspect without making it worse
Use a flashlight and a clean rag. Wipe the fittings, then look for fresh seepage, track lines, and damp edges around the hose ends, cylinder seals, and reservoir connections. If you need to tighten a fitting, do it only after the pressure is relieved and the body is safely supported.
Never chase a leak with your fingers. High-pressure injection injuries can start with a tiny wound and become a major medical emergency.
Repeated fluid loss is the bigger clue. If the reservoir keeps dropping, the problem may be a failing hose, fitting, cylinder seal, breather, or tank issue rather than normal seepage. The faster move is to document the loss, isolate the source, and send it to the shop instead of adding more oil and hoping it behaves.
Hose, Cylinder, and Hardware Replacement Standards
A trailer that keeps limping after a patch usually has two problems, the visible failure and the contamination or wear that caused it. A hose that is only “good enough,” a rod with scoring, or a filter chosen because it happens to fit the mount can keep a unit on the yard for a day and create a bigger repair later. Replacement has to match the hydraulic circuit and the trailer's actual duty, not just the space in the bracket.
What bad hardware looks like
Replace hydraulic hose assemblies when you see cuts, abrasion, cracking, bulges, kinks, crushed sections, fitting movement, or hose creep at the fitting. Guidance from the German Social Accident Insurance says defective assemblies should be replaced, not patched or rebuilt with old parts DGUV hydraulic hose guidance. Clamps, tape, and other improvised fixes do not belong on high-pressure hose work.
Cylinder rods deserve the same standard. Scoring, pitting, corrosion, and bending are all reasons to stop calling the part serviceable. After a repair, a full raise in roughly 8 to 12 seconds for a three-stage cylinder on a 7-ton trailer is a useful field benchmark, though the trailer and OEM specification control. If the lift speed falls outside that range, the system needs a closer look before the trailer goes back to work.
Replacement rule: if the component is damaged and the repair changes the pressure boundary, replace it to the manufacturer's standard rather than improvising a field fix.
Match parts to the system, not to the shelf
Filter choice matters because contamination control is part of hydraulic safety, not an afterthought. A technical SAE study that sampled 144 hydraulic systems found that wire-cloth filters did not achieve the optimum level of contamination control, while older paper filters performed better within their design limits. It also concluded that filter size and quantity should match maximum system flow and the number of hydraulic components SAE contamination study. On a dump trailer, that means the correct filter is the one that fits the power unit's flow and circuit demands, not just the one that threads on easily.
That same logic applies to cylinders, hoses, and fittings. Match pressure rating, thread type, bend radius, and seal style to the system already on the trailer. If the replacement part changes one of those variables, the safe move is to verify the spec first, then install it once.
For fleets that keep common trailer parts on hand, workshop support is useful. A direct-service shop like Brothers Truck Trailer Repair and Welding Corp. can match replacement work to the trailer's actual hardware, which matters when downtime is measured in missed loads instead of a convenient service window.
Record-Keeping and When to Bring in a Specialist Shop
A one-page log is often more useful than a long memory. On a dump trailer, the pattern matters more than the isolated fault. If one unit keeps losing fluid, another drifts after lift, and a third keeps coming back for filters, the log makes that visible before the yard loses another day to guesswork.
What belongs in the log
Record the fluid type, filter changes, sample results, leak events, lift-time benchmarks, and downtime incidents. Add the trailer number, date, and who found the issue. Those details help separate a bad hose, a tired cylinder, a contaminated reservoir, or a pump that is starting to fall behind.
Review the log after every service event and again when the same symptom shows up twice. If contamination keeps returning, if a pump has been replaced more than once, or if lift time keeps getting worse after maintenance, stop treating it as a field fix. That is the point to move the unit into a shop with the right parts, test gear, and room to work clean.
When to escalate
Bring the trailer in when the same failure keeps coming back, when the oil sample stays dirty after service, or when the lift behavior does not match the work that was just done. In Tampa Bay fleets, that can also mean handling body damage, aluminum repair, or Walking Floor issues in the same visit so the trailer does not bounce between shops. Brothers Truck Trailer Repair and Welding Corp. handles truck and trailer repair, Walking Floor systems, aluminum welding, and parts support, which fits that kind of crossover work.
Keep the rule simple. If the log shows a trend, or the trailer keeps telling the same story, stop spending labor on guesses and move it to a proper service bay. Clean records save time, and they also make the decision to stop work easier when the failure point is no longer in the yard.

Expert commercial trailer repair in Tampa for Walking Floor, aluminum welding, and fleet maintenance. Minimize downtime with Brothers Truck Trailer Repair.

Preventive maintenance for commercial trailers: inspection checklists, Walking Floor care, aluminum repairs, and fleet service in Tampa Bay.
Master walking floor trailer hydraulic troubleshooting with expert diagnostics, safety protocols, and repair strategies to minimize fleet downtime.