Aluminum Welding Repair for Trucks and Trailers
A dump trailer arrives on a Tuesday morning with a hairline crack running out from a crossmember joint. A Walking Floor body has torn at a seam, or a fuel-tank bracket is hanging low enough to catch a mechanic's eye during a walkaround. The repair request usually sounds simple: “Can you weld it?”
A competent aluminum repair starts with a different question: Why did it fail, and what will the repaired section have to carry? The answer determines whether the part should be welded, reinforced, replaced, or rejected. Alloy, temper, loading, contamination, heat-affected-zone history, and prior repairs all matter before anyone chooses filler wire or sets an amperage.
For commercial fleets and owner-operators, aluminum welding repair is a decision process, not a bead-placement exercise. A clean-looking weld can still leave a fatigue problem, and a larger bead can create a sharper fatigue notch. The durable result is a repair that is metallurgically sensible, properly inspected, documented, and suitable for the way the truck or trailer works in practice.
Table of Contents
- A Cracked Crossmember on a Tuesday Morning
- Why Aluminum Behaves Differently in the Shop
- Common Failure Modes on Trailers and Trucks
- Inspection Before the Arc Strikes
- Matching the Repair Process to the Job
- Documentation, Ventilation, and Shop Discipline
- When a Weld Is Not the Right Answer
- Sending It to a Specialized Shop
A Cracked Crossmember on a Tuesday Morning
The first inspection happens before the machine is switched on. The technician cleans enough dirt away to see the crack's direction, checks whether it reaches a weld toe or fastener hole, and looks at nearby distortion. A crack in the middle of a lightly loaded body panel raises different questions than a crack at a crossmember-to-rail joint on a trailer that runs heavy loads every day.
The load history matters just as much. A Walking Floor trailer sees repeated movement through its body and floor system. A dump trailer sees impact and flex around floor edges and structural joints. A day cab bracket may carry vibration for thousands of road miles before a small opening becomes a visible failure. The same aluminum alloy can behave very differently depending on where it is installed and how it is loaded.
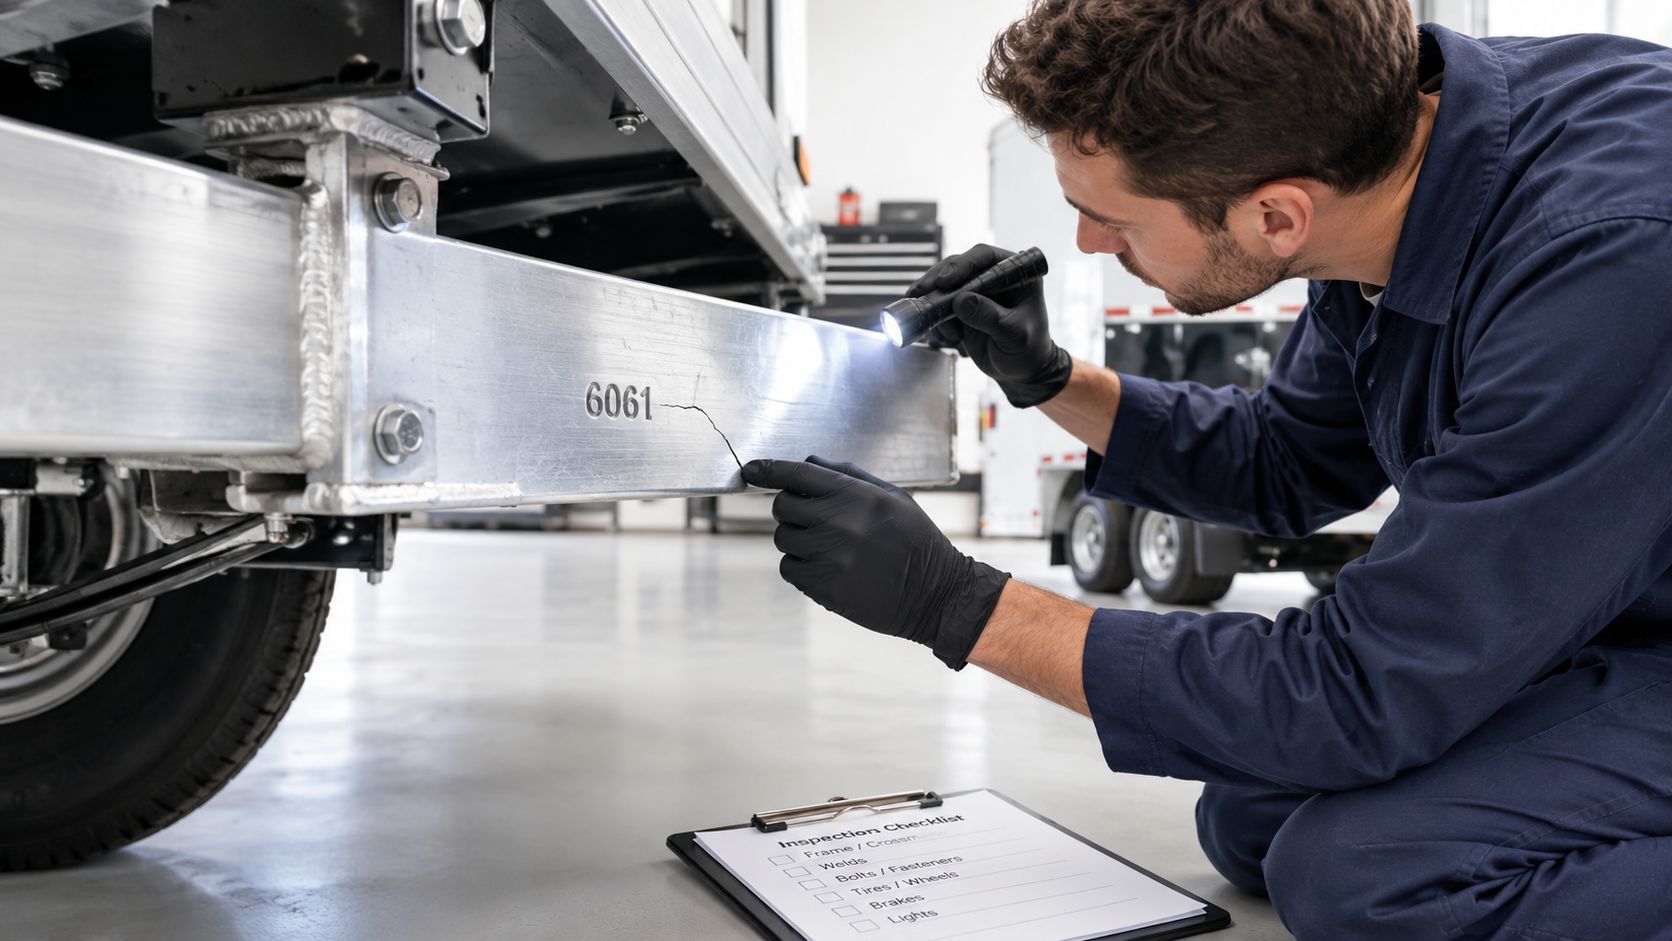
The first questions in the bay
Before discussing filler, a disciplined repair review asks:
- What alloy and temper is this? A stamp, material certificate, drawing, or prior repair record may identify it. If nobody can identify the material, the repair decision carries more uncertainty.
- Where does the damage sit? A weld toe, rail flange, crossmember junction, bracket radius, and panel seam each have different stress patterns.
- Has this area been welded before? Earlier thermal cycles may have changed the surrounding heat-affected zone and reduced the margin for another repair.
- What caused the failure? Impact, corrosion, overload, vibration, poor fit-up, and fatigue cracking don't call for the same remedy.
- What happens if it fails again? A cosmetic panel and a structural support shouldn't receive the same acceptance standard.
A crack that returns beside an earlier repair is a warning, not an invitation to add more metal. The underlying geometry, load path, or weakened heat-affected zone may still be present.
Shop-floor rule: A weld closes a separation. It doesn't automatically restore the original alloy temper, eliminate the cause of fatigue, or make a damaged load path safe.
That rule applies across BTT repair work, from aluminum trailer bodies and brackets to Walking Floor components and custom-fabricated supports. The right objective isn't a photograph of a smooth bead. It's a documented decision that leaves the unit roadworthy for its actual service.
Why Aluminum Behaves Differently in the Shop
Aluminum brings three problems into the bay at once: its oxide surface, its thermal behavior, and its sensitivity to contamination. The surface oxide reforms rapidly after cleaning, so a joint prepared too early can be dirty again by the time the arc starts. The oxide also melts at a much higher temperature than the base aluminum, which makes surface preparation and arc control central to fusion.
A useful shop analogy is welding on a cold mirror sitting in a rainstorm. The mirror reflects heat away and resists a clean bond at its surface, while moisture and oil create trouble inside the weld pool. Aluminum's molten state can dissolve substantially more hydrogen than solid aluminum. As the pool freezes, that hydrogen can form internal porosity, reducing effective cross-sectional area and fatigue resistance. The FAA's aluminum repair guidance emphasizes cleaning, thermal procedures, welder qualification, and post-weld inspection for this reason. FAA guidance on aluminum weld repair controls
Clean metal is a structural control
Preparation isn't cosmetic. A sound sequence is:
- Degrease first. Remove oil and grease before using an abrasive or brush, otherwise the tool can spread contamination across the joint.
- Remove oxide mechanically. Use a dedicated stainless-steel brush or aluminum-compatible abrasive. Don't use a brush that has already worked on steel or dirty surfaces.
- Keep the joint dry. Moisture, wet filler, dirty gloves, and damp tools can introduce hydrogen or other contaminants.
- Weld promptly. Oxide can reform rapidly after cleaning, so a long delay weakens the value of the preparation.
- Protect the joint from handling. Touching the prepared area transfers oil and salts back onto the surface.
Heat-treatable alloys add another layer. 6061-T6 and 6082-T6 can lose strength in the heat-affected zone, even when the bead itself looks uniform. Welding locally changes microstructure, and repeated thermal exposure can further alter the repaired region. In a repair of 6082-T6 using ER4043, laboratory tensile strength changed after repair welding, with the researchers attributing the reductions to additional thermal exposure and double over-aging in over-aged areas. Study of repaired 6082-T6 aluminum joints
That means raw amperage isn't the quality measure. Fit-up, shielding coverage, travel control, filler selection, sequencing, and heat input determine what remains around the weld. A shiny cap can hide a weakened surrounding zone, distortion, incomplete fusion, or porosity.
Common Failure Modes on Trailers and Trucks
A trailer rarely comes in with a problem that starts and ends at the visible crack. On the floor, the job is deciding what the damage means. Some failures call for a clean weld repair. Others need a doubler, a replacement section, or a hard no because the part has already lost too much section, too much alignment, or too much fatigue life.
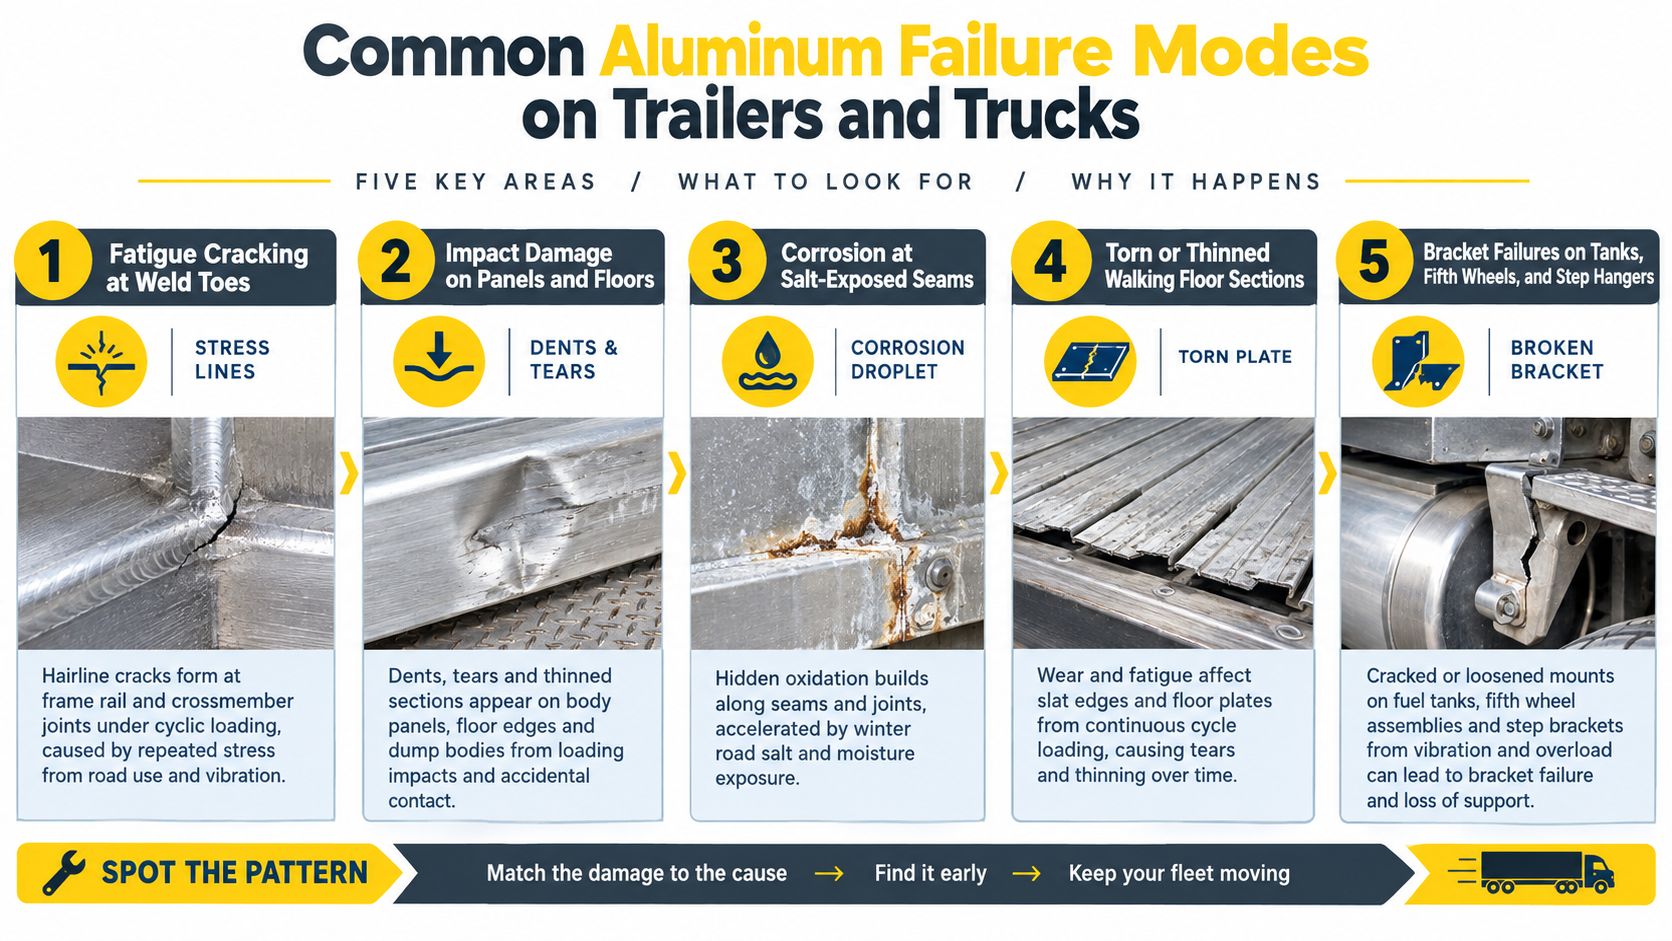
Fatigue at structural transitions
The failures I watch most closely start at structural transitions, weld toes on frame rails, crossmembers, gussets, brackets, and support plates. Those are the places where load path, fit-up, and past heat all meet. Road vibration does the rest. A fine crack at a crossmember end can be the last stage of a long fatigue problem, even if the old weld bead still looks acceptable at first glance.
That changes the repair decision.
If the crack sits in sound material and the surrounding member still carries its shape, a weld repair with the right joint prep may be reasonable. If the crack returns to the same toe, runs through a previous repair, or sits beside distortion, stop treating it like a simple opening to fill. The member may need a design correction, load redistribution, or replacement of the damaged section. Welding the line shut without addressing why it opened usually sends the trailer back out with the same stress concentrated in the same spot.
Impact on panels and floor edges
Panels fail differently. Floor edges, corner caps, side skins, and dump-body sections get torn by loaders, shifting cargo, and repeated strikes on thin edges. Some of these are straightforward aluminum welding repairs. Some are sheet-metal patches that only look structural.
The question is whether the surrounding material is still worth tying into. If the sheet is stretched, work-hardened, thinned, or packed with contamination, a patch can turn into a cover plate over bad metal. Good repairs move load into healthy parent material, hold the original clearances, and do not interfere with doors, floors, slats, or other moving parts. If the edge that supports the panel is bent or cracked too, repair the support first or replace both pieces together.
Corrosion at seams and joints
Corrosion changes the call again. Seams that see salt, trapped dirt, moisture, and dissimilar-metal contact often look better from the outside than they do once opened up. Under the surface, the aluminum may be pitted, porous, laminated with contamination, or too thin to trust.
In that condition, adding weld metal does not restore sound base material. It can seal contamination into the joint and leave a repair that breaks beside the bead. When corrosion extends through a load-bearing area, replacement is usually the cleaner answer. A broad buildup weld over weakened section loss may look substantial, but it does not give the part its original integrity back.
Walking Floor wear and bracket failures
Walking Floor bodies deserve their own category because wear and cyclic loading happen together. Slats, floor plates, edges, and supports see constant movement. A repair that slightly changes height, clearance, or tracking can create a mechanical problem before it creates a welding one.
Bracket failures on fuel tanks, fifth wheels, steps, ladders, ramps, and service bodies follow a similar pattern. The broken bracket gets attention first, but the actual cause may be loose fasteners, a cracked mounting surface, poor support, or overload. Repair decisions should cover the whole attachment area, not just the visible break.
A crack near a crossmember joint is a load-path problem until inspection proves otherwise. A torn body skin is only a panel repair when the supporting edge and surrounding metal are still sound.
Inspection Before the Arc Strikes
A cracked aluminum crossmember can fool a shop in the first five minutes. The opening you see is rarely the whole problem. Before any weld gets discussed, the job is to decide what the part is, what it has already been through, and whether sound metal still exists around the failure.
Start with identification. Check the alloy and temper from stamps, build records, drawings, parts lists, or a known replacement section. That step matters because a heat-treatable member such as 6061-T6 or 6082-T6 does not come back from welding with the same properties it had when new. If the area has already been welded, straightened, sleeved, or patched, mark that history on the part before cleaning hides the clues. A second or third repair in the same zone is a different decision from a first-time crack.
Then expose the damage.
Degrease first, then clean mechanically with dedicated stainless tools and clean abrasives. Keep filler wire clean and dry. Do not prep a joint and then handle it with bare hands. On trailers and truck bodies, cracks often run past the visible end under paint, oxide, road film, or a doubler plate. If I cannot see clean parent metal on both sides of the defect, I do not yet know where the repair begins or ends.
Surface inspection comes next. Dye penetrant is useful for finding surface-connected cracking around toes, brackets, corners, and fatigue-prone details after the area is properly cleaned. If the part is heavily loaded, has been repaired before, or gives you reason to suspect hidden defects, visual inspection alone is not enough. Radiographic examination or another qualified NDT method may be needed to check for internal porosity or discontinuities that a grinder and flashlight will never show.
A useful repair record should let the next shop, the fleet, or the inspector understand exactly why the repair was approved. Record material identification, the component location, and any documents used to confirm it. Note the crack direction, corrosion, impact marks, distortion, missing support, and the suspected cause. Record prep controls such as degreasing, oxide removal, fit-up, and how much unsound metal was cut out. Then log the welding process, filler, shielding gas, heat-control steps, inspection method, and final disposition.
That paperwork is not office filler. For a loaded crossmember, a repeatedly cracked bracket, or a Walking Floor structural section, it tells you whether you are fixing a local defect or chasing a load-path problem that a weld alone will not solve.
Matching the Repair Process to the Job
MIG and TIG both have a place in truck and trailer aluminum work, but they solve different shop problems. MIG generally offers higher deposition and faster coverage, which can suit larger structural repairs when access, fit-up, alloy, and procedure support it. TIG gives the operator finer control over a small pool, making it useful for thin panels, precise edges, and repairs where heat placement matters more than deposition speed.
The process choice isn't made in isolation. In the 6082-T6 repair study cited earlier, MIG joints initially reached 199.6 MPa tensile strength and TIG joints reached 172.2 MPa. After repair welding, MIG reached 178.9 MPa and TIG reached 168.1 MPa. The researchers preferred MIG under their tested conditions because its repaired joints retained higher tensile strength, not because MIG had the smaller strength reduction. Those are laboratory results, not universal limits, so the alloy, procedure, joint design, and service load still control the decision. Research on MIG and TIG repair of 6082-T6
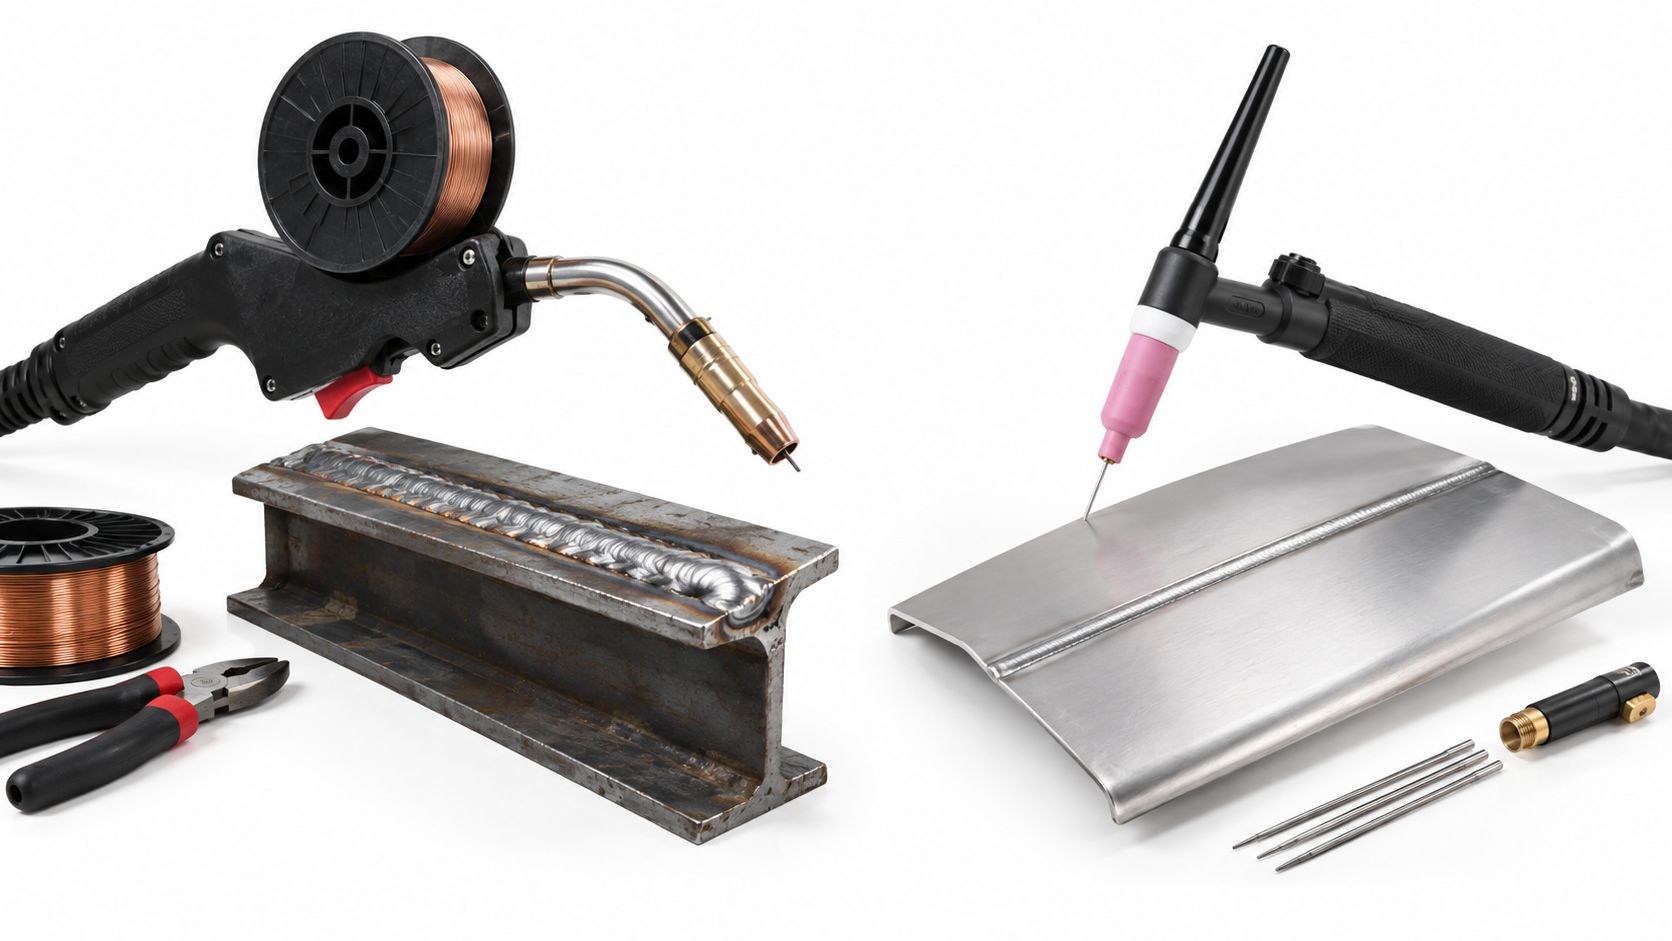
Filler choice changes the repair
ER4043 and ER5356 aren't interchangeable decorations on an estimate. The selected filler affects crack sensitivity, strength characteristics, corrosion behavior, and color match. The base alloy, operating environment, post-weld requirements, and qualified procedure should drive the choice.
A repairer should also explain shielding gas and torch setup. Aluminum needs reliable coverage because turbulence, leaks, contamination, and poor torch angle can promote porosity. Clean liner and contact-tip condition matter in MIG work, while TIG requires disciplined torch control and a prepared tungsten.
Heat control beats aggressive settings
Heat management protects the surrounding material and controls distortion. Tight fit-up, short weld segments, balanced sequencing, and sufficient shielding reduce the tendency to pull a trailer body or bracket out of alignment. Preheat should be limited to what the qualified procedure allows, often to remove moisture and prevent condensation rather than to make the aluminum “hot enough.”
AWS D1.2 guidance summarized in this aluminum welding reference identifies 250°F, or 120°C, as a preheat and interpass limit for heat-treatable aluminum alloys and certain higher-magnesium 5000-series alloys, with temperature-hold limits. The governing code edition, alloy, and qualified welding procedure must be verified before applying that value to a particular repair.
For equipment, the conversation can also include the truck and trailer parts catalog when a damaged bracket, slat, support, or panel should be replaced instead of rebuilt.
Documentation, Ventilation, and Shop Discipline
A commercial repair doesn't end when the welder releases the trigger. The fleet needs a record that connects the observed defect, repair method, inspection result, and final operating decision. That record supports maintenance continuity when a different technician sees the unit later.
Federal inspection rules provide a useful framework. Under 49 CFR 396, each commercial vehicle and each segment of a combination vehicle must receive a periodic inspection at least once every 12 months, and the minimum inspection items include service brakes and trailer brake connections. Fleets must retain the periodic-inspection report for 14 months, while proof of the latest inspection must remain on the vehicle. FMCSA periodic inspection requirements
Make defects visible between inspections
Drivers inspect commercial motor vehicles at the end of each day's work under 49 CFR 396.11. For non-passenger-carrying commercial motor vehicles, a written DVIR is not required when no defect or deficiency is discovered by or reported to the driver. When a defect could affect safe operation or cause a mechanical breakdown, it must be recorded and addressed before dispatch as required by the regulation. Passenger-carrying vehicles and intermodal equipment have separate reporting provisions. The inspection scope includes safety-critical equipment such as service brakes and trailer brake connections, and the report provides a formal record of a new crack, loose bracket, or damaged trailer structure. FMCSA daily vehicle inspection report requirements
A useful aluminum repair file should connect to those existing records rather than sit as an isolated invoice. Record the alloy, filler, process, affected location, preparation, inspection method, and disposition. If the repair was rejected in favor of replacement, document that decision too.
Protect the people doing the work
Ventilation belongs in the same discipline category as cleaning and inspection. OSHA's general-industry welding rule, 29 CFR 1910.252, requires ventilation controls that keep hazardous fumes, gases, and dusts below applicable exposure limits. For general welding and cutting covered by paragraph (c)(2), mechanical ventilation is required in spaces below 10,000 cubic feet per welder, rooms with ceilings below 16 feet, or spaces where barriers significantly obstruct cross ventilation. In those conditions, the rule specifies 2,000 cubic feet per minute per welder, with the specified local-exhaust or airline-respirator alternatives. Material-specific and confined-space requirements must also be checked. OSHA welding and cutting ventilation requirements
Do not treat a single total-fume concentration as a universal OSHA exposure limit. Evaluate the actual contaminants from the base metal, filler, coatings, and welding process, and apply the relevant substance-specific limits under 29 CFR 1910.1000 and other applicable standards. OSHA permissible exposure limits, NIOSH recommended exposure limits, and ACGIH guidance are distinct references. Keep extraction close to the plume source and assess confined-space ventilation and respiratory protection separately. OSHA air-contaminant exposure limits
For Tampa-area operators, bilingual maintenance communication and a clear service record can make handoffs easier. Brothers Truck Trailer Repair and Welding Corp. publishes Spanish-language truck and trailer service information alongside its English material.
When a Weld Is Not the Right Answer
A weld isn't the right answer when it restores appearance but leaves the failure mechanism in place. Impact damage in sound, adequately thick material may respond well to a controlled repair. A fatigue crack in a previously welded crossmember, a corroded rail section, or a bracket that has failed repeatedly deserves a more skeptical decision.
Start with four questions:
- Is this impact or fatigue? Impact usually leaves dents, tears, or a concentrated deformation pattern. Fatigue often follows a weld toe, edge, hole, or repeated load path.
- How many thermal cycles has the area seen? Repeated repairs can leave a weakened or over-aged heat-affected zone.
- What does the part do? A body panel, floor support, tank bracket, and frame member have different consequences if they fail.
- Can the repair transfer load without creating a new notch? A patch or reinforcement that ends abruptly can move the stress to its edge.
A 2025 study of dissimilar 6061/7075 TIG welds found that failures commonly initiated at the weld toe, with secondary cracks present, and that increasing weld reinforcement reduced fatigue life exponentially under low stress. The practical message is sharp: more weld metal isn't automatically more strength. Excess reinforcement can act as a fatigue notch. Study of fatigue behavior in dissimilar 6061/7075 welds
Decision rule: A previously welded, fatigue-loaded aluminum member that is cracking again is often a replacement or engineered reinforcement candidate, not a re-weld candidate.
Replacement may be safer when the remaining section is thin, the alloy is unknown, corrosion has penetrated the load path, or the same joint has failed repeatedly. Rejection is appropriate when the shop can't establish a defensible procedure or inspection basis for a safety-critical repair.
Sending It to a Specialized Shop
A trailer can be back on the road with the wrong repair and still be headed for another crack. Send aluminum work to a specialized shop when the alloy or temper is unclear, the joint has already been welded, the part carries structural or safety-related load, or the damage reaches a Walking Floor body, slat support, floor plate, or a hydraulic mounting point. In those cases, the real job is deciding what should be welded, what needs reinforcement, what should be replaced, and what should be turned down.
Ask direct questions before the unit leaves your yard:
- Can the shop identify the material and trace earlier repairs?
- Will it cut out the full crack and any unsound metal instead of welding over the visible line?
- Does it control cleanliness, shielding gas coverage, fit-up, and heat input closely enough for thin or previously repaired aluminum?
- Will it say plainly when a replacement part is the safer choice?
- Can it document inspection findings, the repair performed, and any limits placed on the unit afterward?
Those answers matter because aluminum failures are often decision problems, not bead-quality problems. A clean weld on fatigued material, an overworked heat-affected zone, or a corroded load path does not restore the original margin.
A shop with fabrication and parts access can also shorten downtime when rebuilding stops making sense. Brothers Truck Trailer Repair and Welding Corp. handles truck and trailer repairs, Walking Floor diagnostics, aluminum welding, fabrication, and parts support, and its truck and trailer repair services give fleets and owner-operators a direct path when a component should be replaced instead of patched again.
Before sending a unit out, confirm that the shop follows documented inspection and ventilation procedures that fit the vehicle's actual duty cycle.
The target is straightforward. Get a repair that is durable, inspected, and documented, and that matches how the truck or trailer really works. If the unit has a cracked rail, damaged Walking Floor section, corroded seam, or failed aluminum bracket, the right outcome may be welding, reinforcement, parts replacement, or a broader repair assessment.
Technical reference for 3500 lbs trailer axles covering GAWR, tire ratings, brake rules, fitment specs, and inspection protocols for commercial fleets.
Learn how etracks in trailer systems work, installation best practices, and repair procedures to keep your cargo secure and compliant on the road.
Master trailer wheel bearings maintenance with expert steps for inspection, repacking, and replacement. Reduce downtime and prevent costly failures today.