15 Ton Trailer Specs and Selection Guide
Most advice about a 15 ton trailer starts with the wrong question, which is how much it can carry. In the shop, the first question is whether the trailer, the tractor, the axles, the tires, and the route all agree on that load, because a brochure number doesn't decide legality by itself. A unit advertised around 30,000 pounds of payload can still be illegal or unsafe once the tractor tare weight, cargo placement, axle spacing, coupling load, and state rules are added into the working mix (FHWA trailer weight and bridge guidance).
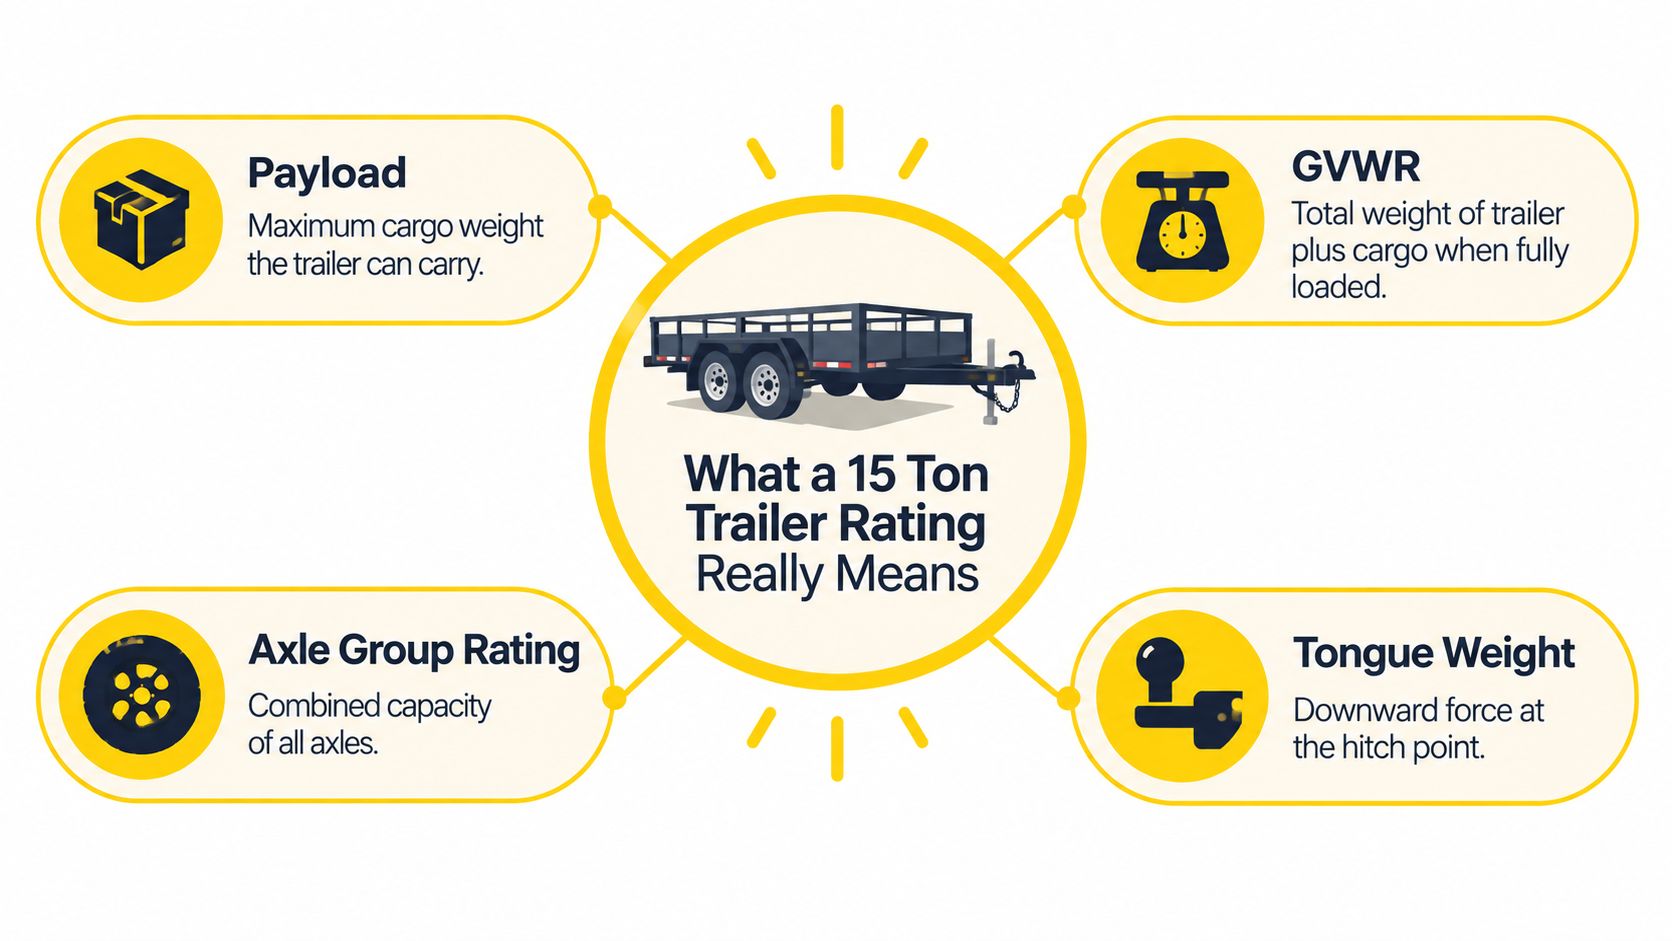
Table of Contents
- What a 15 Ton Trailer Rating Really Means
- Common 15 Ton Trailer Configurations
- Reading the Trailer Data Plate and Axle Ratings
- Axle Layout and Suspension Choices for 15 Ton Trailers
- Braking System Requirements for Heavy Trailers
- Walking Floor Hydraulic and Aluminum Welding Service
- Dynamic Load Distribution and Uneven Loading
- FMCSR Inspection Scope and Brake-Test Cadence
- Pre-Trip and Walkaround Checklist for 15 Ton Trailers
- Choosing a Tampa Bay Repair and Parts Partner
- Post-Overload Inspection and Return-to-Service Steps
What a 15 Ton Trailer Rating Really Means
A 15 ton trailer is a marketing label first and a specification second. One equipment-trailer example shows a 38,340-pound GVWR, an 8,340-pound empty weight, and a 30,000-pound maximum payload, but that plate does not give you a free pass to run that weight on every road, with every tractor, or in every axle arrangement (FHWA reference).
The plate tells the truth faster than the brochure
The data plate is the first thing I read because the trailer body is only part of the load path. Axles, suspension, tires, brakes, coupling hardware, frame, and floor all have their own limits, and the weak link is not always the one customers expect. A trailer can stay under the advertised payload and still miss a lawful axle limit or a route-specific restriction.
Practical rule: if the scale ticket, axle ratings, and route do not agree, the brochure loses.
A Tampa load can prove the point fast. I have seen a unit that looked fine on paper get held back because the axle spacing and bridge limits on the route could not support the weight where it sat. That is why the scale ticket matters, but it is not the only check.
Why the same label can mislead good operators
The federal weight rules treat road legality as more than a payload check. Bridges and access routes can limit a load based on axle count and spacing, which means the number on the side of the trailer is not the final word. A shop foreman starts with the plate, then checks axle loads, then looks at the route before a repair order or dispatch call gets signed.
A trailer can also be mechanically capable of 15 tons and still be wrong for the job. If the cargo rides too far forward, tongue or kingpin load climbs. If it rides too far aft, the axle group can carry more than it should. That is why 15 ton should be read as a starting point, not a promise.
The clean habit is simple. Read the data plate, confirm the axle and tire ratings, then use the scale ticket as the final check before you sign off on the load.
Common 15 Ton Trailer Configurations
The 15 ton label covers several very different builds, and each one calls for different parts, welds, and inspection priorities. One North American equipment trailer in this class uses a 25-foot deck, 102-inch overall width, 38,340-pound GVWR, and 30,000-pound payload. An agricultural trailer carrying the same label can be built around a 741-cubic-foot body, a stated 600-bushel volume, tandem axles, hydraulic brakes, a 120-horsepower minimum tractor requirement, and a 25 mph maximum speed (Hudson Trailers reference).
Equipment trailers and farm trailers do not wear the same load
An equipment trailer is a machinery carrier. It takes concentrated loads, ramps, tie-downs, air brakes, and a heavy structural deck. An agricultural trailer is built to move bulk material, tip hydraulically, and work inside a controlled field or road envelope. Same class name, different failure points.
A 15 ton dump trailer also shows up as a twin-axle build, and that changes the repair picture because dump bodies bring heat, corrosion, and hinge stress with them. Walking Floor units add a moving hydraulic floor, so the shop has to watch seals, slats, and floor alignment instead of just deck steel. Older commercial listings show how loose the label can be, including a 1978 steel, 32-foot shop-built “15 TON” flatbed trailer.
What changes in the shop
- Equipment units usually need close attention to ramps, tie-down points, air-brake components, and deck structure.
- Agricultural units lean toward hydraulic tipping parts, body corrosion, and bulk-material flow issues.
- Dump trailers bring hinge, hoist, and body wear into the conversation.
- Walking Floor trailers make hydraulic seals, slats, and moving-floor alignment the priority.
- Flatbeds often live or die by frame straightness, side rail condition, and weld integrity.
That spread is why parts selection gets messy when the work order only says “15 ton trailer.” The model class does not tell you what broke.
Reading the Trailer Data Plate and Axle Ratings
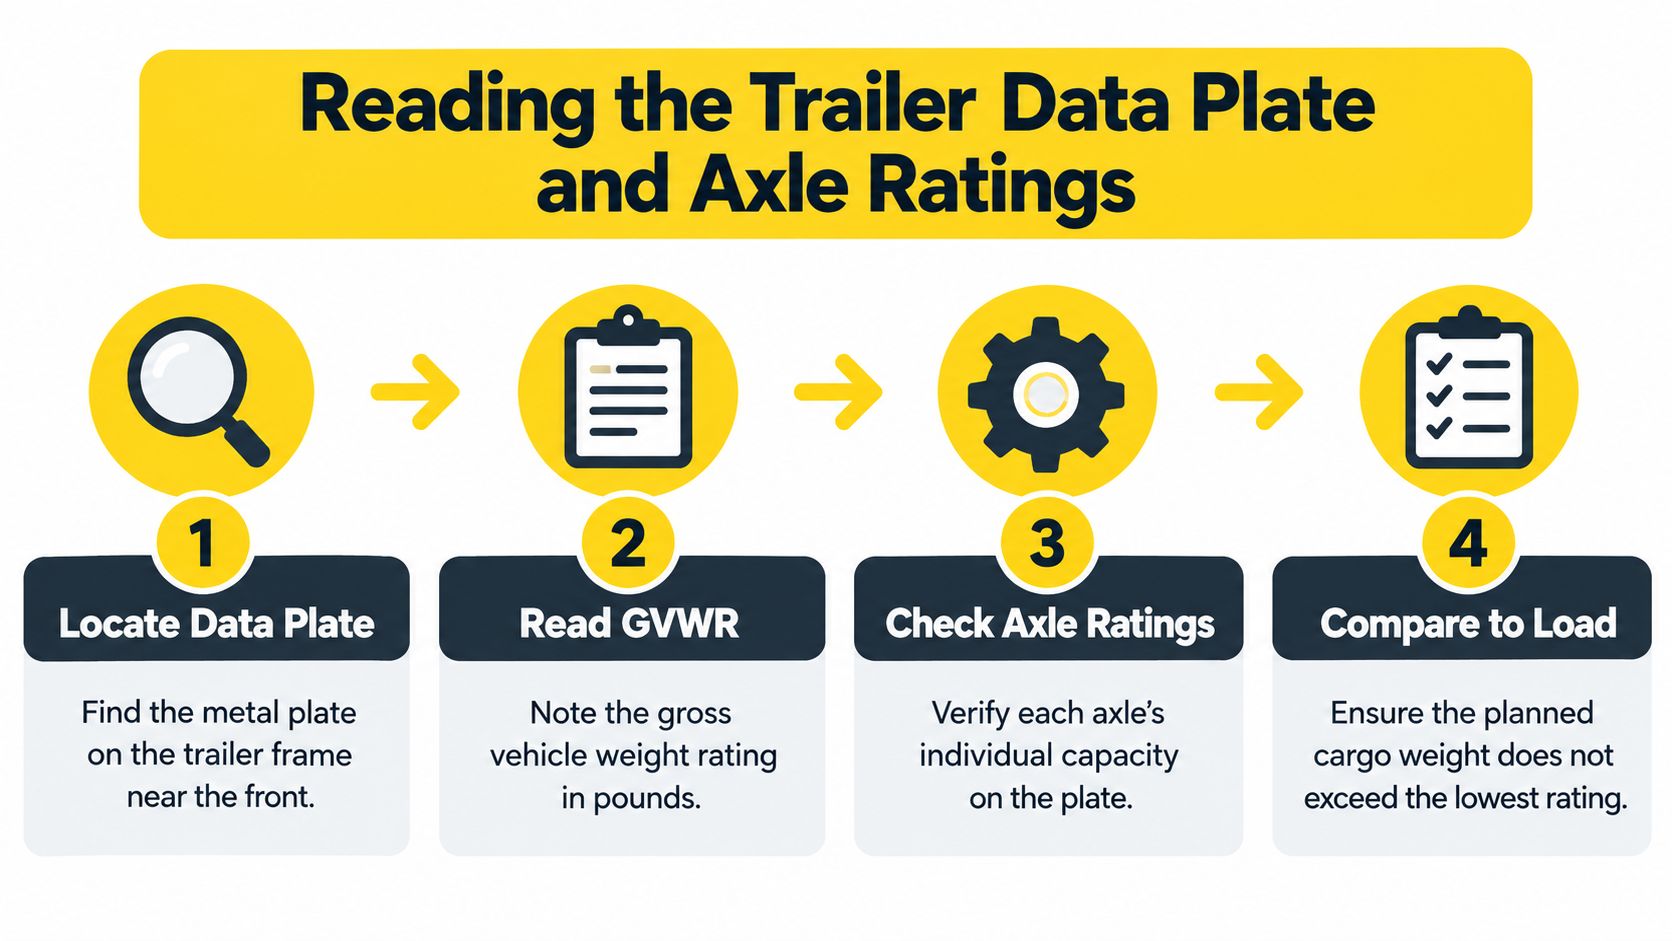
The data plate is where the guesswork stops. It gives you the GVWR, the axle ratings, and, on many units, the build assumptions the trailer was engineered around. If the trailer was sold in metric terms, the first step is simple arithmetic, because 15,000 kg is about 33,069 lb, while a customary 15-ton payload is often treated as 30,000 lb.
Start with the plate before the cargo hits the deck
Read the plate before a load is accepted. Record the GVWR, each GAWR, the tire load index, and the coupling or kingpin rating if it is listed. Then compare those numbers with the intended cargo, the trailer tare weight, and the towing vehicle's own limits.
A trailer can be light enough on the scale and still be wrong on one axle.
That is the mistake that sends a lot of overloaded units into the bay. Federal guidance treats a single axle at 20,000 lb and a tandem axle at 34,000 lb as common limits, with a tridem configuration often reaching 54,000 lb under the appropriate conditions, but the legal answer still depends on bridge formula, axle spacing, and route rules (FHWA truck weight guidance).
The worksheet crews use before signing
- Find the empty weight from a certified scale, or from the manufacturer's plate if it still matches the current build.
- Confirm the GVWR and each axle rating on the trailer plate.
- Check tire ratings against the heaviest axle position expected in service.
- Compare the planned payload to the lowest rating in the chain, not the highest.
- Weigh the loaded combination on a certified scale after loading.
That sequence catches the common mistake of treating a 15 ton trailer as a blanket permission slip. It is not one. The route, the tractor, and the way the cargo sits on the deck all change the legal answer.
Axle Layout and Suspension Choices for 15 Ton Trailers
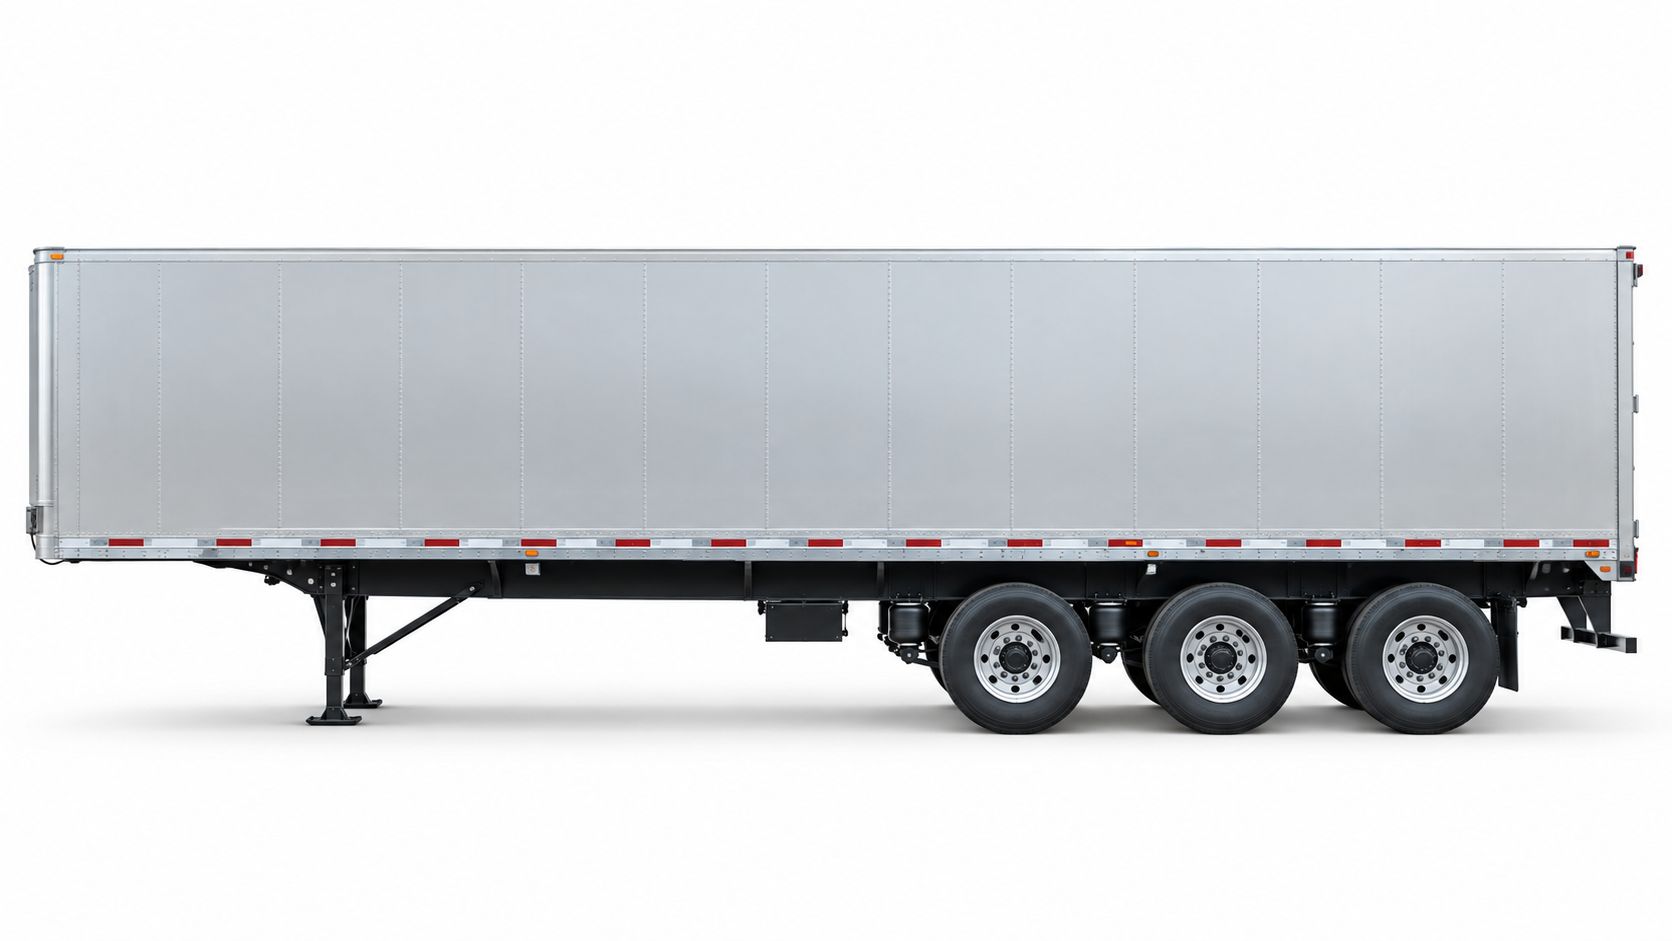
A 15 ton trailer tag does not tell you how the unit will behave on the road. Axle layout does. A tandem spreads the load in a straightforward way, while a tridem can move more weight across more wheel positions, but it also brings bridge formula and spacing questions that the brochure never answers.
The practical question is not which setup sounds stronger. It is which setup the route, the cargo, and the suspension can support without creating a problem at the scale house or on the shoulder.
Tandem versus tridem is a service decision
A tridem only makes sense when the whole combination is cleared for it. If the spacing is off, the trailer can run into route or bridge limits before the gross weight looks alarming on paper. That is why a unit can look more capable and still be harder to run legally.
Suspension choice matters just as much. Air-ride helps hold ride height steady and is easier on fragile cargo. Mechanical spring setups can hold up better in rough vocational service, but they usually pass more shock into the frame, deck, and fasteners. In Florida service, that shows up as tire wear, suspension sag, and brake issues that start appearing long before the owner expected them.
What I look at in the bay
Ride height comes first. Sag often points to air-suspension trouble, tired springs, or a ride-control problem that is already changing how the trailer carries weight.
Then I check alignment and axle tracking. A bad toe setting or thrust angle will eat tires and make the trailer wander. Bushing wear matters too, because loose bushings let the axle walk under load. Axle spacing gets measured because it affects bridge-formula exposure and whether the unit can legally carry the load it was sold to handle.
The side profile tells the truth fast. One trailer sits level and tracks clean. Another hunches, scrubs tires, or starts hunting as soon as it is loaded. That is usually not a “capacity” problem. It is a layout, suspension, or wear problem that needs to be corrected before the next repair order gets more expensive.
Here's the video reference for how a multi-axle trailer layout changes the loading conversation.
Braking System Requirements for Heavy Trailers
A 15 ton trailer is a marketing label until the brakes prove what the unit can stop. For a heavy trailer, the setup has to work as a matched system, not as a collection of parts bolted on and hoped for. UNECE braking provisions require the trailer's maximum mass to stay within the mass that can be braked by coordinated operation of all trailer brakes, and they set the prescribed trailer braking force at 50% of the maximum total axle load, with a mean fully developed deceleration limit of 5.6 m/s² for multi-axle combinations (UNECE R13).
A shop in Tampa does not sign off on that with a quick visual. I want to see the brake chambers or actuators, air lines, valves, drums or rotors, slack adjusters, linings or pads, wheel-end seals, and ABS sensors checked as one circuit. A fault in any one of those pieces can leave the trailer pulling sideways, locking a wheel, or cooking a hub under load.
Loaded behavior matters more than fresh paint or new shoes. A lining thickness check tells you what is installed. It does not tell you how the trailer stops at working weight, and that is where weak valves, lazy adjusters, or a bad sensor usually show up.
Paperwork should match what was done.
- Adjustment measurements taken after service.
- Replaced components listed by wheel-end or axle.
- Post-repair test results from a loaded or dynamometer check where available.
- ABS warning-lamp verification before release.
Brake work is not finished when the parts are bolted on. It is finished when the trailer stops straight under load.
U.S. carrier responsibility sits on top of the engineering standard, so a heavy trailer should not go back out on faith. The repair record needs enough detail for a fleet manager to see what was inspected, what was replaced, and what test supported the release.
Walking Floor Hydraulic and Aluminum Welding Service
Walking Floor trailers usually fail in two places first, the hydraulic circuit and the moving floor. The KEITH Running Floor II manual tells operators to inspect for leaks around the cylinder area, the pressure and return tubes, the switching valve, check valves, and quick disconnects. If a leak shows up, tighten the fittings, cycle the system, and watch it in both load and unload modes (KEITH Running Floor II owner's manual).
Hydraulic leaks are not just mess, they're lost stroke
A Walking Floor can still cycle and still be wrong. That is the kind of problem operators hate, because the trailer looks alive while the floor starts binding, unloading unevenly, or leaving material behind. In Tampa, phosphate dust, fertilizer residue, and road grit get into the same corners, so a small seep or a dirty slider track can turn into real downtime fast.
The manual also calls for pressure-washing the drive unit, sub-deck, and slats at least twice each year, and quarterly when possible. That wash schedule is about function, not cosmetics. Contamination under the slats, dried fines, and hidden leaks all turn into uneven movement and extra wear.
Aluminum welding starts before the torch
NHTSA guidance for trailer sidewall repair says the trailer should be on a level, hard surface with the wheels chocked. It also says cracked welds should be inspected at the upper and lower joints, photographed with weight on the hitch, and repaired with reinforcement such as gussets where needed (NHTSA trailer sidewall repair bulletin).
The prep work matters more than a lot of operators expect.
- Scrape and grind the damaged aluminum to expose the joint.
- Clean with alcohol or a similar cleaner before repair.
- Scuff with sandpaper so the repair material bonds properly.
- Expose the damaged structure instead of hiding it under skin material.
That approach fits Tampa repair work because vibration, salt exposure, and repeated loading punish the same welds again and again. If the crack path is not fully opened up and inspected, the repair just buries the problem.
Dynamic Load Distribution and Uneven Loading
A legal gross weight does not mean a trailer will behave well on the road. Where the material sits on the deck changes steering response, braking feel, tire wear, and coupling load, especially on dump, aggregate, waste, and Walking Floor units. Rear-biased loading can lighten the towing vehicle's rear axle and raise disconnection risk, while front-heavy loading can punish the kingpin or fifth-wheel and work the frame hard (Nature Scientific Reports study on load distribution).
The scale can say yes while the trailer says no
That is the complaint shops hear after a bad load pattern. The unit is legal on paper, but it still drags, leans, pulls, or unloads unevenly. FHWA braking tests and guidance also show that stopping distance grows as load increases, and the test results showed more braking force from drive-axle brakes than trailer-axle brakes.
Uneven unloading is often a load-placement problem before it is a parts problem.
The symptoms usually show up fast. One axle wears tires faster, the suspension sits unevenly, brakes pull to one side, hydraulics strain, and slats take abuse. Those signs point back to how the load sits, not just how much it weighs.
What the yard should check first
- Axle-by-axle weight from the scale ticket.
- Load height and center of gravity relative to the trailer design.
- Suspension stance from front to rear.
- Brake response under working load.
- Post-repair verification after any overload or uneven-load event.
This is the part most capacity charts leave out. A 15 ton trailer can be mechanically sound and still handle badly because the cargo was stacked wrong or shifted during the haul. If the unit unloads unevenly, start with load geometry first, then inspect the hardware.
FMCSR Inspection Scope and Brake-Test Cadence
A trailer plate can look fine and still leave the shop with a bad brake job hidden in the combination. FMCSRs put the maintenance burden on the motor carrier for the whole commercial motor vehicle under its control, and for a tractor-semitrailer or full-trailer combination that scope reaches the tractor, semitrailer, full trailer, and converter dolly when fitted (49 CFR Part 396).
The inspection has to cover the whole combination
A 15 ton trailer does not get judged as a detached box. Required items include braking components, lighting devices, tires, wheels, rims, suspension, coupling devices, and emergency equipment. Brake defects that can put a unit out of service include missing braking action on a required axle, broken shoes or pads, loose air chambers or spiders, and audible air leaks at a brake chamber.
The paper trail matters too. Inspection reports have to be kept and shown to authorized officials when asked.
Brake testing needs a real cadence
The U.K. roadworthiness guide treats brake performance as part of maintenance planning, not a guess. It calls for brake testing with a roller brake tester, a suitable electronic braking-performance monitoring system, or a decelerometer with temperature readings, and where no electronic monitoring is used, it expects at least four laden brake tests spread across the year, with the annual test counting as one (UK roadworthiness guide).
That cadence makes sense in the shop even where local rules differ. An unloaded check can hide imbalance, fade, or pull that shows up at working weight. On Tampa fleets, I want the brake test tied to real load, because a scale ticket and a cold yard roll do not prove the same thing.
Pre-Trip and Walkaround Checklist for 15 Ton Trailers
A good pre-trip catches expensive problems before the driver leaves the yard. Start with the data plate and the tire load index, then move into the body, the running gear, and the brake gear. That order saves time because the trailer itself tells you where the risk is before anyone crawls under it.
Yard sequence that actually works
- Data plate and tire ratings: Confirm the trailer identity, GVWR, and tire load index before the cargo is even discussed.
- Frame and body walkaround: Look for cracks, fresh distortion, and aluminum panel damage.
- Hydraulic leak check: Inspect cylinders and quick disconnects on Walking Floor or tipping equipment.
- Suspension stance: Compare ride height side to side and front to rear.
- Brake chamber and slack-adjuster check: Measure obvious travel problems and look for air leaks.
- Lighting and ABS lamp test: Verify the driver won't roll out with a simple electrical fault.
- Coupling hardware: Check the kingpin, drawbar, or hitch gear for wear and damage.
Why the order matters
Each step points to a different failure mode. A cracked frame or bent panel can mean overload or impact. A hydraulic leak can turn into uneven unloading. A weak brake chamber can create pull or poor stopping. If you run the checklist in the same order every time, the inspection becomes repeatable instead of memory-based.
If the trailer is being signed out for road use, the walkaround has to end with a clean yes or a documented no.
This same sheet should flow straight into a post-event inspection whenever the trailer has seen an overload, a shifted load, or a hard stop. That's the handoff that keeps the next shop ticket from becoming a repeat failure.
Choosing a Tampa Bay Repair and Parts Partner
The right repair partner for a 15 ton trailer is the one that can support the trailer type you run. Walking Floor work, aluminum welding, structural repair, and parts availability all matter more than a glossy promise, because downtime doesn't care how polished the counter looks.
Three ways fleets usually buy repair support
An in-house workshop gives you direct control, but only if the team already has the skill set and parts on hand. A dealer network can help with brand-specific support, but scheduling and lead time often become the bottleneck. Mobile service can keep a unit from sitting, but it's only as effective as the tech's tooling, stocked parts, and ability to handle the actual defect.
A Tampa Bay fleet should ask a simple set of questions before booking:
- Can the shop diagnose Walking Floor hydraulics?
- Can it weld aluminum structurally, not just cosmetically?
- Does it stock common trailer parts, or does every job wait on shipping?
- Can it document the inspection, repair, and return-to-service steps clearly?
The best shop is the one that trims the lag between diagnosis and release without cutting corners on the record. For fleets running trailer bodies that live hard, the parts shelf matters almost as much as the torch, the brake stand, or the lift.
Post-Overload Inspection and Return-to-Service Steps
After an overload or uneven-load event, the trailer needs a documented return-to-service process, not a shrug and a dispatch. Start with the scale ticket and confirm axle-by-axle weights against the axle ratings and bridge-formula limits, then photograph how the load sat in the trailer. If the numbers or the load position look wrong, the rest of the inspection usually just confirms it.
The return-to-service sequence
- Pull the scale ticket and compare each axle group to its rating.
- Inspect the frame at suspension mounts and crossmembers for cracks or shifts.
- Check aluminum sidewalls and body panels for fresh distortion.
- Run a loaded brake-performance test before release if the equipment allows it.
- Verify Walking Floor hydraulics if the unit uses a moving floor.
- Retain the inspection record with the repair file.
Each step catches a different failure mode. A cracked mount points to stress transfer. Fresh body distortion points to impact or overloading. Brake testing checks whether the trailer still behaves straight under the same kind of weight that caused the trouble in the first place.
The trailer goes back on the road only after the evidence says it's ready. That's the clean line between a repair and a repeat call.
Brothers Truck Trailer Repair and Welding Corp. handles the kind of trailer work this article is talking about, including Walking Floor system diagnostics, aluminum welding, trailer repair, and in-stock parts support for Tampa Bay fleets and owner-operators. If your 15 ton trailer needs hydraulic troubleshooting, structural repair, brake attention, or parts that keep the unit moving, visit Brothers Truck Trailer Repair and Welding Corp. and get the trailer looked at before the next load turns into another roadside problem.
Learn proper weight distribution on trailers with practical steps for tongue weight, load placement, axle checks, and fleet inspection routines.
Technical reference for 3500 lbs trailer axles covering GAWR, tire ratings, brake rules, fitment specs, and inspection protocols for commercial fleets.
Learn how etracks in trailer systems work, installation best practices, and repair procedures to keep your cargo secure and compliant on the road.